Top 10 Tips to Plant for Pollinators

spring 2024 was a good montth early this year and bees were building up. (charlotte ekker wiggins photo)

Top Ten Tips to Help Pollinators

Spring is a good 4-6 weeks early in mid-Missouri. I keep track of when crocus and the first daffodils bloom, then compare to National Phenology Network's reports of when lilacs bloom. My old-fashioned lilacs, by the way, are also in bud a good month earlier than last year.

Since spring is making an early show this year, here are ten things to consider as you plan your garden to help pollinators:

  1. Plant a Diversity of Native Flowers: Choose a variety of native plants that bloom at different times throughout the year to provide a continuous source of nectar and pollen for pollinators. How many? Start with at least 26 trees, shrubs and flowers blooming at the same time through the growing season. Honey  bees need 2 million flowers to make 1 pound of honey.

  2. Avoid Pesticides: Minimize or eliminate the use of pesticides, especially those containing neonicotinoids. Hang bird houses so birds provide natural pest control. If you have to use a product, don't use it when flowers are in bloom.

  3. Create Pollinator-Friendly Habitats: Designate areas in your garden specifically for pollinators, providing shelter, water, and nesting sites such as bee hotels or piles of wood and leaves. Better yet, leave fall leaves on the ground until you see bumble bees flying around your garden. Most bumbles nest in the ground.

  4. Plant a Bee-Friendly Garden: Select flowers with open, accessible blossoms that make it easy for bees to access nectar and pollen. Think daisy-shaped flowers like zinnias, sunflowers, and coneflowers. Pollinators are also partial to most herbs.

  5. Provide a Water Source: Pollinators need water, especially in hot weather. Create shallow water dishes with pebbles or sticks and rocks for bees and butterflies. Bird baths make great pollinator drinking areas, too.

  6. Avoid Hybrid Plants: While hybrids can be beautiful, they often lack the nectar and pollen resources that pollinators need. Opt for heirloom and native plant varieties.

  7. Plant Native Trees and Shrubs: Native trees and shrubs provide valuable habitat and food sources for pollinators including native bees. Choose species like willows, fruit trees, and native flowering shrubs. 

  8. Practice Sustainable Gardening Techniques: Implement practices such as mulching, composting, and natural weed control to create healthy soil and reduce the need for chemical fertilizers and herbicides.

  9. Educate Others: Spread awareness about the importance of pollinators and the threats they face. Encourage family, friends and community members to create pollinator-friendly habitats in their own gardens and green spaces.

  10. Support Local Beekeepers and Pollinator Initiatives: Purchase honey and other bee products from local beekeepers who practice sustainable beekeeping methods. Get involved in local pollinator conservation projects and advocate for policies that protect pollinators and their habitats.

    My limestone garden was selected Yard of the Month in 2020 by our local Horticulture Society based on these principles.

    For more gardening, beekeeping, cooking and easy home decor tips, subscribe to Garden Notes.

    Charlotte

Learn About Bees. Take a Class!

My bee buddy david draker, left, and I have taught beginning beekeeping classes for many years. this year we are turning the class over our new great plains master beekeeping journeyman, a beekeeping program out of University of nebraska at lincoln training beekeeping educators. (christine richards photo)

Learn About Bees. Take a Class!

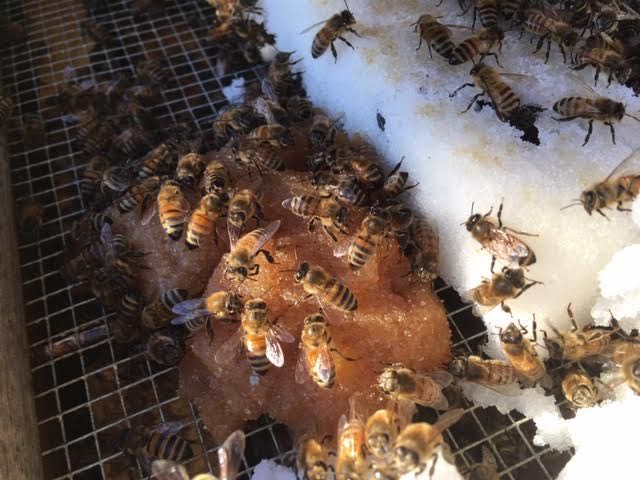
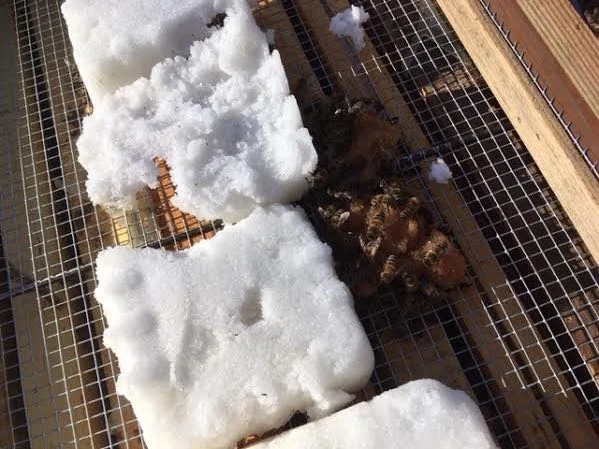
If you’re one of those who think beekeepers are basking by fireplaces resting over winter, think again. Winter is when most beekeepers are catching up – on reading, hive repairs, classes, and planning plantings. We don’t get to spend time with our bees, that’s true, but winter is anything but relaxing. Before you know it, bees are leaving hives to forage for pollen and start their spring increases all over again, if you’re lucky. National numbers suggest we are now losing one out of every two colonies over winter. 

So why would anyone want to keep bees? Actually not everyone should be a beekeeper. If you’re thinking you are “saving bees,” native bees are the ones that need help, not honey bees. Plant native trees, shrubs and flowers to provide unique food sources native bees need. Bees are important. One out of every three bites of healthy food are pollinated by bees, honey and native ones.

1. When I started keeping honey bees, the first question I was usually asked was what was I going to do with “all of that honey.” I didn’t start keeping bees for honey; I wanted bees to help me with fruit tree pollination, one of the many reasons someone also might want to be a beekeeper.

2. If you do want honey, it can be several years before bees collect enough extra honey you can have. It takes 2 million flowers to make one pound of honey. In the Midwest, colonies need between 50-80 pounds of honey to get through winter not counting extra honey for you. Keep planting!

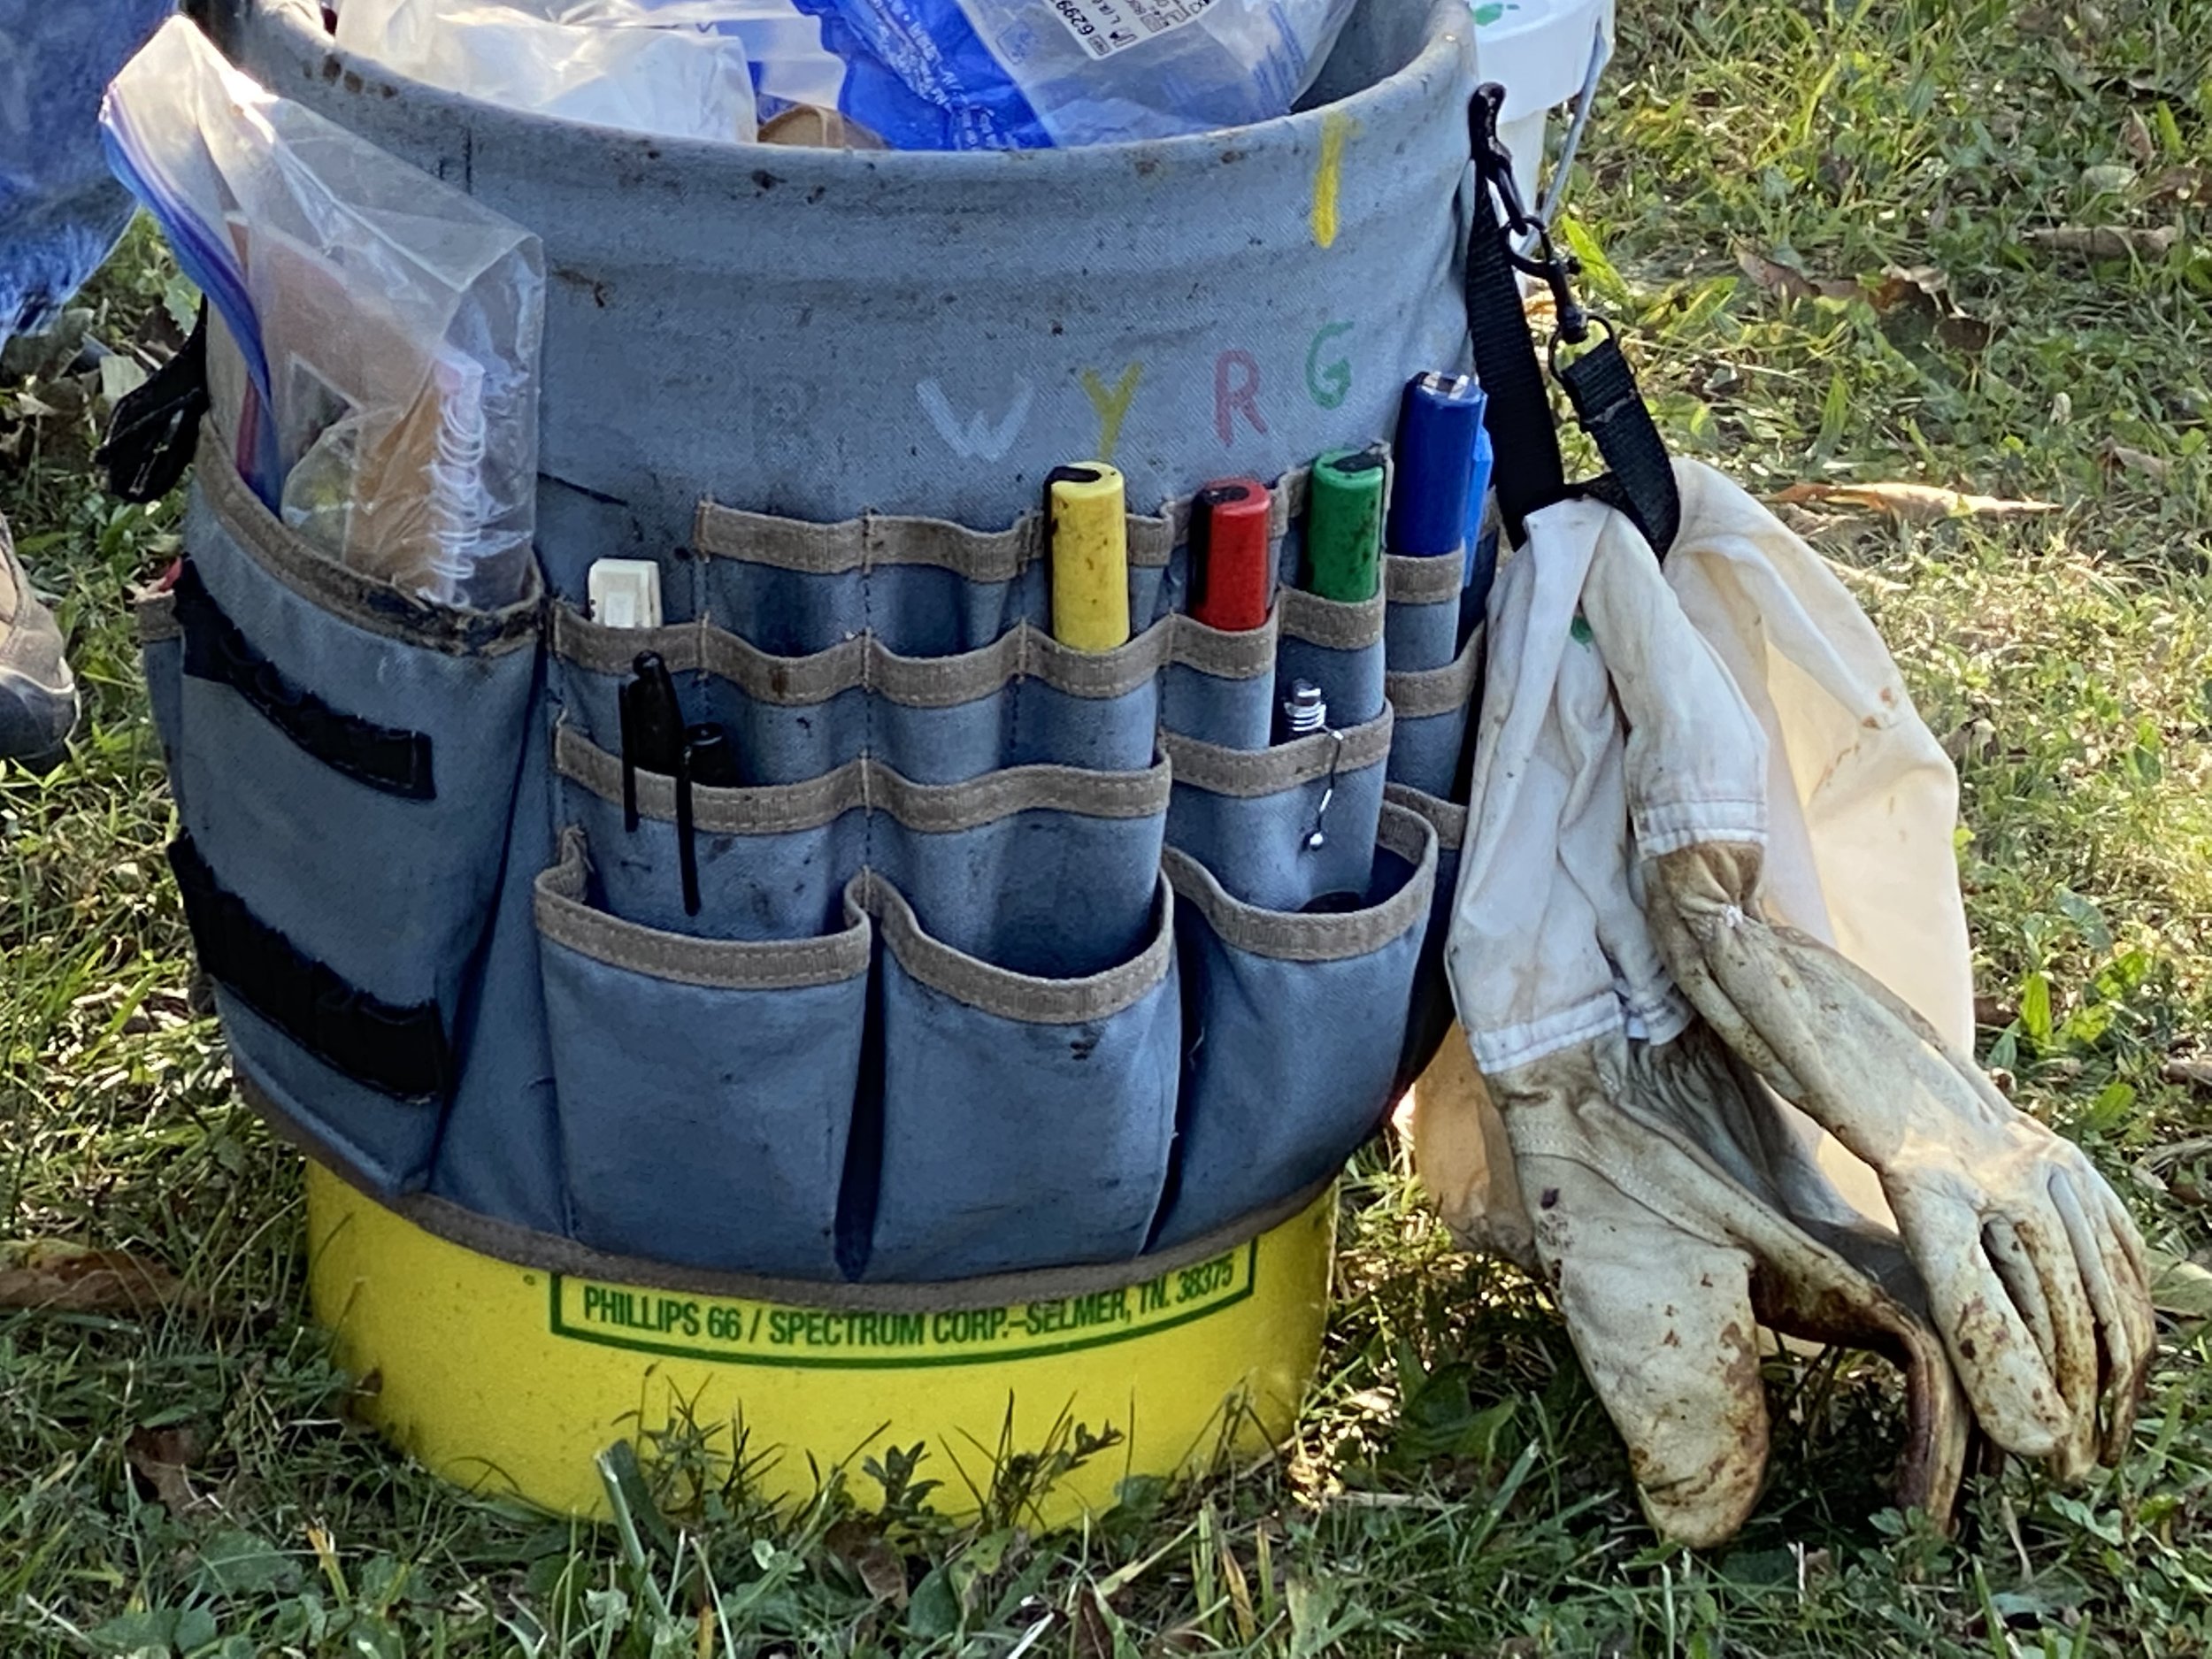
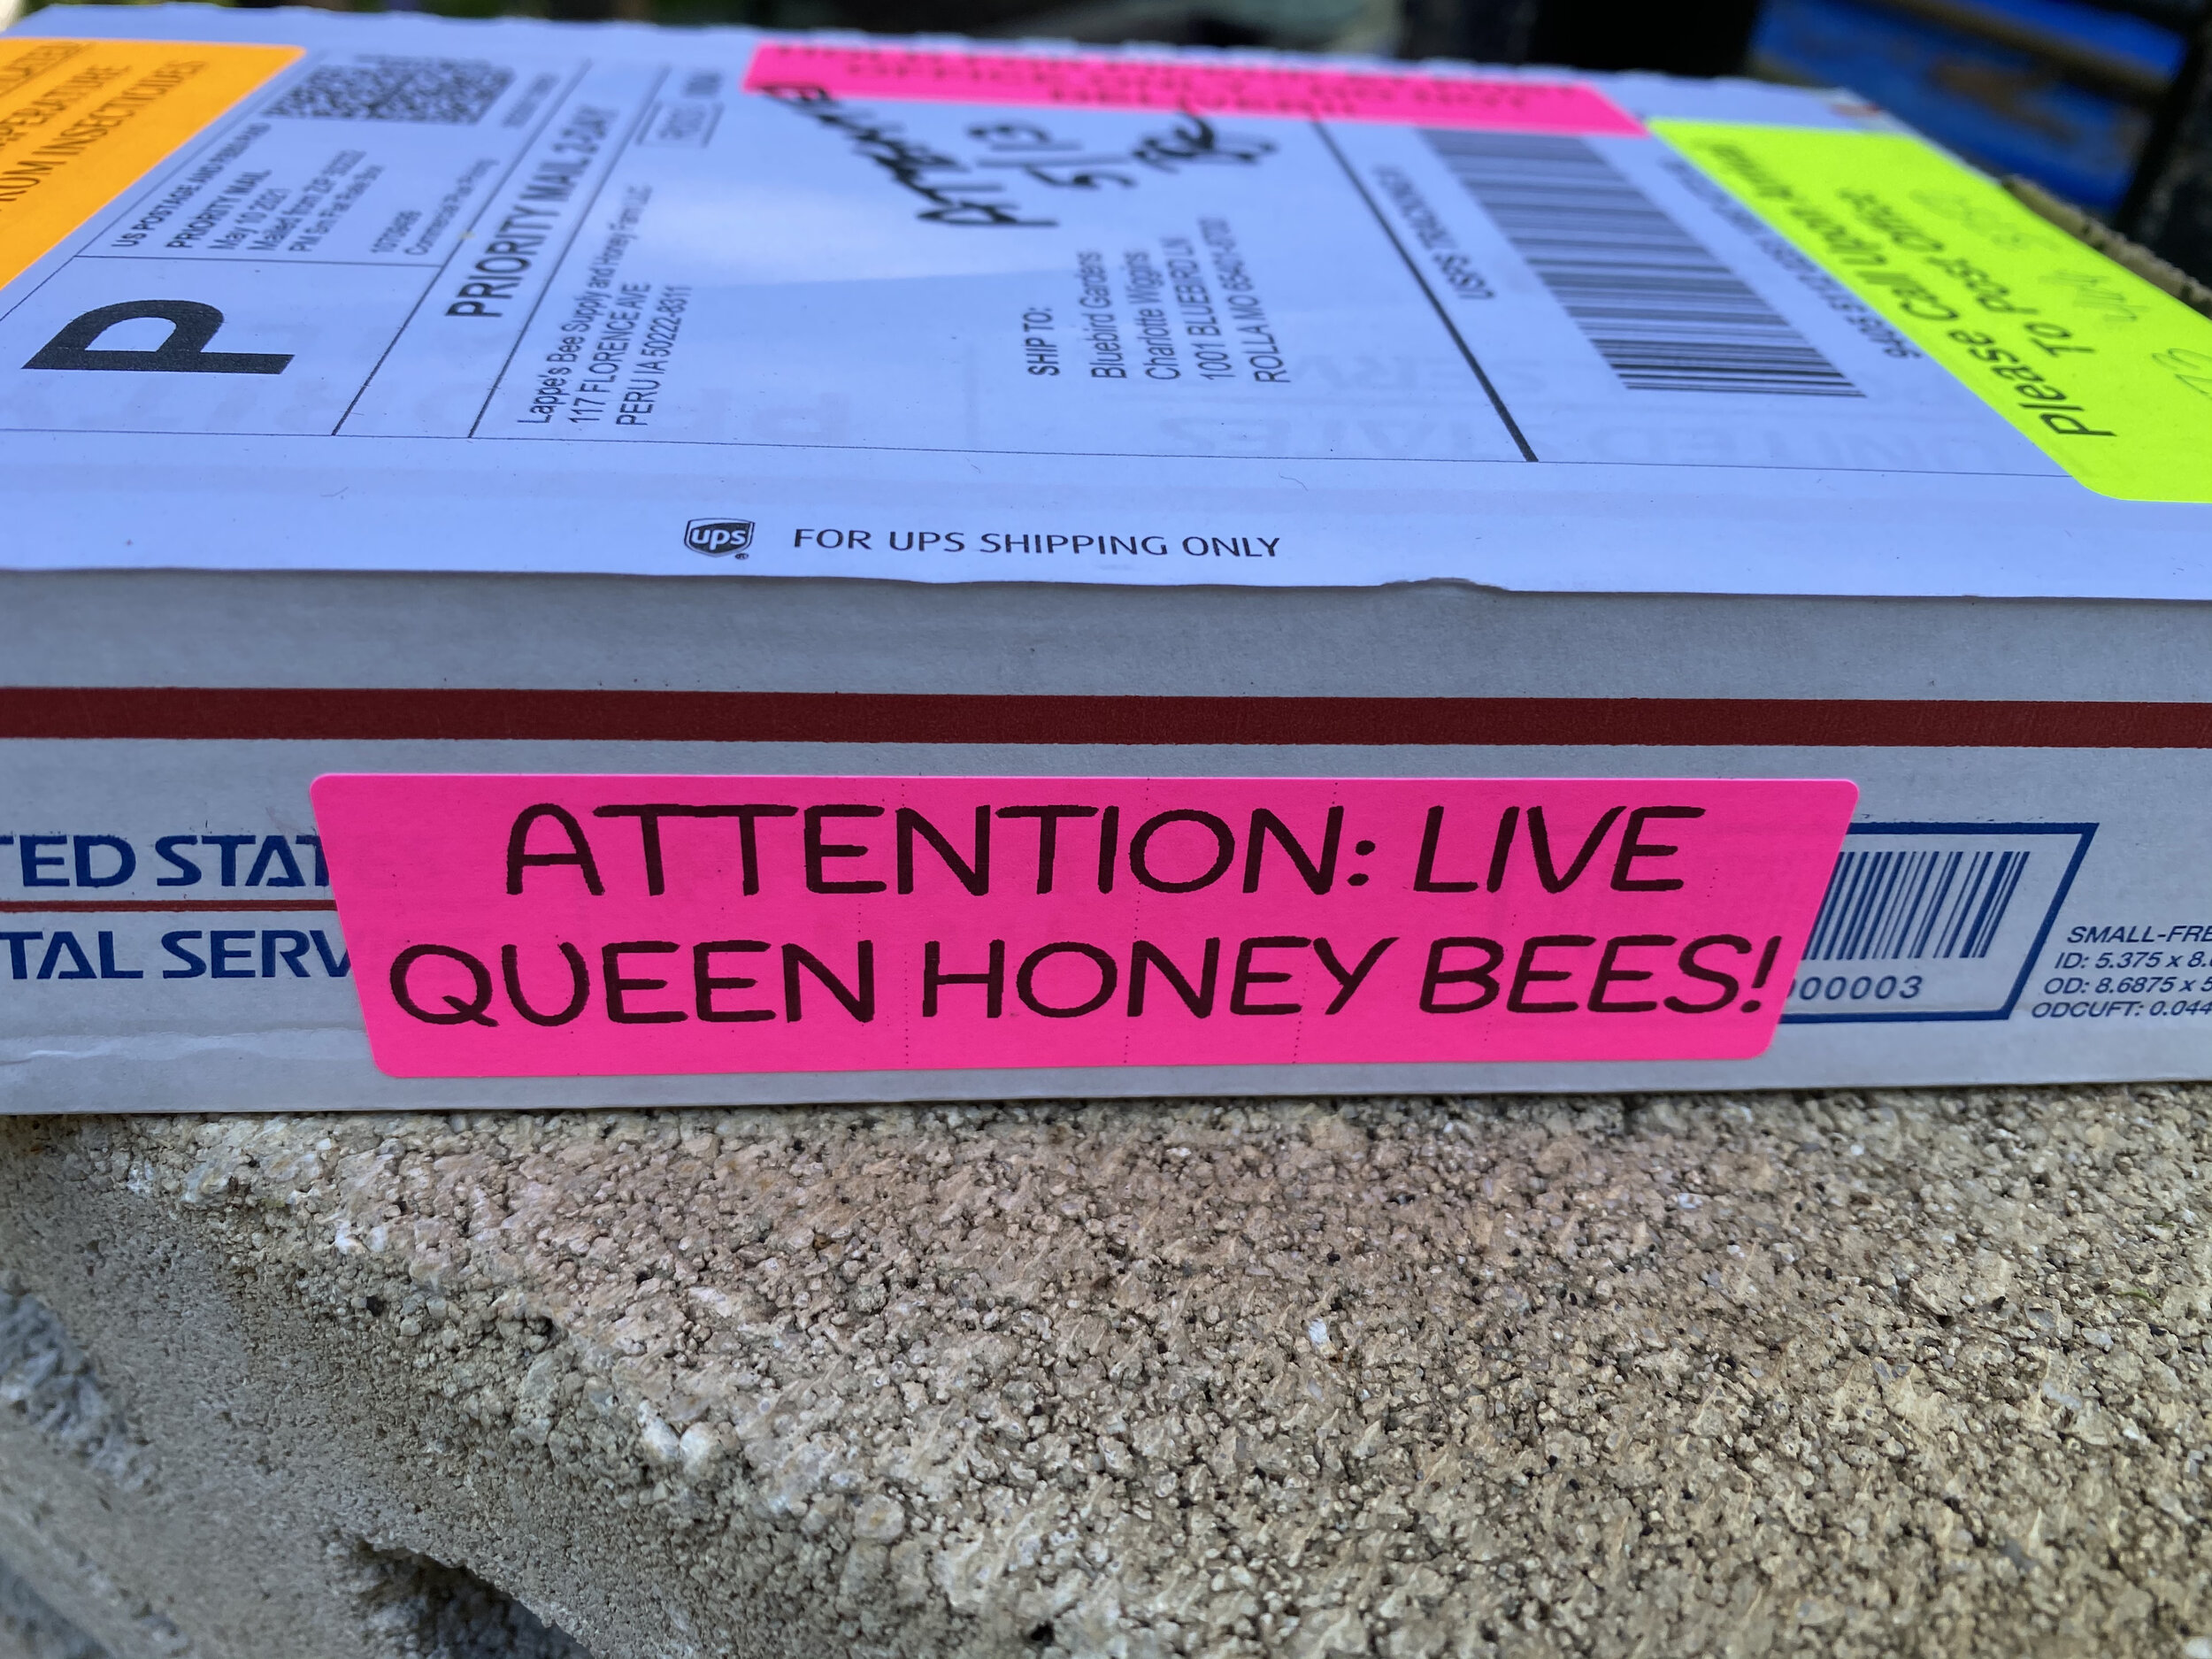
3. If you are thinking of starting a business, there are other hive products that can be the foundation of a cottage business: beeswax, propolis, bee pollen are all bee products used in from lip balms and soaps to tinctures. Some people also do well selling actual bees.


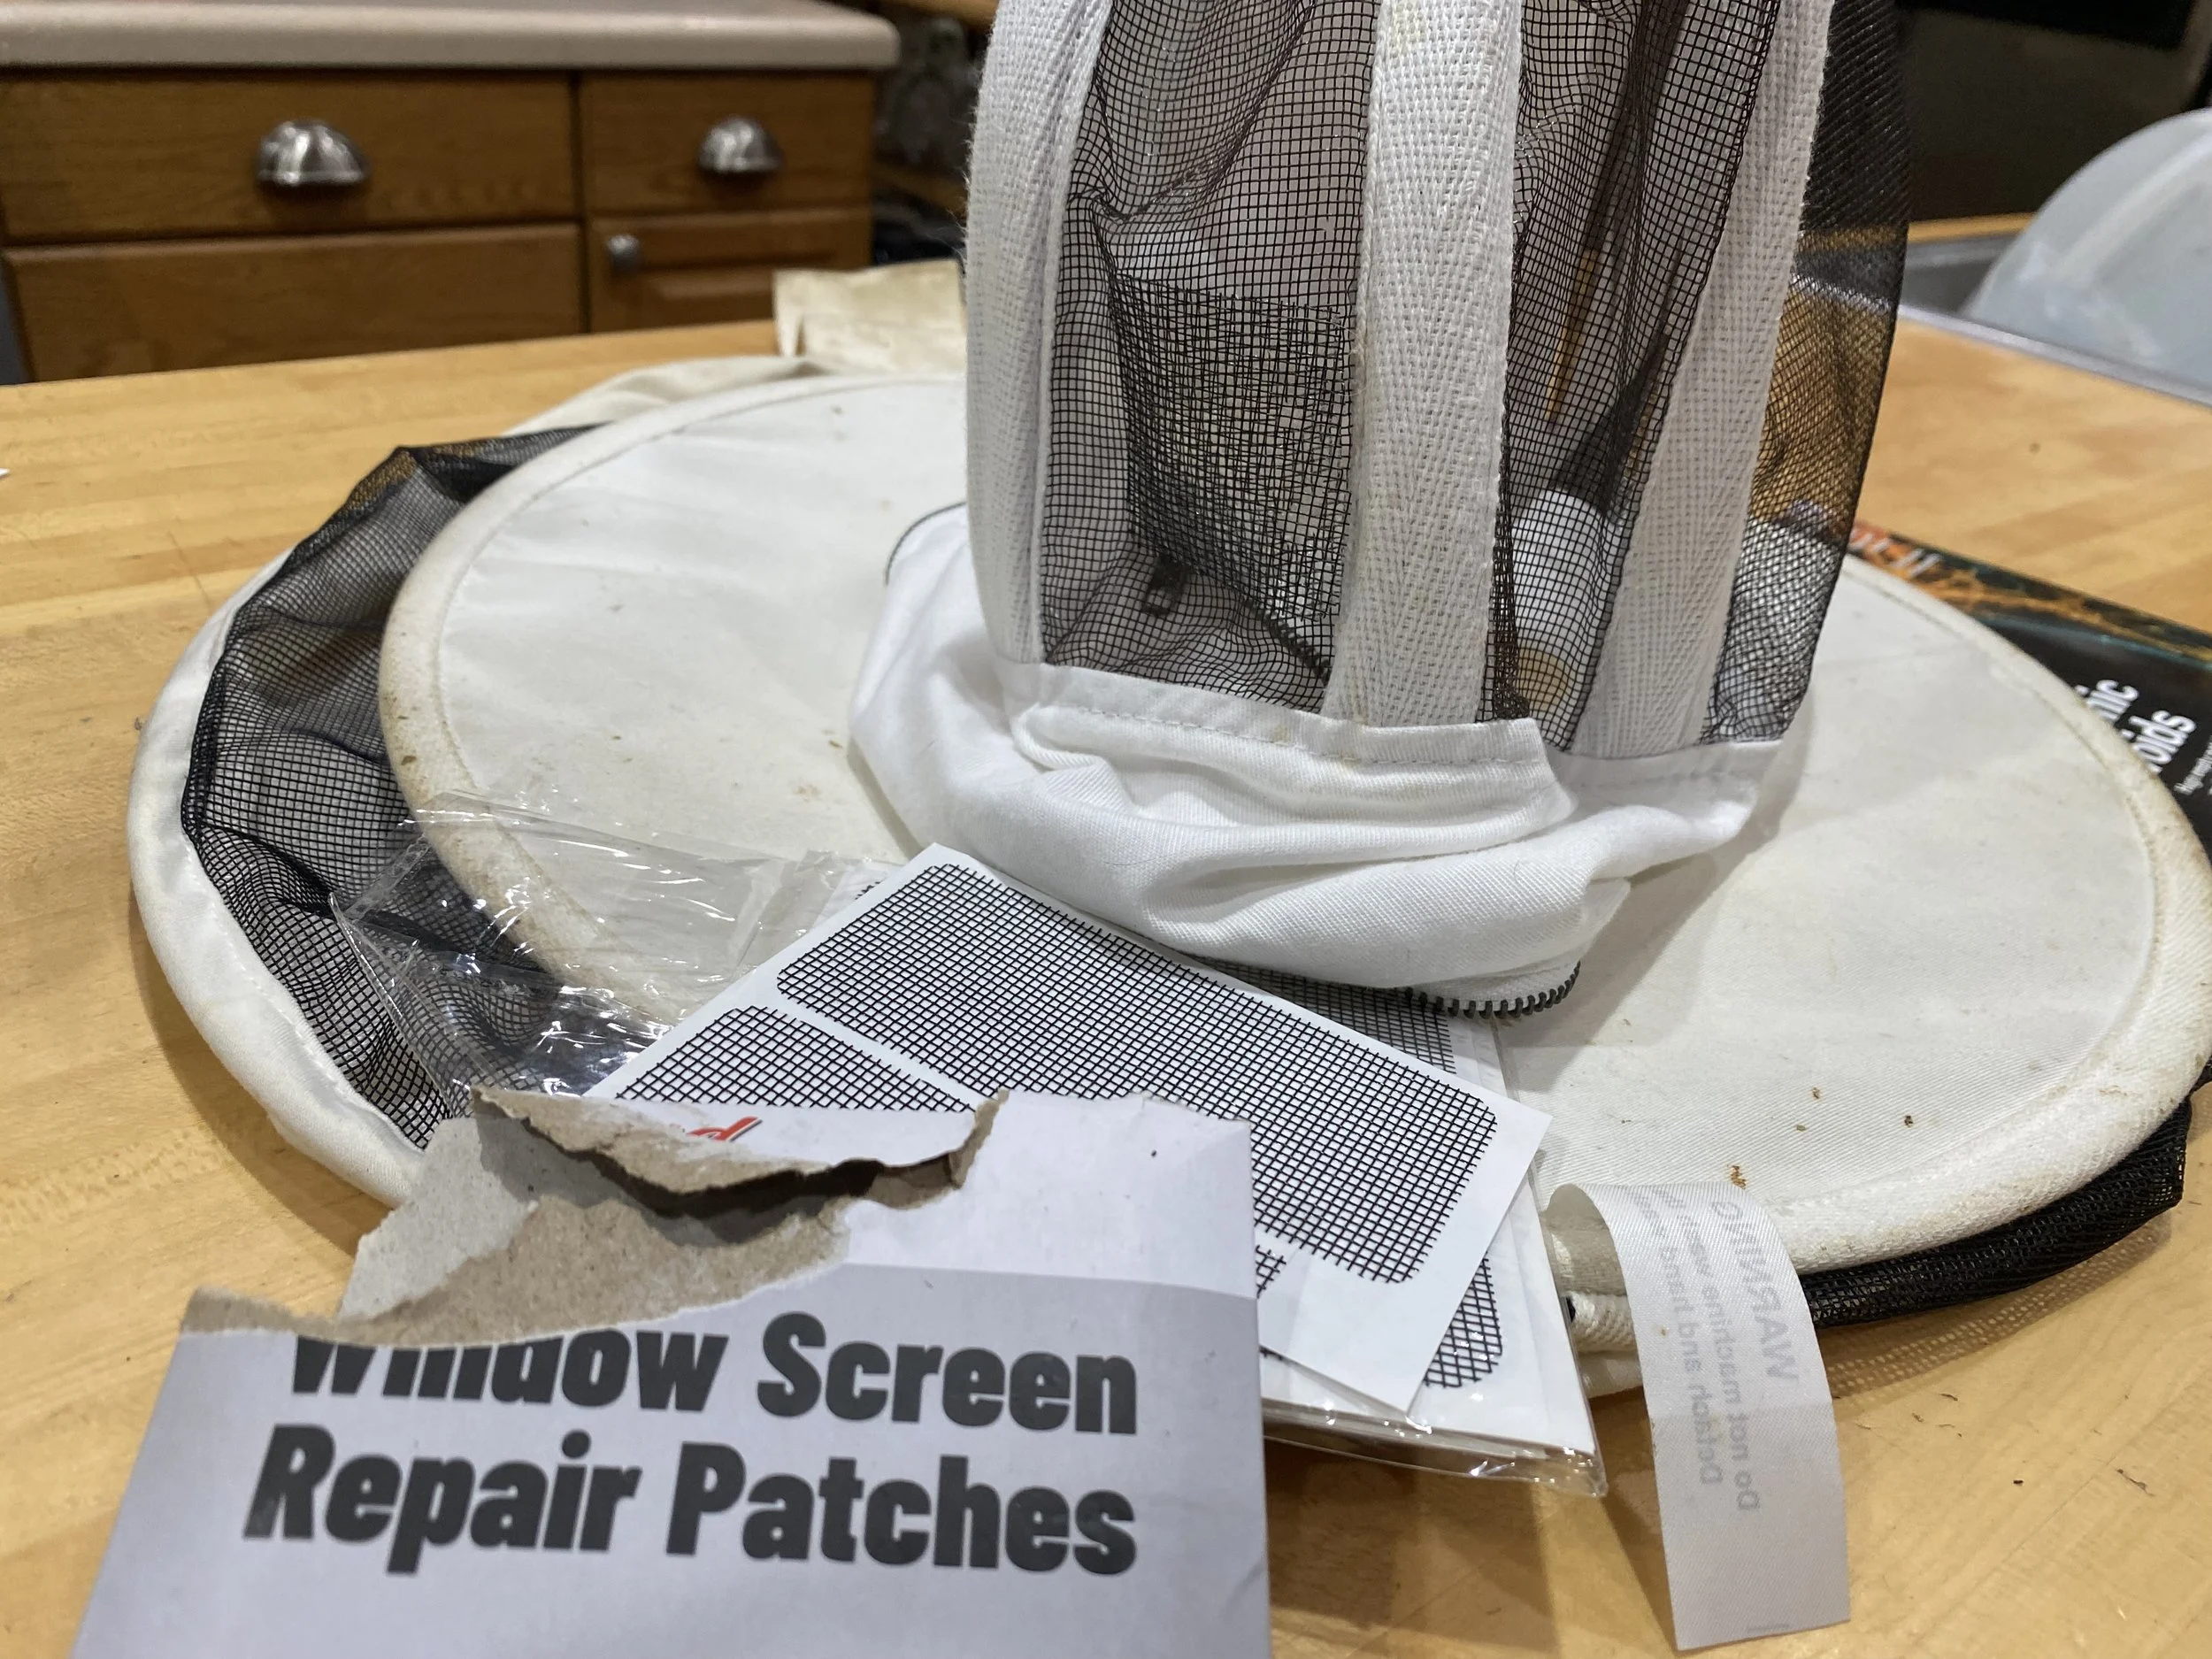
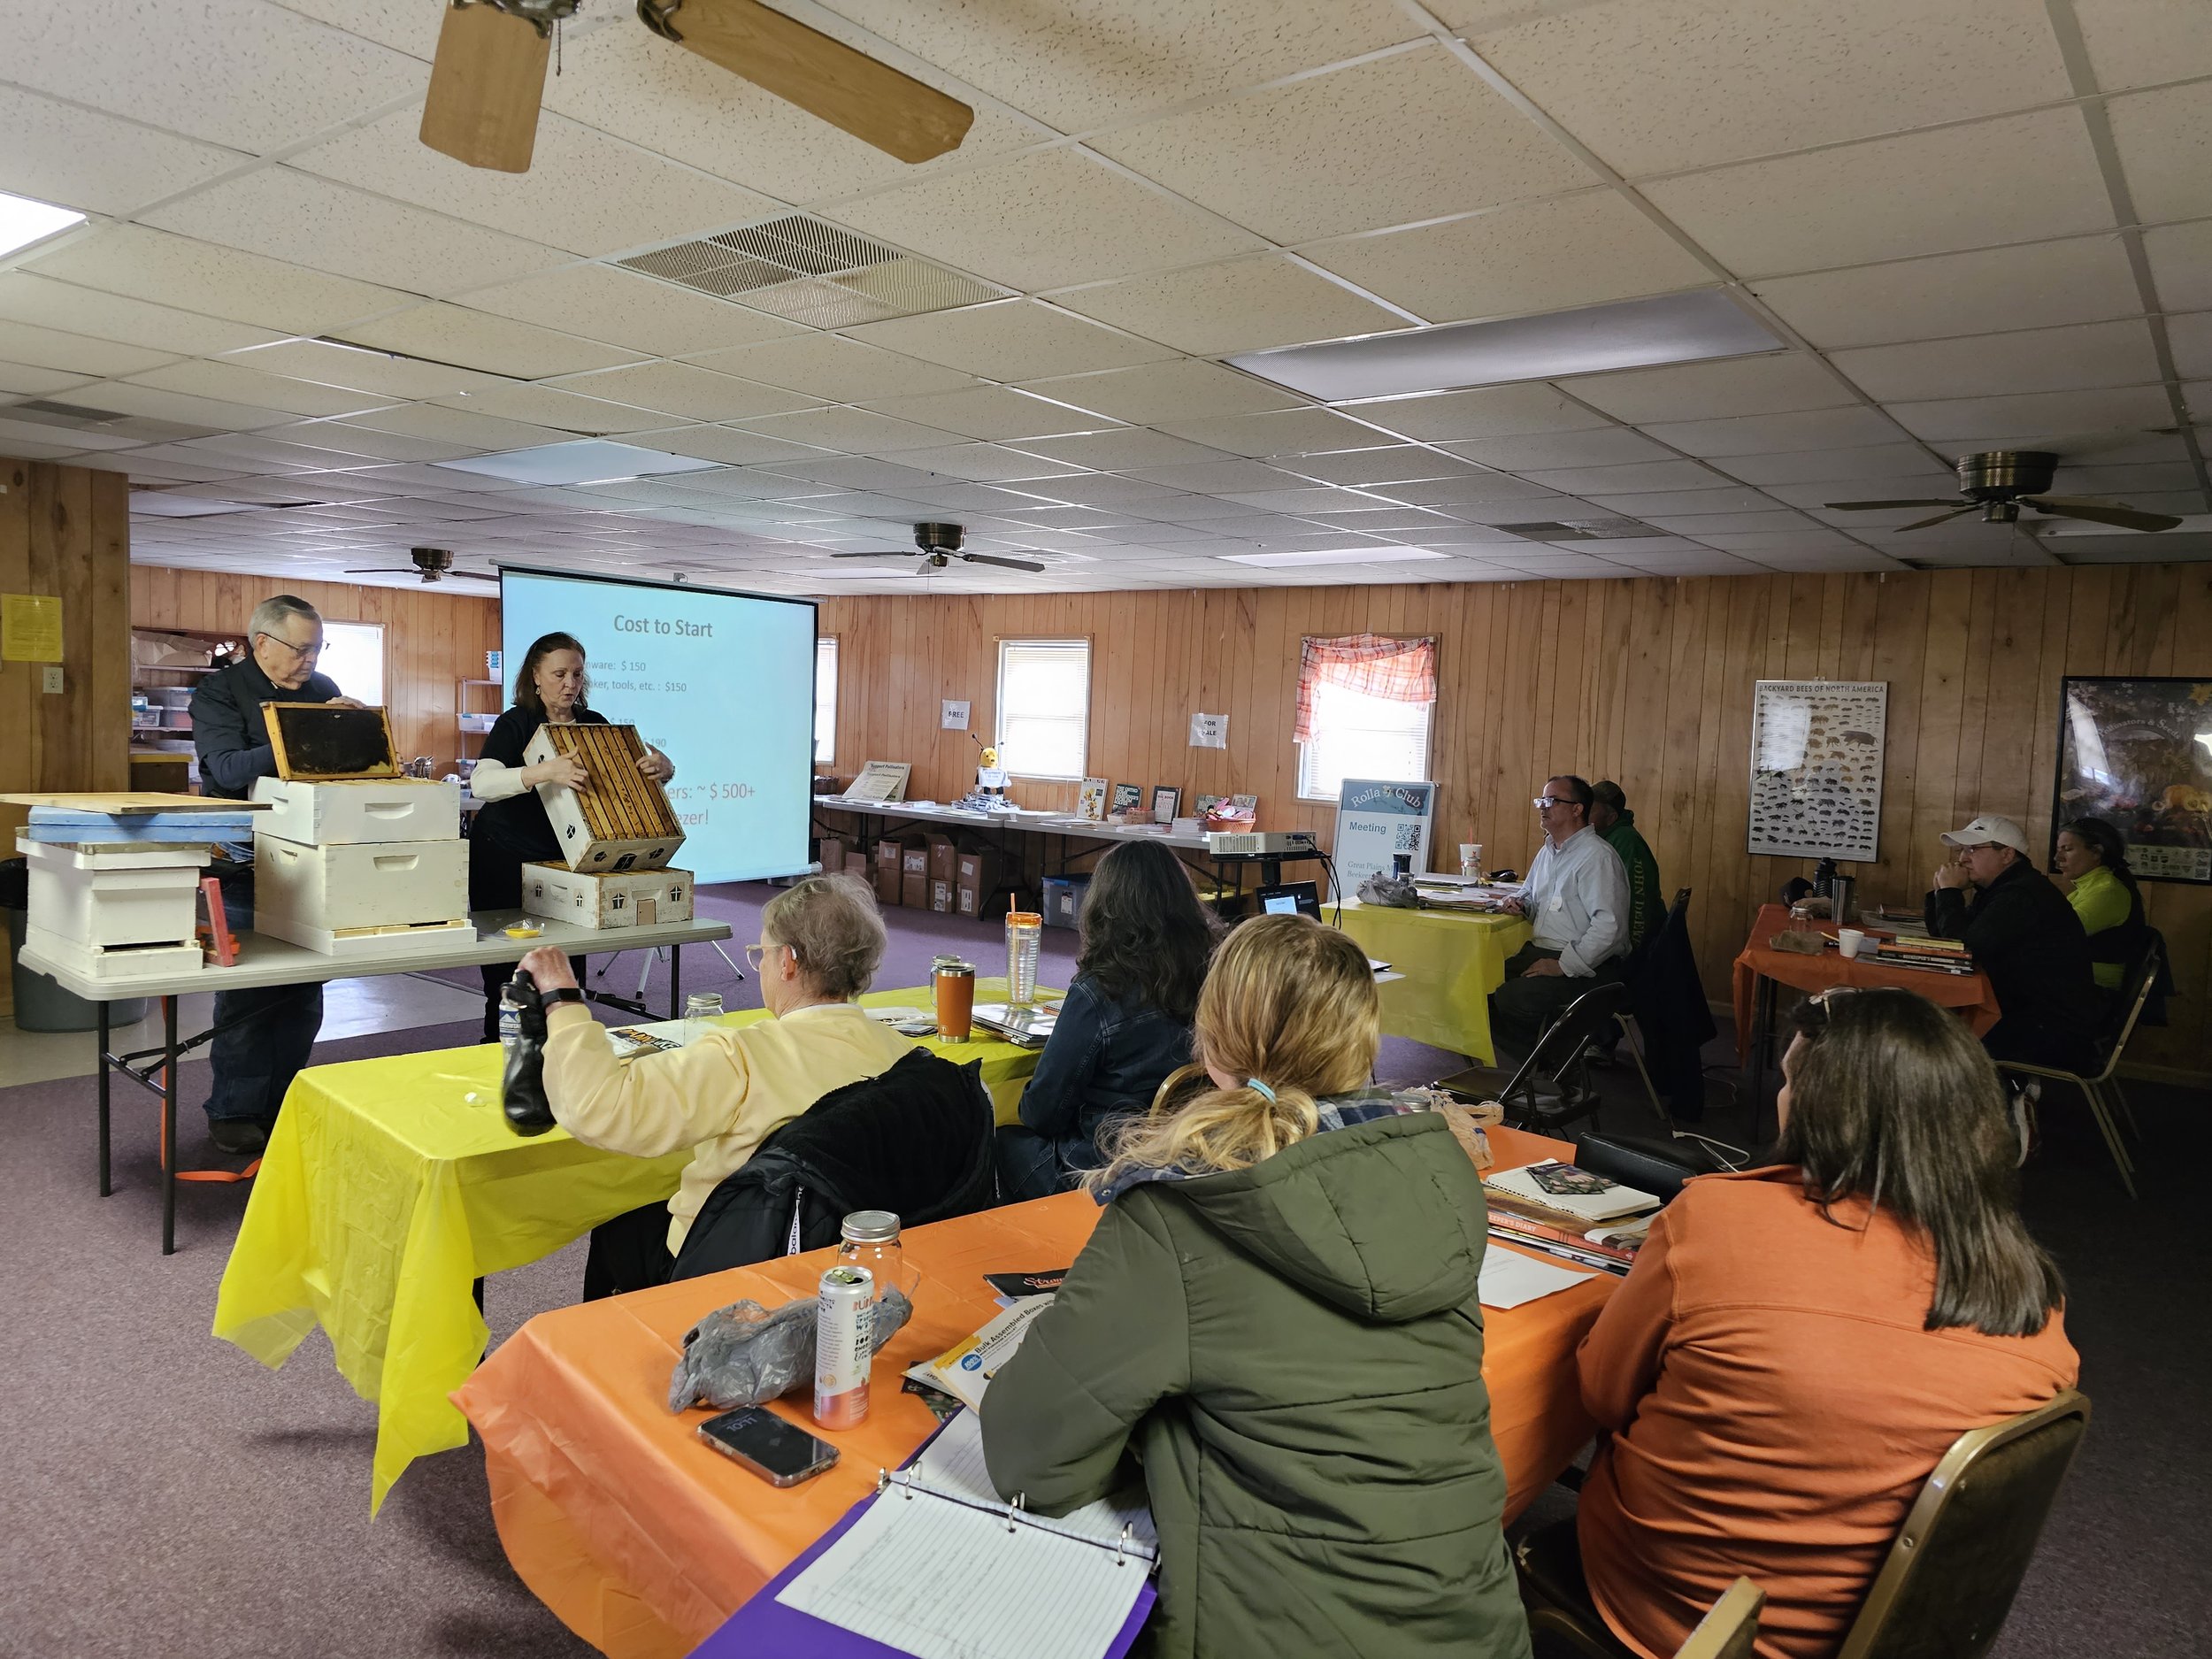
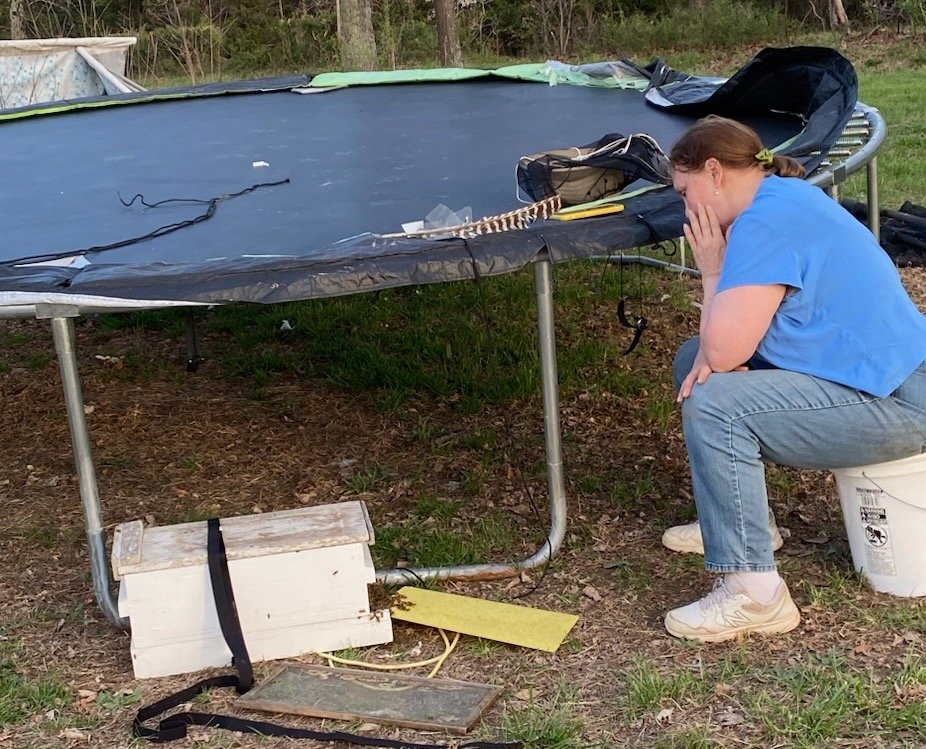
4. Some of the students of our local bee club beginning beekeeping classes decide not to keep bees because it’s too expensive, takes too much time, they’re afraid of being stung…Those are all excellent reasons not to keep honey bees. Taking a class may help you realize that before one spends a lot of money to buy equipment. Success comes in many shapes and sizes.


5. Actually we don’t need a ton of beekeepers, we need good beekeepers following best management practices and mentoring others.


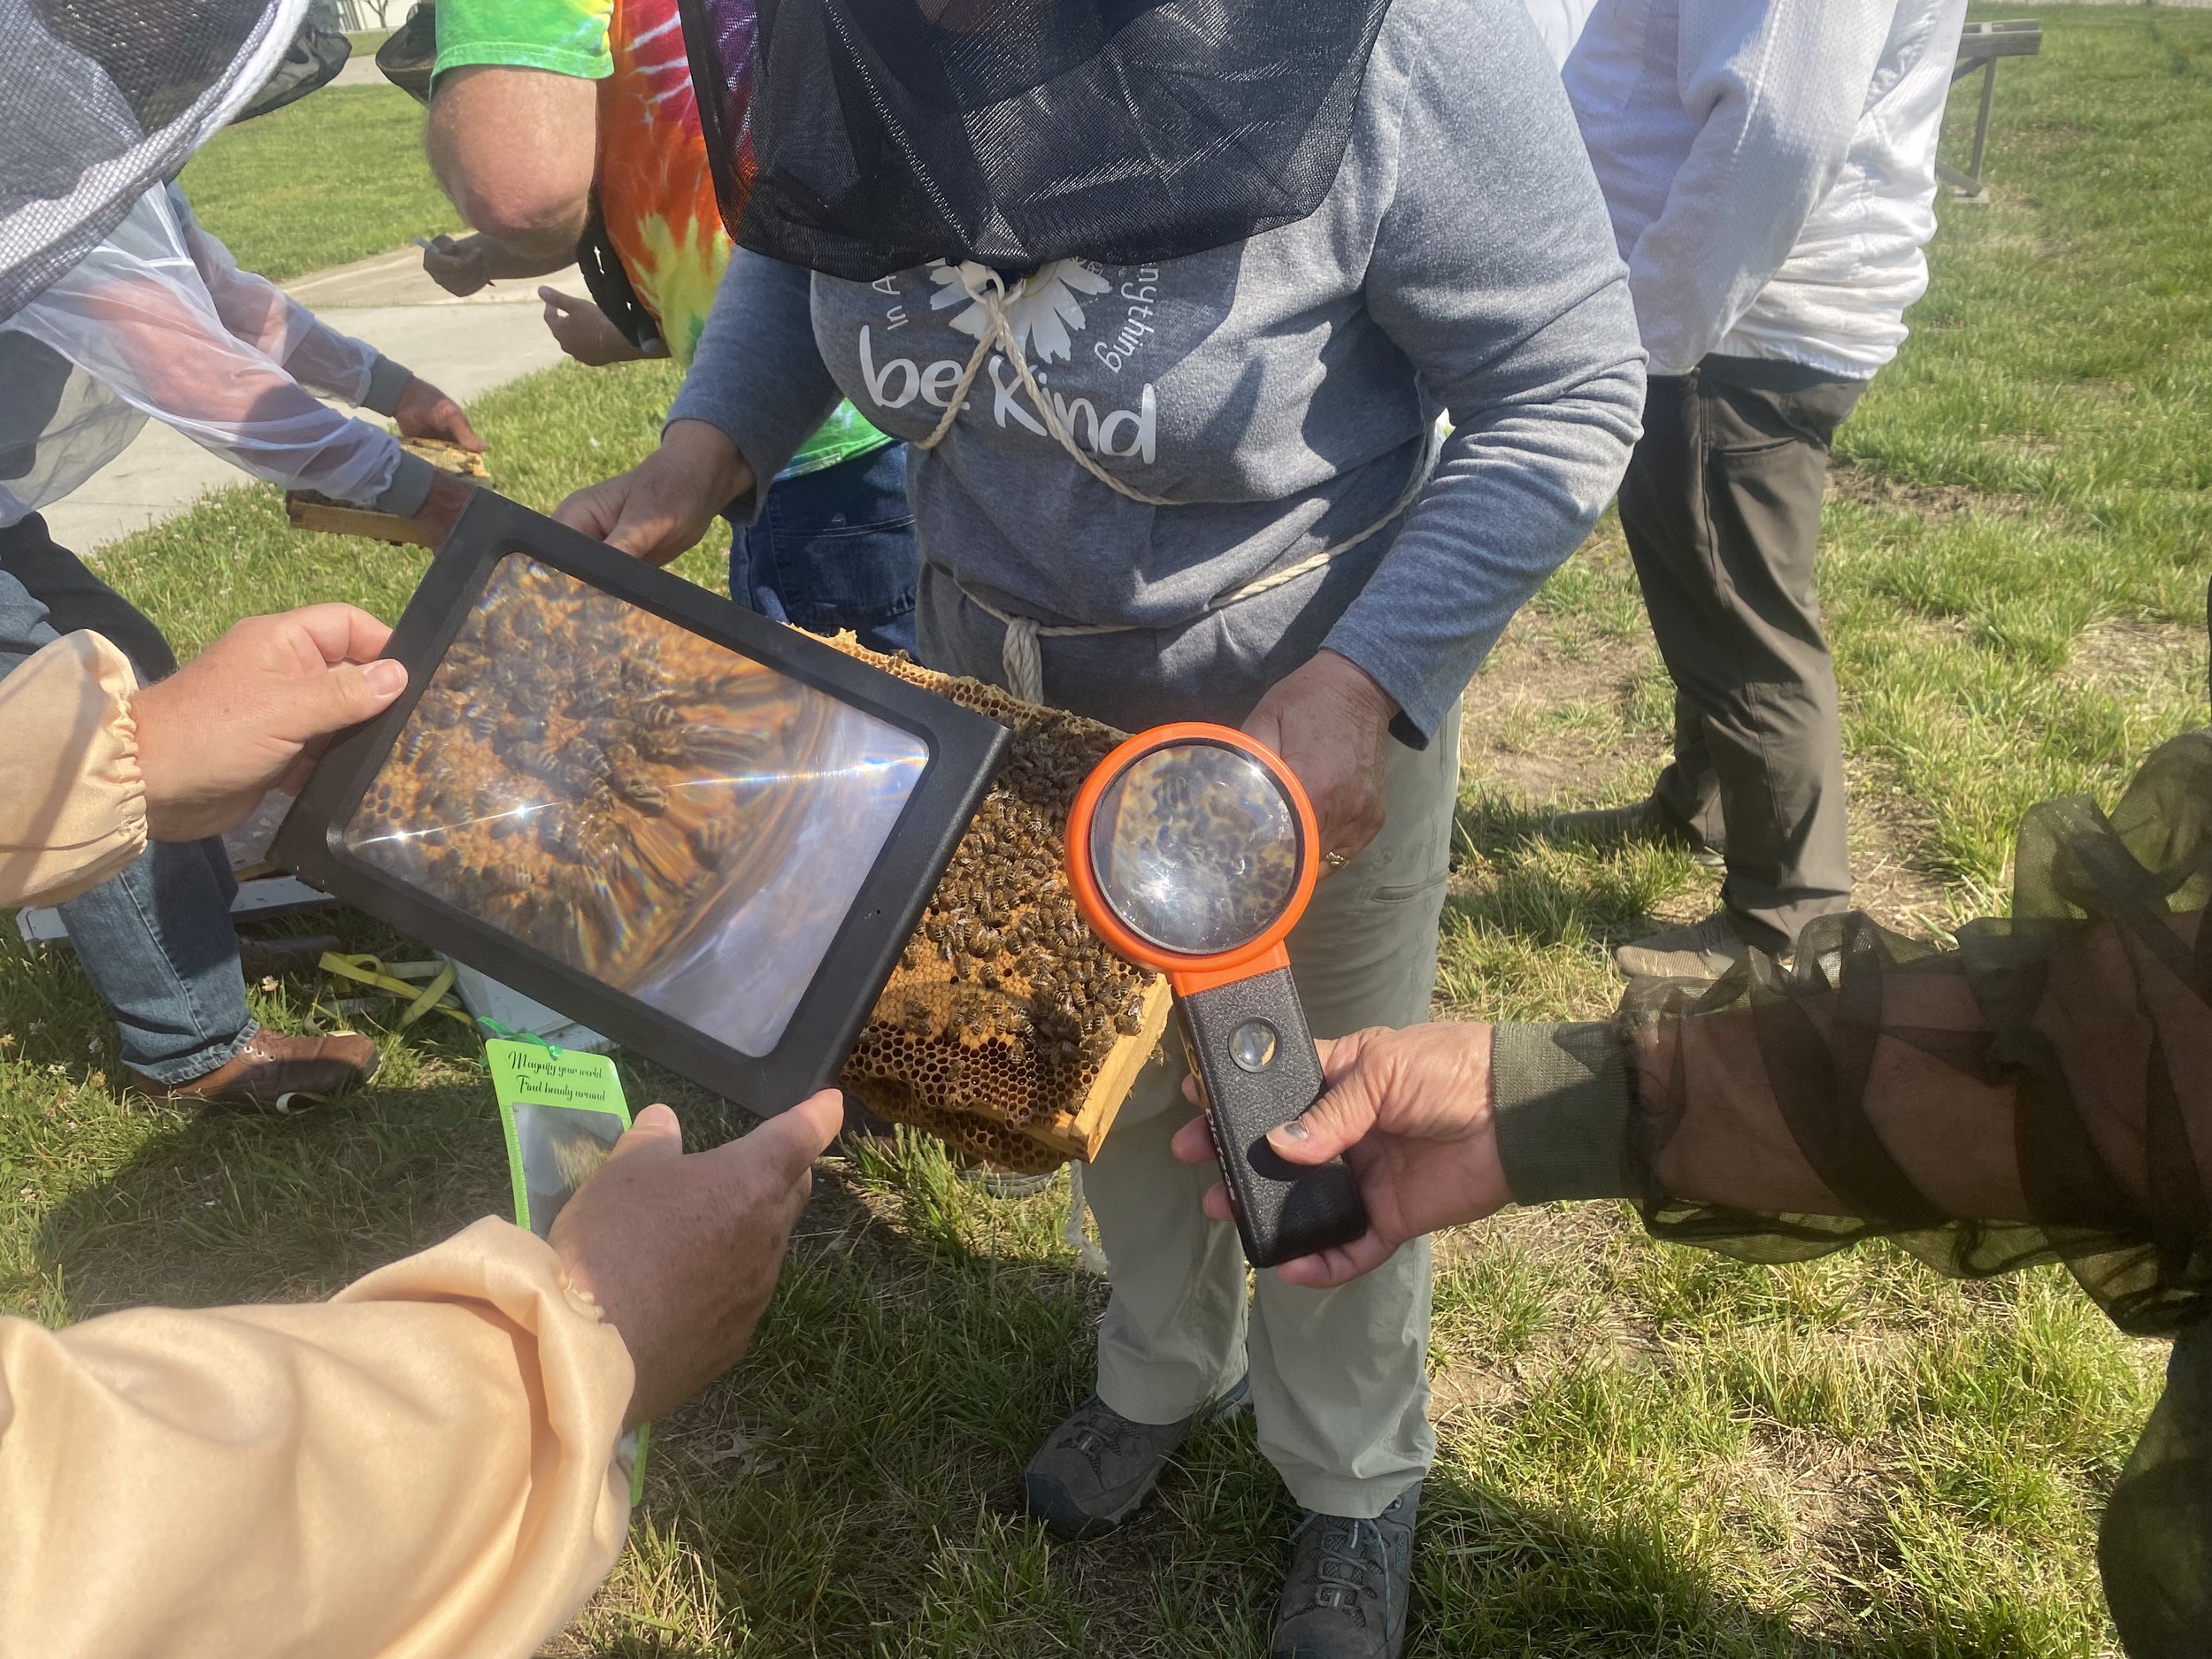
6. Where I live, the Rolla Bee Club supports beginning beekeeping students throughout the year at monthly meetings from lectures to hands-on practice with bees at teaching apiaries. They also host beginning beekeeping classes January-March. The first class January 27, 2024 is full; registration is open for the second beginning beekeeping class February 24, 2024 and for the Second Year Beekeeping class March 23, 2024. Check with your local bee club for their classes; most offer classes over winter when they are not busy with bees.

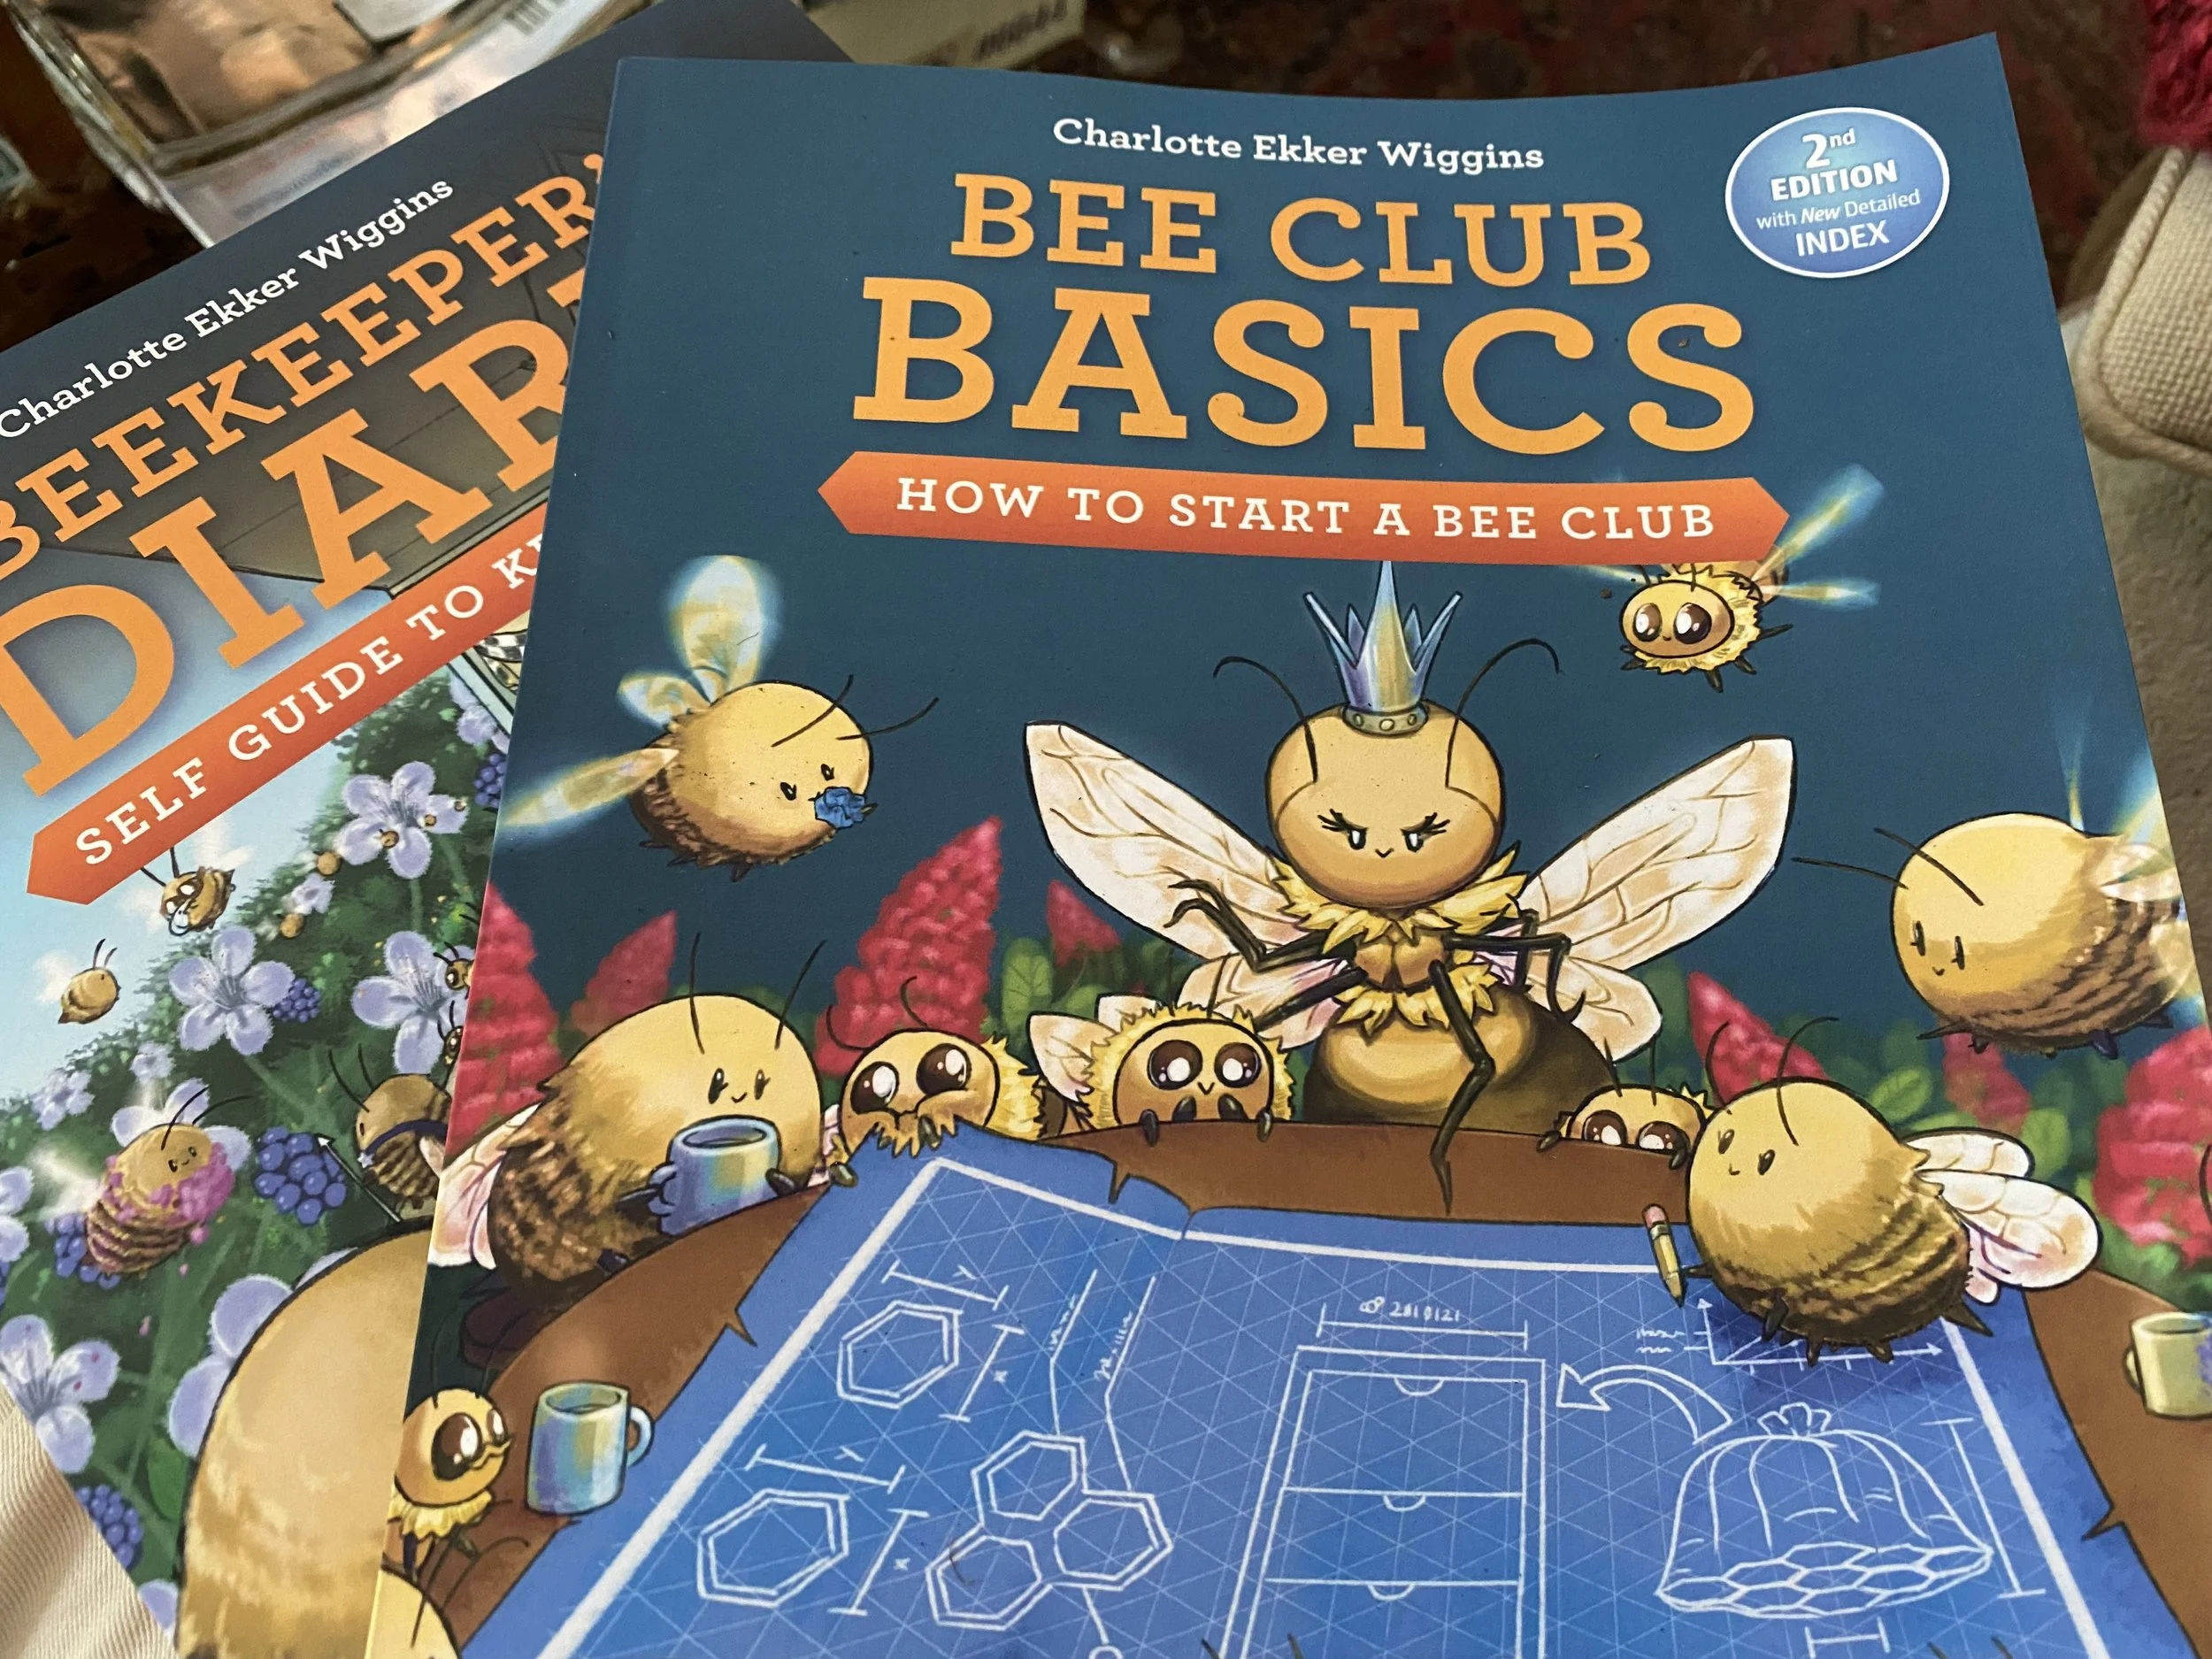
If you don't have a club close by, pick up a copy of A Beekeeper's Diary; Self Guide to Keeping Bees. It's the workbook we use for our beginning beekeeping classes. It will quickly give you an overview of how to get started and hopefully save you some money.

If you do nothing else, take a beginning beekeeping class; you will be amazed at all beekeeping requires and how fascinating bees are. Did I mention they are an important part of our food chain?

Charlotte

Sugar Cakes Recipe

My bees now have both winter protein in winter pollen patties as well as sugar cakes for winter food. (Photo by Charlotte Ekker Wiggins)

My bees now have both winter protein in winter pollen patties as well as sugar cakes for winter food. (Photo by Charlotte Ekker Wiggins)

Winter Bee Feeding

When I first started beekeeping, the more experienced beekeepers only talked about using sugar - mush bags, sugar cakes, candy boards - all carbs for winter supplemental feeding. I understood the concept, that this was to supplement stored honey supplies in case bees ran out mid-winter.

However, even honey, real honey, contains pollen, which is a protein source, or food for bees. More specifically, nurse bees need protein to trigger their glands to produce royal jelly so they can feed bee larvae. Studies show that under-nourished bee larvae grow up to be unhealthy bees. With the other bee stressors including pesticides, pathogens and poor foraging areas, good nutrition has become a priority in my apiary.

For two winters now I have been feeding my winter bees both sugar cakes and winter protein pollen patties in addition to giving the a medium super full of honey at the beginning of fall, then replacing empty honey frames with more frames of honey end of November. At this point in a relatively mild winter, all of my colonies are now in the top box showing very healthy colony numbers on warm days so I worry less about them pulling through winter because the cluster is too small.

So let’s take a look at a few of my hives and what I found under the inner cover when I inspected them on a sunny day that was 67F in early January 2019. I am located in mid-Missouri.

What do you find in your quick winter hive inspections under the inner cover? (Photo by Charlotte Ekker Wiggins)

What do you find in your quick winter hive inspections under the inner cover? (Photo by Charlotte Ekker Wiggins)

This is a second year queen that went into winter with very strong colony numbers. All colonies were treated with formic acid strips end of August to knock down varroa mite numbers going into winter. I treated because my varroa mite count was 10 mites per hundred when voluntarily tested by the state and analyzed by the USDA Bee lab in Maryland.

This colony has once again finished their winter protein patty. (Photo by Charlotte Ekker Wiggins)

This colony has once again finished their winter protein patty. (Photo by Charlotte Ekker Wiggins)

Even with replenished honey frames, my colonies seem to gravitate to the top of the hive on warm days.

This particular colony was like the rest, the colony had consumed the winter pollen patty so I replaced it.

Another winter protein patty quickly added before I closed up the hive. (Photo by Charlotte Ekker Wiggins)

Another winter protein patty quickly added before I closed up the hive. (Photo by Charlotte Ekker Wiggins)

Here’s another hive check. This colony is in its third year and also had finished their winter pollen patty so I added another one.

Homemade sugar cakes with winter pollen patties. (Photo by Charlotte Ekker Wiggins)

Homemade sugar cakes with winter pollen patties. (Photo by Charlotte Ekker Wiggins)

I make my own sugar cakes and now add Honey Bee Healthy to the mix in early winter, and pollen substitute for the sugar cakes I add to the colonies in January and February. Here is the recipe:

Charlotte's Bee Winter Sugar Patties Recipe 

5 lbs or 11 1/4 cups sugar
7 1/2 ounces of water (make sure it's exact)
1 teaspoon white distilled  vinegar (don't use apple cider vinegar, attracts small hive beetles)
1 tsp Honey Bee Healthy

For January-Feb use, I will add
1/4 cup Bee Pro protein to each batch

​Add Honey Bee Healthy and vinegar to measuring cup; then add water to 7 1/2 ounces. Mix well. Spread in bread pans and re-used fruit clam shells.

Leave overnight in cold oven to dry out. Once top is dry, remove and turn over on a cookie sheet to let the bottom dry out for a couple of days. If you end up with still moist patties, re-mix and add a little more sugar, then dry again.

If you don't need to use immediately, store in sealed plastic container.

Sugar patties not only provide supplemental feeding but also help to keep moisture out of the hives.

Now to yet another colony check, this one the smallest colony with a first year queen.

Smallest colony is also consuming winter protein patties. (Photo by Charlotte Ekker Wiggins)

Smallest colony is also consuming winter protein patties. (Photo by Charlotte Ekker Wiggins)

As beekeepers, especially ones who keep bees for honey, it’s easy to focus just on the carbs or sugar. For a colony to be healthy, however, and be able to collect flower nectar as both flight fuel and winter food storage, or honey, they need to be healthy and that means they first need pollen, which is protein.

I will be interested to see how my colony numbers are coming out of this relatively mild winter with the colonies getting both the nectar-substitute in the form of sugar cakes as well as protein patties.

These are the size of the protein patties I shape for each colony. (Photo by Charlotte Ekker Wiggins)

These are the size of the protein patties I shape for each colony. (Photo by Charlotte Ekker Wiggins)

Since small hive beetles also winter over inside the colony cluster, I keep my winter pollen patties small, about the size of the palm of my hand. The larger colonies may get two pollen patties, one each on the edge of the cluster and I checked the pollen patty bottoms to make sure there are no small hive beetle larvae getting established.

Do you feed your bees both sugar and protein pollen during winter feeding?

Charlotte

For more tips on gardening, beekeeping, cooking and easy home decor, subscribe to my weekly Garden Notes.

How to See Teeny Tiny Eggs

Plastic magnifying sheets and magnifying glasses are handy to have. (charlotte ekker wiggins photo)

How to See Teeny Tiny Eggs

One of the challenges in beekeeping is seeing the teeny tiny eggs queens lay. Maybe the sign of a pin head in the first few hours, it’s a critical skill to help monitor the health of a colony.

Over the years I’ve tried a number of options including reading glasses stronger than my prescription. Not the best option since safely moving can be challenging and its not easy to remove the glasses under a bee suit.

Here are a couple better options:

  1. Magnifying plastic sheets. These are inexpensive and easy to use to better locate the tiny eggs. I found several available on Amazon for $1 each. The magnification is 3X.

  2. Magnifying glass with light. These are also relatively inexpensive. The light helps with seeing the eggs when the sunlight is not in the right spot. Home and garden centers and craft stores have several options,

What about black foundation? These can still be challenging but they do help with better seeing the eggs. The one challenge I have is my bees don’t like the frames so it takes some convincing and sugar water to get them used.

Charlotte

For more tips on gardening, beekeeping, cooking and easy home decor, subscribe to my weekly Garden Notes.

Bee Club Basics 2nd Edition

Second reference book in a three-set series is out. (Charlotte Ekker Wiggins photo)

Bee Club Basics 2nd Edition

The second edition of “Bee Club Basics, How to Start a Bee Club” is now out. It’s a helpful guide for those who want to start an educational non-profit. It will also come in handy for those wanting to re-invigorate their current bee clubs. The COVID 19 pandemic has made us all multi-functional so we can meet online or safely in person.

To be successful beekeepers, it’s helpful to have a supportive community. Having a bee club that invites beekeepers to meet, share information and lend a helpful hand is critical to the success of a beekeeping community.

In particular rural areas of the country, where internet service is not reliable, there are still some basic meeting principles that work in bringing people together.

Have you willed the coffee to finish like the rest of us? (Charlotte Ekker Wiggins photo)

I founded a bee club where I live in 2014 at the request of my beginning beekeeping class students. The forms I used to start this club including a club charter, then club by laws and other samples in between, are included in this book for easy reference. They are all collected in the back section for easy access and copying.

i also asked Michele Colopy, LEAD for Pollinators, a non-profit offering beekeeping organizations management advice, to review this edition.

And should you like to see the advice in action, you’re welcome to our club meetings. We put into practice the advice in “Bee Club Basics 2nd Edition” and use the enclosed samples ourselves.

I’ve established a dozen nonprofits since 1979. I know how challenging it can be for a new person to tackle the process. This book makes it more manageable and offers tips from someone who has some experience navigating non-profits. If you have any questions, feel free to contact me with your questions.

This 286-page paperback joins “A Beekeeper’s Diary, Self-Guide to Keep Bees 2nd Edition” as part of a three volume reference series I’m writing. Currently there are no other reference books like mine on the market. Kim Flotum, Bee Culture magazines retired senior editor last year, said I was “revolutionizing the way beekeeping was taught.”

All I am trying to do is to help other fellow beekeepers.

Charlotte

Award-Winning Beginning Beekeeping Book

“A Beekeeper’s Diary Won First Place in the 2022 “How to” Category. (Independent Press Award graphic)

Award-Winning Beginning Beekeeping Book

A potential new beekeeper asked me earlier this week about my award-winning beginning beekeeping book. “Have you used it yourself,” she asked.

After 10 years of teaching beginning beekeeping classes and 8 years of running a bee club, I still do, I told her. “A Beekeeper’s Diary Self-Guide to Keeping Bees” has been used in all of my beginning beekeeping classes, starting with the many check lists I’ve developed over the years to help new beekeepers keep track of all of the decisions they have to make.

Even though I know the book is helpful, there’s some pleasure in hearing others think it’s a good product.

The second edition has a very handy detailed index. (Becky’s Graphic Design)

The Independent Press Awards in 2022 is the latest award. They chose “A Beekeeper’s Diary Self-Guide to Keeping Bees” as the best in 2022 the “How to” nonfiction category. The Independent Press Awards bring increased recognition to the thousands of exemplary independent, university, and self-published titles published each year.
​"A Beekeeper's Diary Self-Guide to Beekeeping" has also been approved by Great Plains Master Beekeeping out of University of Nebraska as covering scientifically-based best management practices. The Great Plains Master Beekeeping program started in Nebraska and now includes Missouri, Iowa, Wisconsin, Nebraska and Kansas.
The diary reinforces information new beekeepers receive in beginning beekeeping classes and guides them through the decisions they have to make to get started. The diary has places for documentation, an important skill for good beekeeping. “It’s easy to skip this step in the first year but by your second year you will be thankful that you have those records.”
If a new beekeeper can’t get to a beginning class, the diary will help fill that gap. I like to be practical!
As much as I appreciate the awards, the best reward is to have a struggling beekeeper say “now I get it” after reading the book!

Charlotte

Multi-Purpose Beginning Beekeeping Guide

Autographing diaries before they get shipped. (Photo by Charlotte Ekker Wiggins)

Multi-Purpose Beginning Beekeeping Guide

The second edition of the award-winning “A Beekeeper’s Diary Self-Guide to Beekeeping” is now available.

The 310-page large print 8.5x11 inch paperback is available in print with black and white photos and ebook 70% color photos. The book covers the first 3 years of beekeeping and supports beginning beekeeping classes with helpful guides and checklists; stands alone as a helpful guide for those who can't make a beginning beekeeping class but still want to start keeping bees, and includes an extensive helpful index.

This 2nd edition includes 310 pages in large print for easy reading.(Photo by Charlotte Ekker Wiggins)

A Beekeeper's Diary 2nd Edition is also now a study guide for Great Plains Master Beekeeping's (GPMB) online Apprentice to Journeyman test. The GPMB educational teach-the-teacher beekeeping program is out of the University of Nebraska at Lincoln and is now including Missouri in their 7-state program.

Handy check lists guide beginning beekeepers through the options. (Photo by Charlotte Ekker Wiggins)

The beginning beekeeping book and diary includes basic beekeeping information and guides appropriate to Midwest states.

The diary also includes space for notes. (Photo by Charlotte Ekker Wiggins)

The diary retails for $34.95 and is available where most books are sold.

Autographed copies are available here.

If you are just starting your beekeeping journey, welcome!

Charlotte

Queen Bee Marking Pens

Organizing queen bee marking pens in a gardening apron. (Photo by Charlotte Ekker Wiggins)

Queen Bee Color Pens

There are few things most beekeepers like more than finding new ways to do something. I certainly fall in that category so it was with great interest that I spotted this gardening apron turned into a queen bee color marking guide.

Queen bees are marked with a special color to indicate the age of the queen. There is an international queen bee marking code based on 5 colors and the last number of the year:

White: year ending in 1 or 6

Yellow: year ending in 2 or 7

Blue: year ending in 5 or 0

Green: year ending in 4 or 9

Red: year ending in 3 or 8

This system helps the beekeeper know the queen’s age while making it easier to spot her in a crowd of moving bees.

Now if all of your queen bees are the same age, you only need one marking pen. They’re special pens, by the way, not a marker you buy at your local big box store. And if you have different-aged queen bees, then you need different colored pens.

This is where the gardening apron comes in. This particular beekeeper has set up a system on the gardening apron to keep track of his marking pens. Sounds simple enough but once you’re out in your apiary handling bees and need to grab a marking pen - this marked gardening apron will make the pens very convenient and easy to find.

Charlotte

Wear a Veil

My removable veil I use on a pith-helmet like hat to prevent stings. (Photo by Charlotte Ekker Wiggins)

My removable veil I use on a pith-helmet like hat to prevent stings. (Photo by Charlotte Ekker Wiggins)

Wear a Veil

Some of the pictures are a bit disturbing, images of beekeepers with swollen faces because they were stung. There’s an attitude among some beekeepers that they should be able to work bees without protective equipment. Some of it is bravado; most of it is ignorance and the combination of the two is a dangerous option.

A recent popular online video of a young woman in perfect makeup without a suit has literally gone viral although her claims of being an experienced beekeeper has understandably been questioned. Her appeal, in my opinion, is that she’s attractive and making beekeeping look benign. People already are fascinated by the idea of beekeeping; she and her husband has just make it look good.

Here’s the bottom line. If you are going to work bees, wear head protection. It can be as simple as mosquito netting over a baseball hat or the easier to maneuver pith helmet shaped hat draped with netting.

You are working with arthropods that sting when threatened. Why wouldn’t you take precautions just in case you hit a cranky one?

I’ve been keeping bees for 11 years. There are days when I know I can work my bees without gloves but I always have something on my head - a veil works well for those quick hive visits, a bee jacket is better if I have to spend any time with the colony.

If the weather is good, it’s a wonderful days with my bees but I don’t risk having a sting where I don’t want one.

It’s such an easy step to take. Please be a responsible beekeeper.

Charlotte

Lifting Hives

This motorized hive lifter can be operated by one person. (Photo by Charlotte Ekker Wiggins)

This motorized hive lifter can be operated by one person. (Photo by Charlotte Ekker Wiggins)

Lifting Hives

If you spend any time around beekeepers, the topic of backs - and more specifically bad backs - will come up. At the end of a growing season, beekeepers have a lot of weight to lift thanks to hopefully busy bees storing and dehydrating nectar into honey. One typical medium frame of capped honey can weigh between 3-5 pounds.

The weight, and wear on backs, is partially responsible for beekeepers moving from 10-frame hives to 8-frame ones. That small transition can lighten a hive box by 10 pounds each per box.

There are a couple of available hive lifting tools that contribute to adaptive beekeeping. One is a manual one requiring two beekeepers to pick up a handle on each side of a hive. I have one of those; it is constantly being borrowed by my beekeeping friends but requires a second set of hands to use.

I recently saw another, more expensive bee hive lifter at Central Missouri State University’s open apiary in support of Heroes to Hives Missouri, the first state chapter of this military veteran beekeeping program. This one is motorized and surprisingly lightweight. The “Bee Hive Lifter” can be operated by one person, making it a more practical tool in an apiary. The manual version costs about $1,000; the motorized version $1,500.

Probably not a practical tool for the hobby beekeeper but anyone going into business and moving a lot of hives may want to add this to their equipment list. Beehivelifter.com, made in USA.

Charlotte

Watering Bees

Preparing one of my bird baths with twigs to give my bees a safe landing spot. (Photo by Charlotte Ekker Wiggins)

Preparing one of my bird baths with twigs to give my bees a safe landing spot. (Photo by Charlotte Ekker Wiggins)

Watering Bees

It’s been getting record hot where I live. In addition to making sure my plants are watered, I concentrate on getting my pollinators, including honey bees, drinking water. Honey bees use water for a variety of things from air conditioning the hive to making food.

Now when I talk about providing bee water in beekeeping classes, usually someone will pipe up that they have a pond within so many miles of their hives. My question to them is, would you want to drive the 2 miles to water or would you rather have a handy watering hole nearby.

Bees are no different. It’s better to have water close by so they can easily access it versus spending extra energy for the water carriers to fly off and carry water back to the hive.

In my apiary, I have concrete bird baths situated within a few feet of my hives. That way bees have easy access to the water and don’t compete to get it. I also prepare the bird baths with sticks and rocks so the bees have a safe spot to land. Leaves falling in? Even better, the leaves and other garden debris offer amino acids that are critical for bee health.

In addition, those bird baths are now favorite watering holes for a variety of pollinators including butterflies and moths. They also use sticks and rocks for safe landing spots.

Not everyone has the room to add bird baths so there’s an excellent alternative: Boardman feeders, the very same we beekeepers use to feed bees sugar water.

Boardman feeders with glass jars on top of frames make handy inside water drinking stations. (Photo by Charlotte Ekker Wiggins)

Boardman feeders with glass jars on top of frames make handy inside water drinking stations. (Photo by Charlotte Ekker Wiggins)

Clean out the glass jars and refill with water. Then turn over for gravity to remove the air and place in the Boardman feeder over the bee frames. This way bees have access to water without having to leave the hive and no one can disturb it.

Also a good way to repurpose those Boardman feeders since outside feeding is no longer recommended. Feeding outside encourages robbing, facilitates Varroa mite movement and sometimes can heat up fast.

Charlotte

Shipping Queen Bees

Clearly mark the package so handlers know these are live. (Photo by Charlotte Ekker Wiggins)

Clearly mark the package so handlers know these are live. (Photo by Charlotte Ekker Wiggins)

Shipping Queen Bees

If you ever get queen bees shipped, or have a reason to ship queen bees, this is the best example of how to ship them.

First, make sure the carrier you use knows they are on their way. A call to the local post office is usually enough. Provide the shipper’s address and the estimated delivery time. Also provide your phone number and ask them to call you as soon as the package arrives. A little jar of honey at Christmas time helps them to remember who you are.

To help this process go smoothly, this shipment included instructions on the outside of the box.

Not only does this have my phone number but a note that a call was made.(Photo by Charlotte Ekker Wiggins)

Not only does this have my phone number but a note that a call was made.(Photo by Charlotte Ekker Wiggins)

If you are shipping queens, make sure your package is well-marked like this one. There is a label for the handler, a label for the post office and a note for the receiving beekeeper.

Another label reminds the recipient to get these in the hive as soon as possible. (Photo by Charlotte Ekker Wiggins)

Another label reminds the recipient to get these in the hive as soon as possible. (Photo by Charlotte Ekker Wiggins)

Inside, the queen bees are traveling with several worker bee attendants. It’s not unusual for a couple attendants to be dead upon arrival but check that the queens are still alive.

The white circles at the top of the queen box are a source of sugar to keep the bees fed on their journey. This will also buy time for the queen bees to get acclimated to their new home by spreading their pheromones for a few days. Usually by the time the sugar is eaten the queen has been accepted and the colony looks forward to welcoming her.

Queen bees with attendants and sugar plugs inside the shipping box. (Photo by Charlotte Ekker Wiggins)

Queen bees with attendants and sugar plugs inside the shipping box. (Photo by Charlotte Ekker Wiggins)

The queen boxes have been carefully glued to the cardboard so they don’t move around during shipping.

Two more labels to wrap up the shipping. (Photo by Charlotte Ekker Wiggins)

Two more labels to wrap up the shipping. (Photo by Charlotte Ekker Wiggins)

Some shippers use only corks in the queen boxes, which means the bees need to be fed upon arrival. These bees have a candy plug that the bees will remove themselves.

And finally, an incentive to leave a good review. Unfortunately when I tried that link it did not work so don’t add something with a link without checking it.

Charlotte

Calling a Beekepeer

This “call” has been taken care of but is an example of calls coming in. (Photo by Charlotte Ekker Wiggins)

This “call” has been taken care of but is an example of calls coming in. (Photo by Charlotte Ekker Wiggins)

Calling a Beekeeper

If you’re a beekeeper, not only is this a busy time of year with your bees but also with the rest of the world. Bees in trees, bees flying around back doors, bees getting into garages - people email and call for help to get flying insects off their property, because they or family members are allergic, and sometimes to “save the bees.”

Regardless of the reason for calling, if you have bees where you don’t want them:

  1. Don’t panic. Honey bees won’t hurt you unless they are being attacked. Route traffic around the area until you can identify what is happening.

  2. Determine if they are indeed bees. Take photos and videos you can easily share; beekeepers can’t help you with other possible pollinators like wasps.

  3. If you don’t know where to start, call your local Extension Office. They usually know who to call if this is an issue with bees.

  4. Your local exterminators also usually have beekeeping contacts. Many where i live refuse to kill a bee colony so try to first find a beekeeper.

  5. Find the closest bee club. State beekeeping associations usually have a list of local bee clubs. As of this spring, Missouri had 47 local bee clubs.

  6. If these are bees established in a house wall, you will need a contractor to work with the beekeeper to try to locate the bees and remove them. There will be a cost involved for sure with the contractor and possibly with the beekeeper.

  7. Finally, be patient. Most beekeepers are busy this time of year and help others out on their own time. If they can help they will but it can take time to find someone in the area who can help.

    Charlotte

Putting A Lid On It

The Clauss Hive Done is designed to keep the hive temperature even. (Photo by Charlotte Ekker Wiggins)

The Clauss Hive Done is designed to keep the hive temperature even. (Photo by Charlotte Ekker Wiggins)

Putting A Lid On It

Beekeepers love gadgets, even more than the chefs and cooks I know. They are either making them or inventing them, and the Clauss Hive Dome is one such new invention. Made out of plastic, the dome is designed to help keep hive temperature even. Bees only keep the cluster, or all of bees, warm in winter. The dome evenly distributes the heat so the colony has warmth on all frames, encouraging earlier raising of brood or baby bees according to the inventor Gordon Clauss.

A super goes over the Clauss Hive Dome to secure it. (Photo by Charlotte Ekker Wiggins)

A super goes over the Clauss Hive Dome to secure it. (Photo by Charlotte Ekker Wiggins)

Now I have not used the Clauss dome over winter nor do I know anyone else who has. Bees overwinter by clustering, or balling up in the center of the hive keeping only the ball of bees warm, not the entire hive.

Before I researched the use of the Clauss Hive Dome, I thought I could use this as a temporary lid so visitors could see the bees on the frames. To be able to easily take the dome off and on, I would need to add a wood frame around the edge to keep it held down.

One of our students also has the idea of putting a hole in the center to add ventilation and then keep the bees from flying up. That defeats part of the observation of a hive, watching the bees, and would not be good to leave exposed for long or it would heat up the hive. The bees keep the hive temperature regulated on their own.

Interesting new beekeeping gadget.

Charlotte

Checking Bees for Food

Checking my first colony February 27, 2021 to make sure they have enough food. (Photo by Charlotte Ekker Wiggins)

Checking my first colony February 27, 2021 to make sure they have enough food. (Photo by Charlotte Ekker Wiggins)

Checking Bees For Food

The day was cold and overcast but I still headed out to my apiary to check my colonies for food. Many honey bee colonies are lost at the end of winter when bees run out of honey. Even though I gave my colonies extra supplies last fall, I also add sugar cakes at the top of the hive in case they run out.

This is a colony that is now at the top of the hive almost out of supplemental food. They consumed the honey that was stored in the supers on their way up to the top of the hive.

This colony has consumed the extra sugar I gave them a month ago. (Photo by Charlotte Ekker Wiggins)

This colony has consumed the extra sugar I gave them a month ago. (Photo by Charlotte Ekker Wiggins)

It’s easy to think mild winters are good for bees but the opposite is true. Mild winters mean bees will be consuming more honey as they fly out of the hive so beekeepers have to keep track of honey stores and provide extra.

One way I make sure my colonies have enough food is to give them supplemental sugar cakes at the top of the hive. I make sugar cakes out of just sugar early winter; by this time of the year I add pollen supplements turning the sugar cakes yellow. The pollen provides food for the nurse bees to be able to provide new bees food as they eclose.

White sugar cakes need to be sprayed with water so bees can get to the sugar. (Photo by Charlotte Ekker Wiggins)

White sugar cakes need to be sprayed with water so bees can get to the sugar. (Photo by Charlotte Ekker Wiggins)

Whatever white sugar cakes remain this time of year also need to be sprayed with water to loosen up the sugar so bees can access it.

Another advantage of having sugar cakes is that if the hive has moisture, the sugar will absorb it. Cold temperatures don’t kill bees but moisture can.

So far, so good!

Charlotte

Hive Robbing Screens

This screened front porch helps protect resident bees from robbers. (Photo by Charlotte Ekker Wiggins)

This screened front porch helps protect resident bees from robbers. (Photo by Charlotte Ekker Wiggins)

Hive Robbing Screens

Honey bee colonies can have a hard time during the late summer dearth in USDA Hardiness zone 5. Without rain and temperatures over 86F, plants stop making nectar and pollen moving into survival mode. That means honey bees don’t have a food source and often start raiding hummingbird feeders and sometimes other bee colonies.

Since my hives are painted like homes, the homemade robbing screens give my hives the look of front porches but with an important purpose. Robbing screens allow the resident bees to go in and out and keep the unwelcome bees at bay.

The robbing screens keep non-resident bees out. (Photo by Charlotte Ekker Wiggins)

The robbing screens keep non-resident bees out. (Photo by Charlotte Ekker Wiggins)

When you look at robbing screens from the top you will see a space between the screen and the hive. Resident bees move in and out of the hive through that space, making their way up and down the front of the hive protected by the screen.

I put on robbing screens at night so the early morning foragers have time to get used to the new hive entrance.

Robbing screens sit about half an inch off the hive front so resident bees can move in and out. (Photo by Charlotte Ekker Wiggins)

Robbing screens sit about half an inch off the hive front so resident bees can move in and out. (Photo by Charlotte Ekker Wiggins)

To ensure a snug fit, robbing screens fit into the hive opening again leaving a space so resident bees can easily go in and out of the hive.

Robbing screens fit into the hive opening leaving a space for bees to move in. (Photo by Charlotte Ekker Wiggins)

Robbing screens fit into the hive opening leaving a space for bees to move in. (Photo by Charlotte Ekker Wiggins)

Robber bees tend to fly straight into the hive opening. With the robbing screen on, they may smell honey inside but can’t access it.

Robbing screens are relatively easy to make with scrap wood and some good measurements to allow for the bee space bees need to go in and out.

Charlotte

Swarm Catching Tips

Swarm is in the nuc, it’s right before a rain storm. (Photo by Charlotte Ekker Wiggins)

Swarm is in the nuc, it’s right before a rain storm. (Photo by Charlotte Ekker Wiggins)

Swarm Catching Tips

It’s swarm season in Missouri. In the past it has started around Mother’s Day but this year we’ve had swarm calls for about a month earlier.

Bees swarm when the colony runs out of room. The colony raises a new queen. Once she’s eclosed, the old queen leaves with a percentage of the colony to start a new colony.

For the past three swarms, I have watched people put swarms in cardboard boot boxes and nucleus boxes (photo) without frames or with just one frame.

This nucleus box has two frames of drawn comb to entice a swarm. (Photo by Charlotte Ekker Wiggins)

This nucleus box has two frames of drawn comb to entice a swarm. (Photo by Charlotte Ekker Wiggins)

That’s a good idea at first if you are cutting the swarm out of a tree but the best way to entice a swarm into your beekeeping equipment is to use a frame with drawn comb. Remember they are looking for a new home. Offering them frames of drawn comb means they can get started laying eggs and collecting nectar.

Or better yet, a frame with both open and closed brood (baby bees). Nurse bees travelling in the swarm will want to care for the brood and will want to stay with the frame you have included.

Also once the swarm is in the new home you have offered, add more frames so they have a structure to climb on.

I like to add at least 2 more frames of drawn comb and a frame of honey.

Here’s the swarm when it was settled in the boxwood. (Photo by Charlotte Ekker Wiggins)

Here’s the swarm when it was settled in the boxwood. (Photo by Charlotte Ekker Wiggins)

Bees in a swarm tend to be docile in the first couple of days of swarming. As they run out of stored honey, they can become hungry and aggressive.

Once in the nuc and settled in their new home, feed them 1:1 sugar water so they have easy to access food.

If they are settling in during a nectar flow, they will soon prefer to bring in flower nectar than consuming the provided sugar water.

Charlotte

Small Hive Beetle Lure

Small hive beetle lure fermenting in my refrigerator. (Photo by Charlotte Ekker Wiggins)

Small hive beetle lure fermenting in my refrigerator. (Photo by Charlotte Ekker Wiggins)

Small Hive Beetle Lure

My bee buddy David was the first to share this recipe for a homemade lure to keep small hive beetle numbers low inside bee hives. For years we called it “David’s Cocktail.”

You can buy lure or you can make your own. I tend to make my own since I have banana peels galore.

Small Hive Beetle (SHB) Trap Lure Recipe (also called David's Cocktail)


½ cup apple cider vinegar
¼ cup sugar
1 cup water
1 ripe banana peel cut up finely (or two cut up banana peels if using white vinegar)

Combine all ingredients and allow to ferment for about 2 weeks. 

Fill center of re-usable traps with lure. Fill side traps 1/3 full with mineral or vegetable oil.  Replace when full of small hive beetles or every few days. Also make sure the lids are securely down or bees will die in the traps.

With hotter weather, traps should be checked and refreshed more frequently. Clear top of traps of propolis.

During spring-fall, place small hive beetle traps in opposing super corners and rotate the placement as you add supers.

For winter, place small hive beetle traps in the center of the hive where the bees will cluster.

Using small hive beetle traps is not a replacement for checking frames for small hive beetle larvae or for beekeepers themselves killing small hive beetles in hives.

Small hive beetles can take over a stressed strong colony in just a few days so carefully monitor your hives for these destructive, invasive species from sub-Sahara Africa.

Charlotte

Russian Scion Swarm Catcher

I have one of the Russian swarm catchers on a nearby tree. (Photo by Charlotte Ekker Wiggins)

I have one of the Russian swarm catchers on a nearby tree. (Photo by Charlotte Ekker Wiggins)

Russian Scion Swarm Catcher

Some beekeepers love to make, and try, new, and sometimes old things. Luckily I have two beekeeping friends who regularly are up to trying something, this time a “Russian scion” swarm catcher.

Now there are a couple of special things about this old gadget:

First, my bee buddy David, well known for not doing much if any woodwork, made one for me. Actually he made me two, one for each of my apiaries.

Secondly, I am past the period in my life where I want to climb trees, even if it is after a swarm of honeybees.

My northern apiary primarily faces down hill. (Photo by Charlotte Ekker Wiggins)

My northern apiary primarily faces down hill. (Photo by Charlotte Ekker Wiggins)

Basic Russian Apiary Tool

From what I read about the Russian scion, it is a basic tool in Russian apiaries. The device is designed to catch swarms in midflight, effectively interrupting their settling high into trees. Most swarms move in small increments to keeping scions close to hives is probably a good idea.

In illustrations I found online, Russians hang the scions from tall poles.

I placed mine on the side of a tree downwind from my apiaries, hoping the scion will attract any swarms that my colonies may generate.

Two pieces of wood form the foundation of the Russian scion. (Photo by Charlotte Ekker Wiggins)

Two pieces of wood form the foundation of the Russian scion. (Photo by Charlotte Ekker Wiggins)

How to Make a Russian Scion

According to David, Russian scions are easy to make. He made the ones he gave me from wood remnants.

The center round pole is covered in melted wax. David said it should also be lightly covered with lemongrass, which I have yet to do.

According to a reader, lemongrass smells similar to the nasonov pheromone, which bees share to guide other bees to an area. Lemongrass is also used asa a swarm lure in swarm traps and bait hives.

The center round piece is covered in melted wax and lemongrass. (Photo by Charlotte Ekker Wiggins)

The center round piece is covered in melted wax and lemongrass. (Photo by Charlotte Ekker Wiggins)

Of all of the swarm “traps” and ways to try to entice swarms, this is definitely the easiest one to make. Especially since someone else made them for me!

Charlotte

Candy Plug

The white candy plug replaces the cork in the queen bee cage. (Photo by Charlotte Ekker Wiggins)

The white candy plug replaces the cork in the queen bee cage. (Photo by Charlotte Ekker Wiggins)

Queen Bee Box Candy Plug

The tiny boxes queen honey bees are shipped in are not all the same. It’s why we advise our beekeeping students to check the boxes to make sure the queen bee and her entourage have food to nourish them before they are released into their new home.

Some suppliers include both a candy plug or some sort on one side of the box. That candy plug is what feeds the queen bee and her attending worker bees while they live inside the box. Some “plugs’ are made out of sugar cane sugar and has to be kept moist with a daily application of a drop of water so bees can eat the sugar.

Another way to make the candy plug is to use miniature marshmallows.

I prefer making my own out of confectioner’s sugar and honey.

The trick is to thoroughly mix confectioner’s sugar into the honey. (Photo by Charlotte Ekker Wiggins)

The trick is to thoroughly mix confectioner’s sugar into the honey. (Photo by Charlotte Ekker Wiggins)

To make this candy plug, start with a few drops of honey that you start mixing with confectioner’s sugar.

Don’t mix it in the palm of your hand; the heat from the friction will warm up the honey and make it runny. A cold surface is better.

Keep working sugar and honey mixture until it’s very dense. (Photo by Charlotte Ekker Wiggins)

Keep working sugar and honey mixture until it’s very dense. (Photo by Charlotte Ekker Wiggins)

Keep folding the confectioner’s sugar into the honey until it is the consistency of a bread dough.

Don’t get discouraged, it will take time and patience but you will get there.

Once the candy plug is ready, you can store in a container in the refrigerator if you don’t need to immediately use it.

Charlotte