Queen Bee Marking Pens

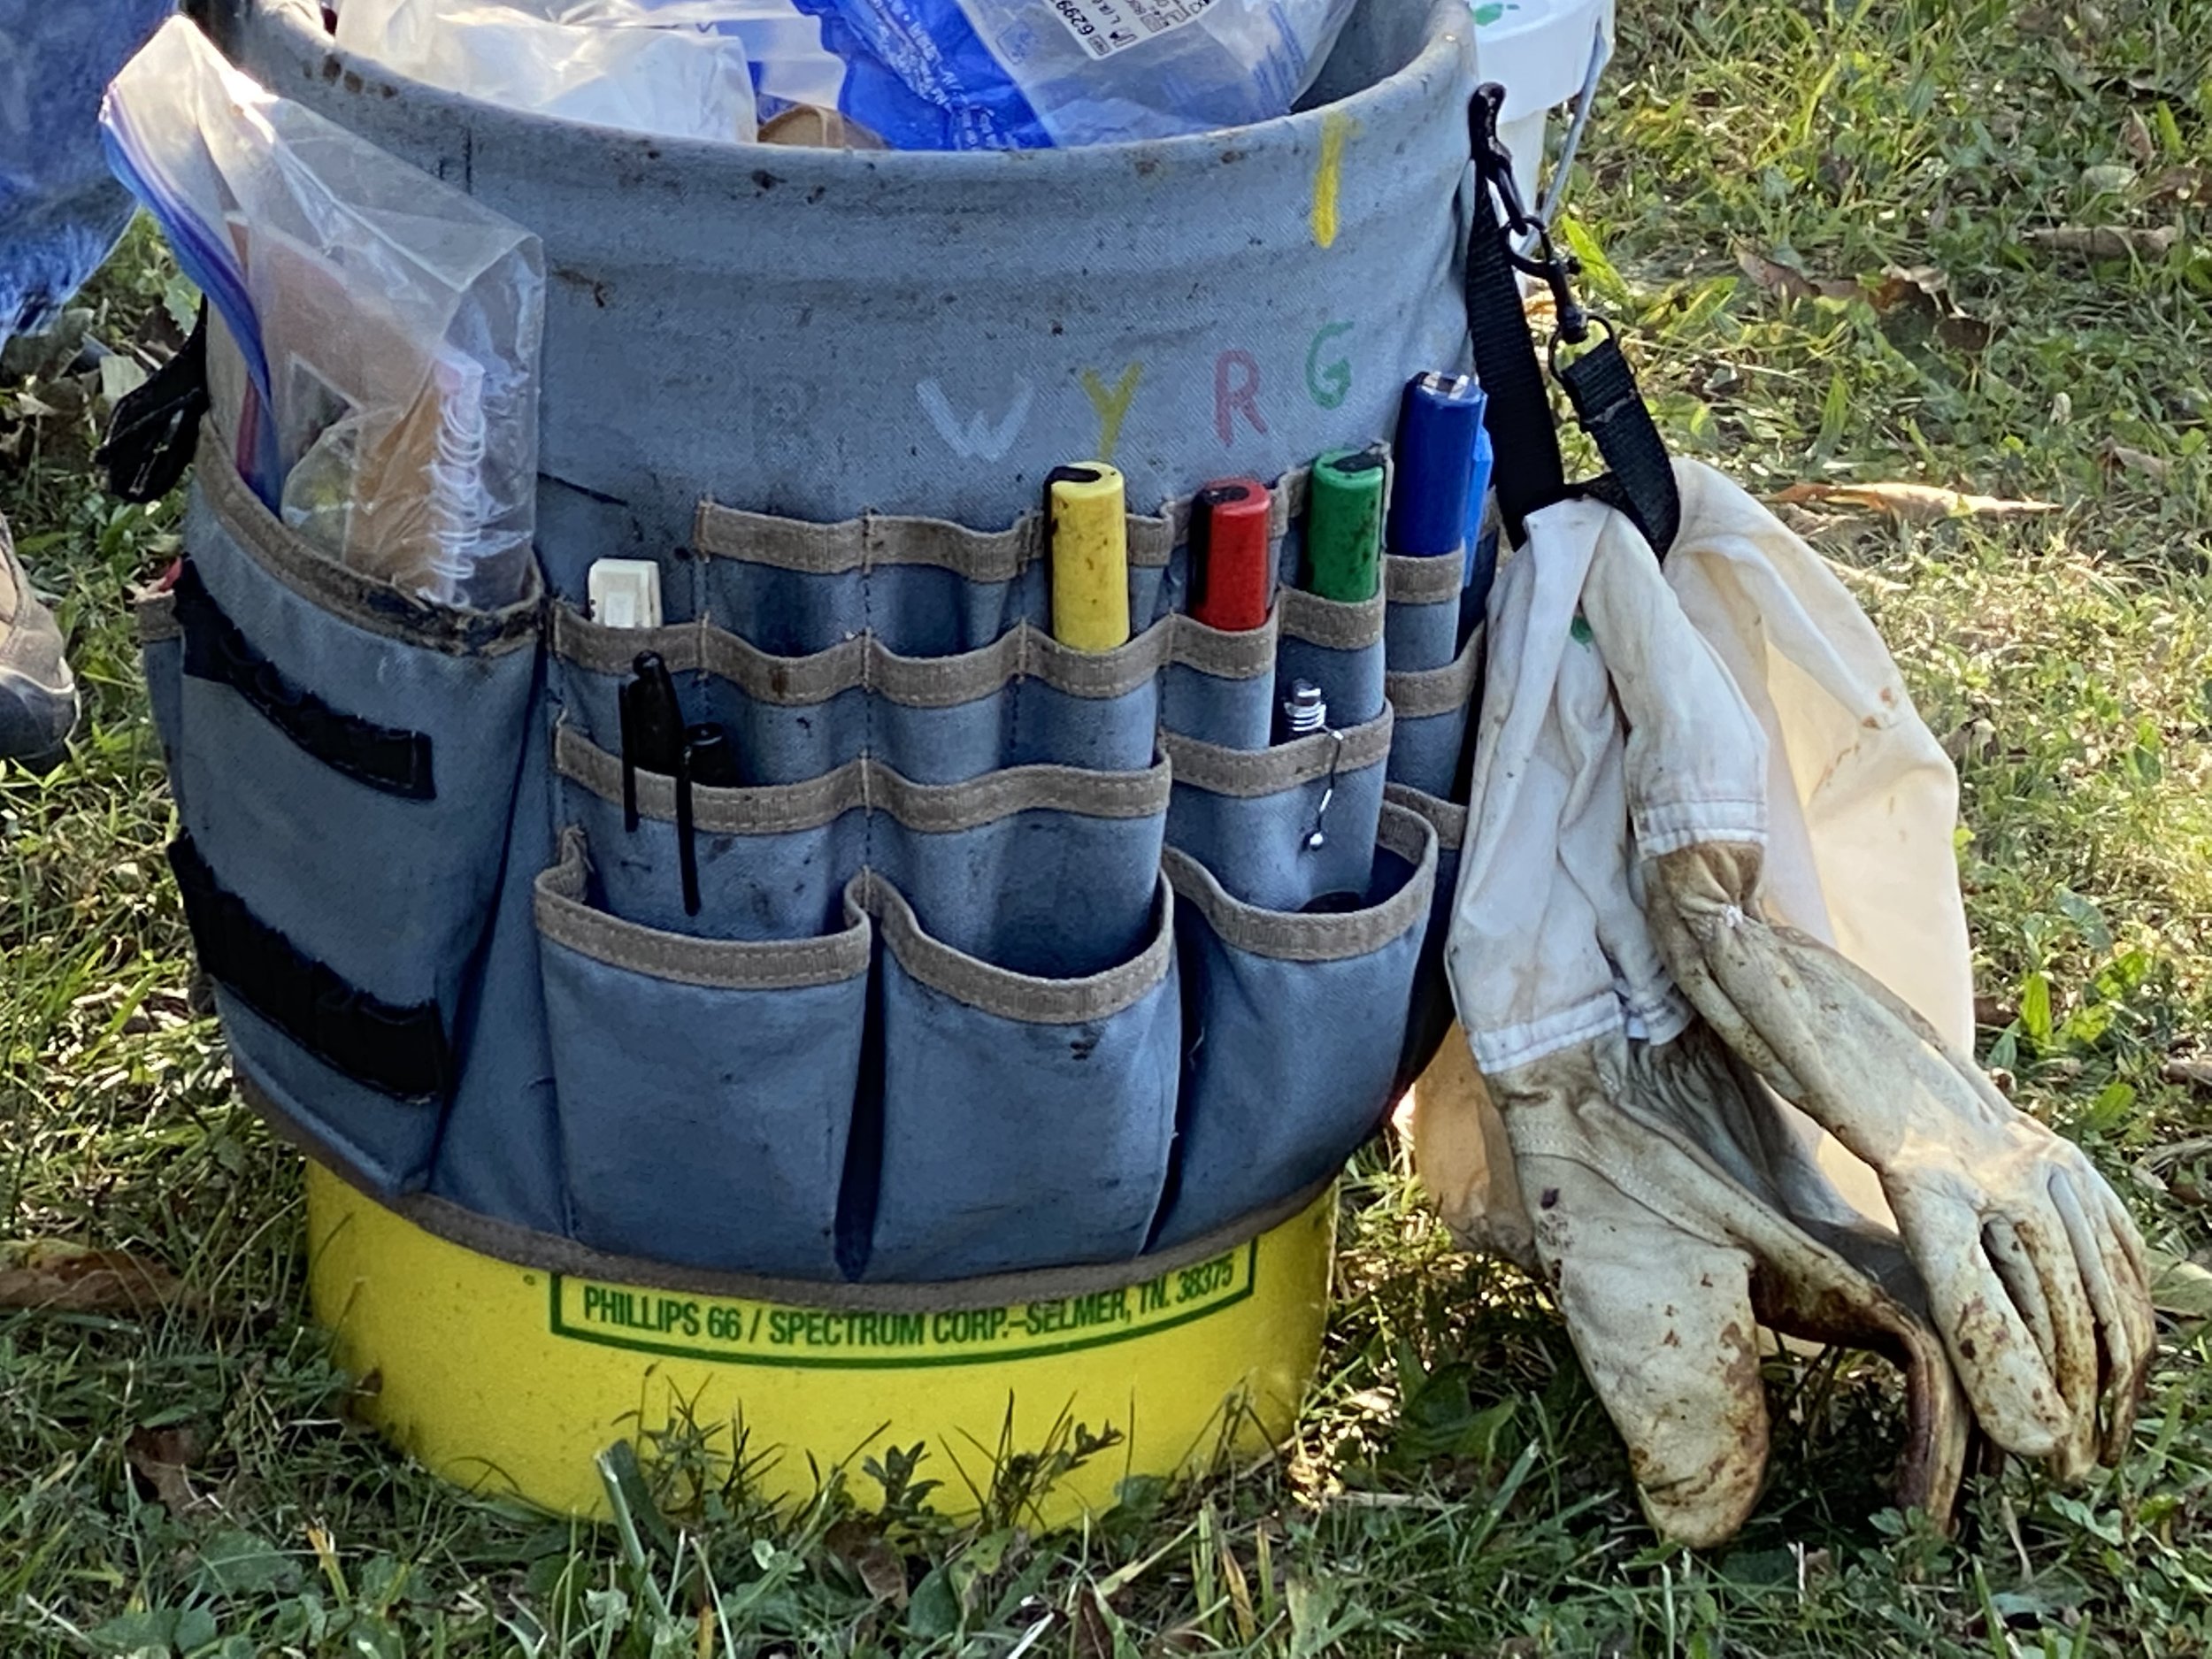
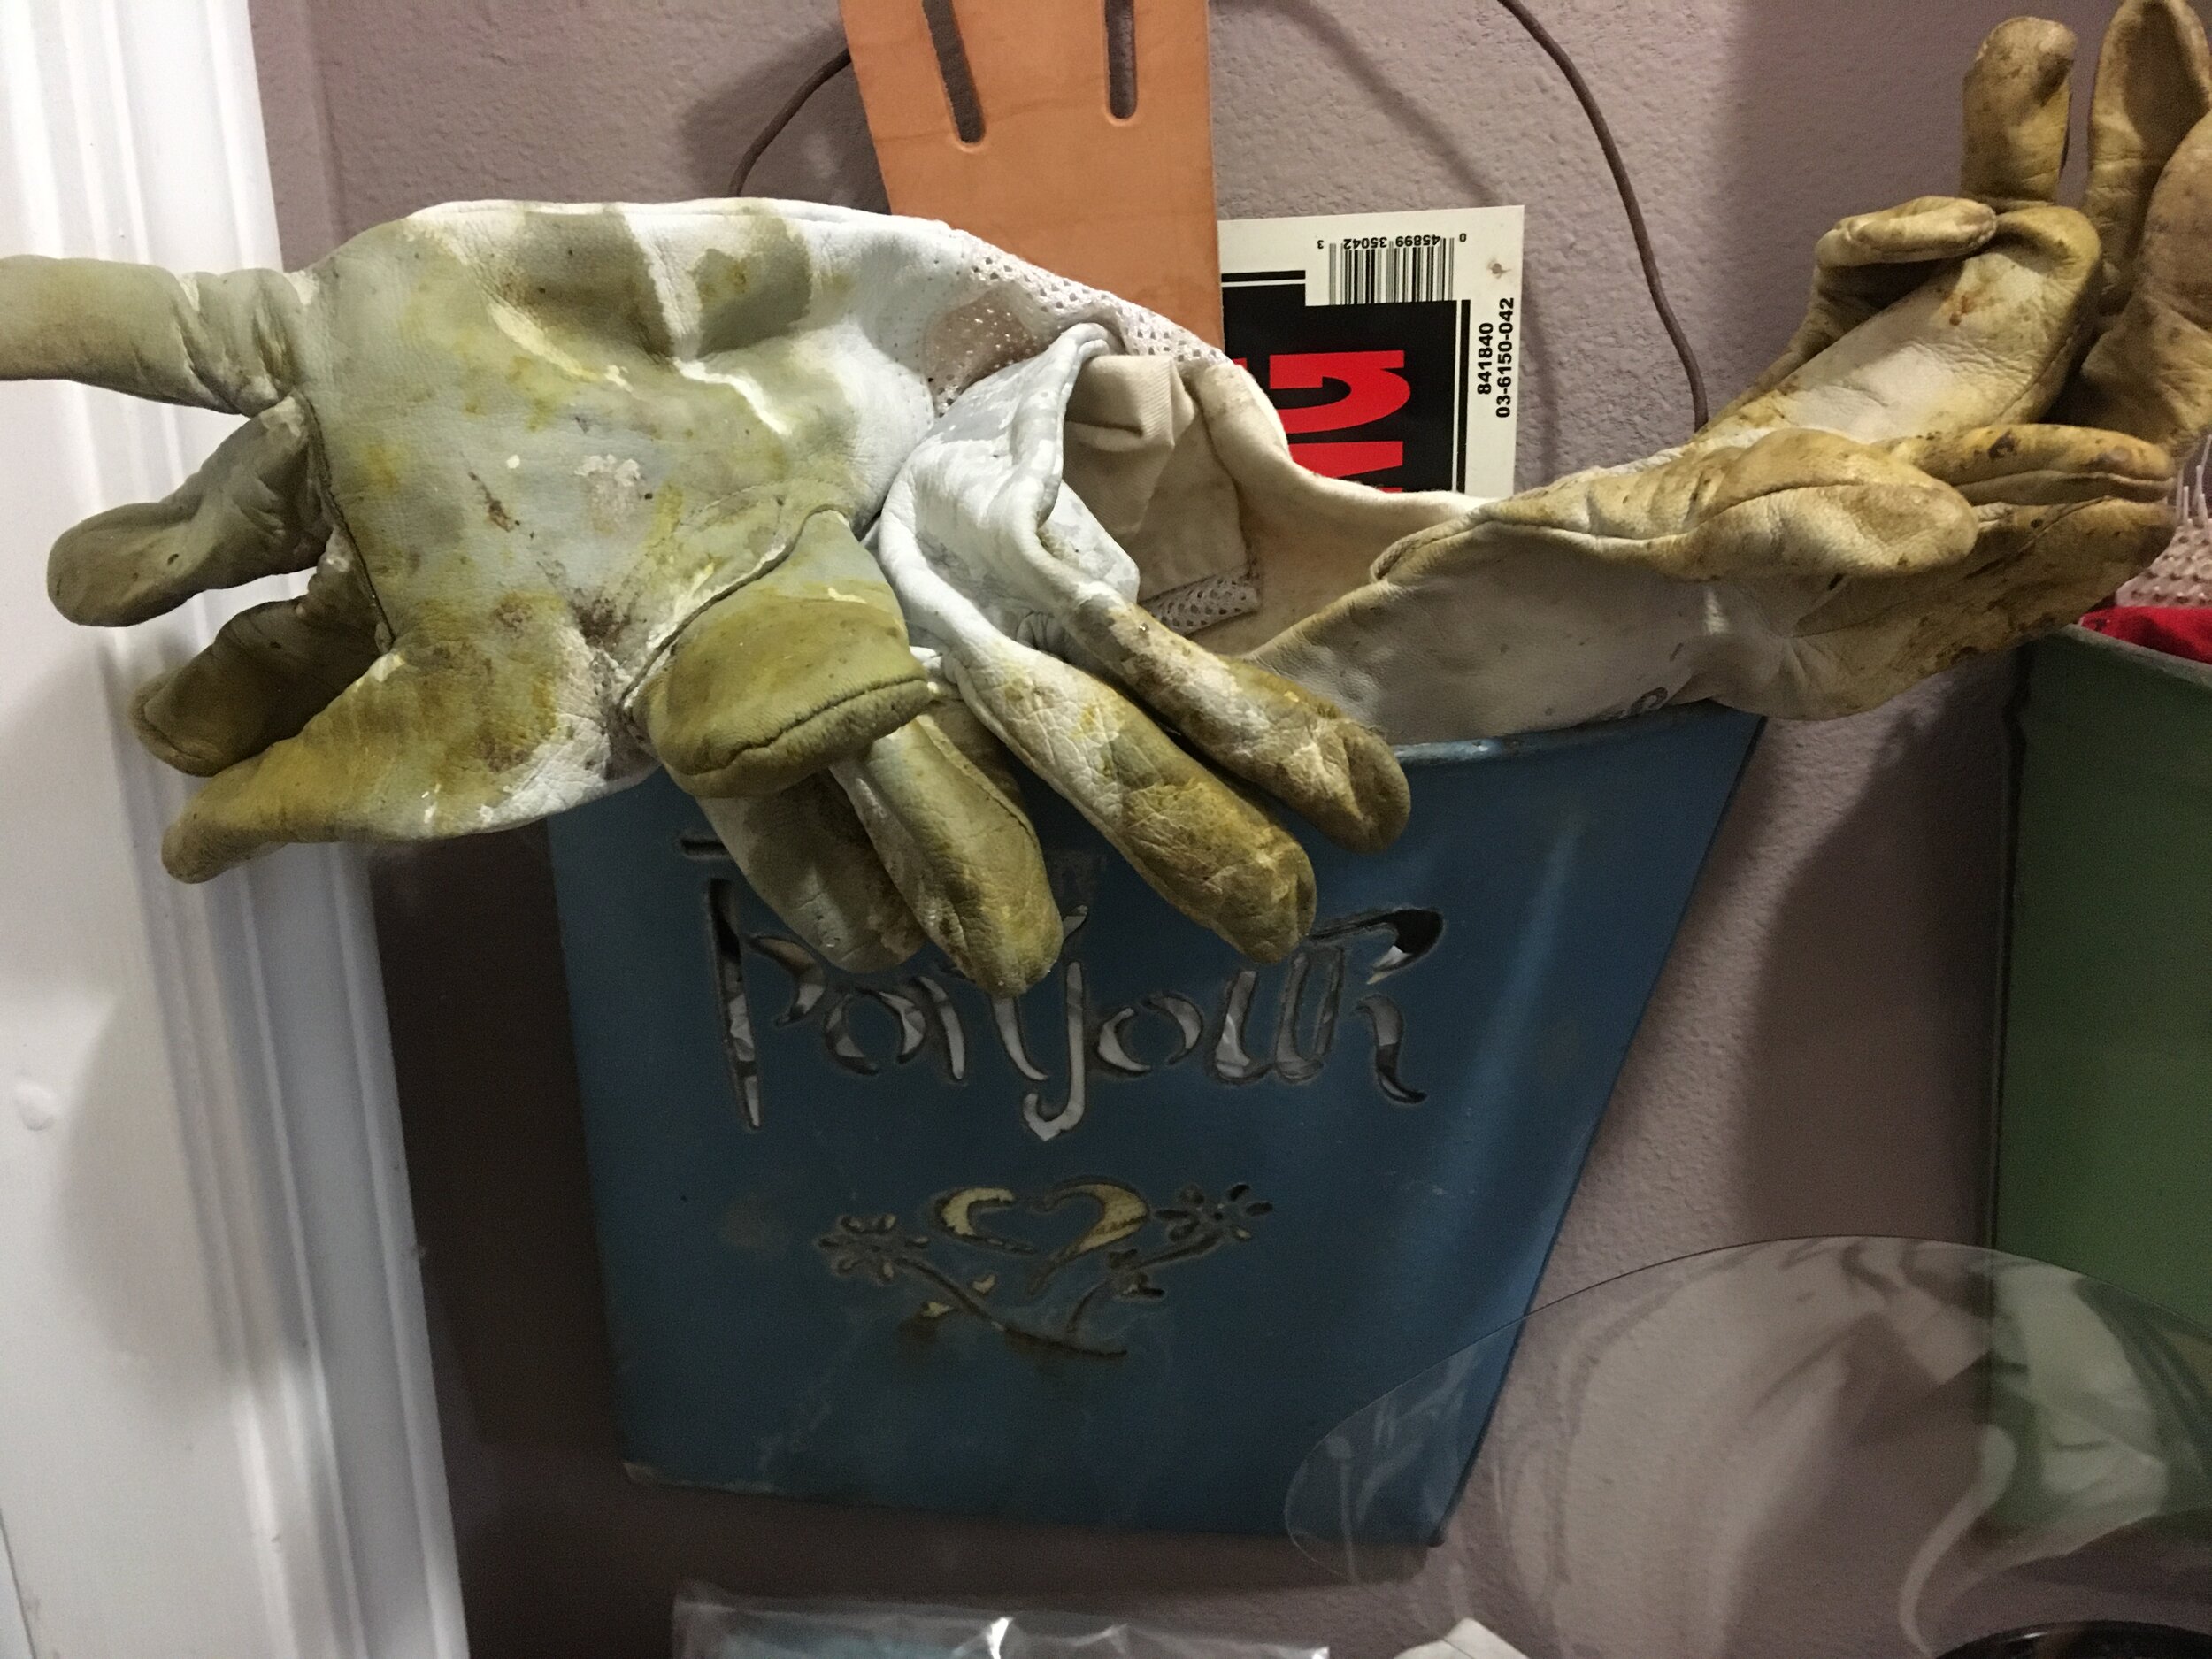
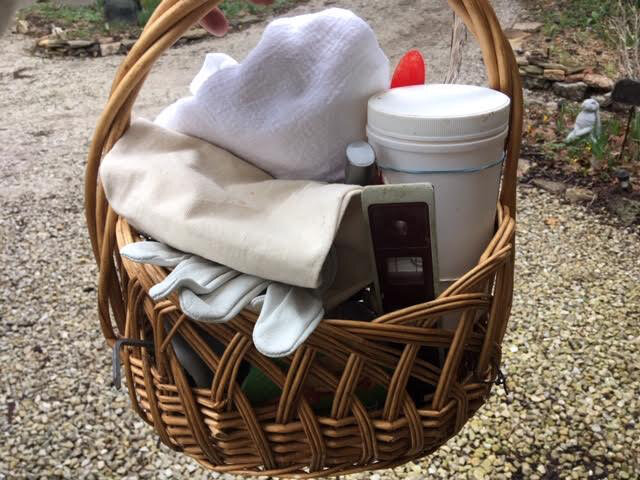
Organizing queen bee marking pens in a gardening apron. (Photo by Charlotte Ekker Wiggins)

Queen Bee Color Pens

There are few things most beekeepers like more than finding new ways to do something. I certainly fall in that category so it was with great interest that I spotted this gardening apron turned into a queen bee color marking guide.

Queen bees are marked with a special color to indicate the age of the queen. There is an international queen bee marking code based on 5 colors and the last number of the year:

White: year ending in 1 or 6

Yellow: year ending in 2 or 7

Blue: year ending in 5 or 0

Green: year ending in 4 or 9

Red: year ending in 3 or 8

This system helps the beekeeper know the queen’s age while making it easier to spot her in a crowd of moving bees.

Now if all of your queen bees are the same age, you only need one marking pen. They’re special pens, by the way, not a marker you buy at your local big box store. And if you have different-aged queen bees, then you need different colored pens.

This is where the gardening apron comes in. This particular beekeeper has set up a system on the gardening apron to keep track of his marking pens. Sounds simple enough but once you’re out in your apiary handling bees and need to grab a marking pen - this marked gardening apron will make the pens very convenient and easy to find.

Charlotte

Wear a Veil

My removable veil I use on a pith-helmet like hat to prevent stings. (Photo by Charlotte Ekker Wiggins)

My removable veil I use on a pith-helmet like hat to prevent stings. (Photo by Charlotte Ekker Wiggins)

Wear a Veil

Some of the pictures are a bit disturbing, images of beekeepers with swollen faces because they were stung. There’s an attitude among some beekeepers that they should be able to work bees without protective equipment. Some of it is bravado; most of it is ignorance and the combination of the two is a dangerous option.

A recent popular online video of a young woman in perfect makeup without a suit has literally gone viral although her claims of being an experienced beekeeper has understandably been questioned. Her appeal, in my opinion, is that she’s attractive and making beekeeping look benign. People already are fascinated by the idea of beekeeping; she and her husband has just make it look good.

Here’s the bottom line. If you are going to work bees, wear head protection. It can be as simple as mosquito netting over a baseball hat or the easier to maneuver pith helmet shaped hat draped with netting.

You are working with arthropods that sting when threatened. Why wouldn’t you take precautions just in case you hit a cranky one?

I’ve been keeping bees for 11 years. There are days when I know I can work my bees without gloves but I always have something on my head - a veil works well for those quick hive visits, a bee jacket is better if I have to spend any time with the colony.

If the weather is good, it’s a wonderful days with my bees but I don’t risk having a sting where I don’t want one.

It’s such an easy step to take. Please be a responsible beekeeper.

Charlotte

Lifting Hives

This motorized hive lifter can be operated by one person. (Photo by Charlotte Ekker Wiggins)

This motorized hive lifter can be operated by one person. (Photo by Charlotte Ekker Wiggins)

Lifting Hives

If you spend any time around beekeepers, the topic of backs - and more specifically bad backs - will come up. At the end of a growing season, beekeepers have a lot of weight to lift thanks to hopefully busy bees storing and dehydrating nectar into honey. One typical medium frame of capped honey can weigh between 3-5 pounds.

The weight, and wear on backs, is partially responsible for beekeepers moving from 10-frame hives to 8-frame ones. That small transition can lighten a hive box by 10 pounds each per box.

There are a couple of available hive lifting tools that contribute to adaptive beekeeping. One is a manual one requiring two beekeepers to pick up a handle on each side of a hive. I have one of those; it is constantly being borrowed by my beekeeping friends but requires a second set of hands to use.

I recently saw another, more expensive bee hive lifter at Central Missouri State University’s open apiary in support of Heroes to Hives Missouri, the first state chapter of this military veteran beekeeping program. This one is motorized and surprisingly lightweight. The “Bee Hive Lifter” can be operated by one person, making it a more practical tool in an apiary. The manual version costs about $1,000; the motorized version $1,500.

Probably not a practical tool for the hobby beekeeper but anyone going into business and moving a lot of hives may want to add this to their equipment list. Beehivelifter.com, made in USA.

Charlotte

Checking Bees for Food

Checking my first colony February 27, 2021 to make sure they have enough food. (Photo by Charlotte Ekker Wiggins)

Checking my first colony February 27, 2021 to make sure they have enough food. (Photo by Charlotte Ekker Wiggins)

Checking Bees For Food

The day was cold and overcast but I still headed out to my apiary to check my colonies for food. Many honey bee colonies are lost at the end of winter when bees run out of honey. Even though I gave my colonies extra supplies last fall, I also add sugar cakes at the top of the hive in case they run out.

This is a colony that is now at the top of the hive almost out of supplemental food. They consumed the honey that was stored in the supers on their way up to the top of the hive.

This colony has consumed the extra sugar I gave them a month ago. (Photo by Charlotte Ekker Wiggins)

This colony has consumed the extra sugar I gave them a month ago. (Photo by Charlotte Ekker Wiggins)

It’s easy to think mild winters are good for bees but the opposite is true. Mild winters mean bees will be consuming more honey as they fly out of the hive so beekeepers have to keep track of honey stores and provide extra.

One way I make sure my colonies have enough food is to give them supplemental sugar cakes at the top of the hive. I make sugar cakes out of just sugar early winter; by this time of the year I add pollen supplements turning the sugar cakes yellow. The pollen provides food for the nurse bees to be able to provide new bees food as they eclose.

White sugar cakes need to be sprayed with water so bees can get to the sugar. (Photo by Charlotte Ekker Wiggins)

White sugar cakes need to be sprayed with water so bees can get to the sugar. (Photo by Charlotte Ekker Wiggins)

Whatever white sugar cakes remain this time of year also need to be sprayed with water to loosen up the sugar so bees can access it.

Another advantage of having sugar cakes is that if the hive has moisture, the sugar will absorb it. Cold temperatures don’t kill bees but moisture can.

So far, so good!

Charlotte

Screened Inner Cover

Screened inner covers, left, help ventilate a hive and keep bees from flying up. (Photo by Charlotte Ekker Wiggins)

Screened inner covers, left, help ventilate a hive and keep bees from flying up. (Photo by Charlotte Ekker Wiggins)

Screened Inner Cover

It’s the middle of winter, bitter cold outside, and a number of beekeepers I know are getting cabin fever. Perfect time to introduce something we can all make at home for our bee hives, screened inner covers.

Most hives have solid inner covers that fit under the hive lid. They usually have an opening in the middle that helps with ventilation and bee traffic.

In summer, though, homemade screened inner covers are handy to have. They not only improve hive ventilation but keep bees from flying up so a beekeeper can take a peek under the lid without fear of getting stung. It’s great to have bees in the garden but bees in a hive can get defensive of their home.

Screened inner covers are easy to make. Using the solid inner cover as a guide, make a wooden frame the same size as the solid inner cover. If you have any woodworking skills, you can cut the corners at an angle. I don’t so I make mine the simplest way I know how, gluing the pieces like a picture frame.

A wood frame is simple to make using a solid inner cover as a guide. (Photo by Charlotte Ekker Wiggins)

A wood frame is simple to make using a solid inner cover as a guide. (Photo by Charlotte Ekker Wiggins)

The biggest challenge may be in locating No. 8 hardware cloth, a gauge of wire mesh that keeps all bees from getting out.

Once you locate the hardware cloth, cut the wire mesh to the size of the wooden frame and attach with staples.

Number 8 hardware cloth attached to the frame with staples. (Photo by Charlotte Ekker Wiggins)

Number 8 hardware cloth attached to the frame with staples. (Photo by Charlotte Ekker Wiggins)

Then add a two-bee wide notch in the center of one of the sides so bees have an entrance at the top of the hive through the screen.

Add a little exit in the middle of one side of the screened inner cover. (Photo by Charlotte Ekker Wiggins)

Add a little exit in the middle of one side of the screened inner cover. (Photo by Charlotte Ekker Wiggins)

I paint only the top side to preserve the wood.

Once you make some of these, you will wonder how you ever made it without them!

Charlotte

Glove Storage

Repurpose plastic jars to store beekeeping gloves when not in use. (Photo by Charlotte Ekker Wiggins)

Repurpose plastic jars to store beekeeping gloves when not in use. (Photo by Charlotte Ekker Wiggins)

Glove Storage

Besides, hive tools, often the most “lost” piece of beekeeping equipment are gloves. That’s because once beekeepers have enough experience to read their bees, they can work in their hives without gloves. Tucking gloves in pockets or buckets raises the chances a glove, or two, will get left behind.

Over winter, the problem is a different one. Beekeeping gloves will easily collect wax, pollen, honey and become a favorite snack for small animals such as pack rats and mice.

Beekeeping gloves get dirty quickly and can attract animals chewing on fingers. (Photo by Charlotte Ekker Wiggins)

Beekeeping gloves get dirty quickly and can attract animals chewing on fingers. (Photo by Charlotte Ekker Wiggins)

To keep your beekeeping gloves out of harm’s way, store your gloves in recycled plastic containers. I use clear nut jars so that I can easily spot where I have the gloves stored.

These containers also work well for temporary storage of wax and seeds.

Wash them out and allow to dry thoroughly before using.

This is a nut container that works well to store my beekeeping gloves. (Photo by Charlotte Ekker Wiggins)

This is a nut container that works well to store my beekeeping gloves. (Photo by Charlotte Ekker Wiggins)

During summer, when there are more chances of not seeing a dropped glove because of the greenery, and watching bees on flowers, I keep my beekeeping gloves handy next to my inside door out into the garage, where I hang my bee suit.

The beekeeping gloves sit in a metal hanging pocket with the magnet holder my bee buddy David gave me. The magnet is to help me keep track of my hive tools. Well, it’s a good idea in concept.

I also have these charming metal wall pockets to store gloves inside. (Photo by Charlotte Ekker Wiggins)

I also have these charming metal wall pockets to store gloves inside. (Photo by Charlotte Ekker Wiggins)

You can also find buckets and other decorative containers you can hang by a door to hold your beekeeping gloves.

I find that having a specific place for the gloves has decreased the times when I can’t find them when I need them!

Charlotte

Finding Bee Eggs

A small pen light helps to locate bee eggs on a frame of drawn comb. (Photo by Charlotte Ekker Wiggins)

A small pen light helps to locate bee eggs on a frame of drawn comb. (Photo by Charlotte Ekker Wiggins)

Finding Bee Eggs

There is beekeeping equipment and then there is beekeeping equipment. Some of it is offered through beekeeping supply companies. The rest are either homemade or cobbled from other uses like this small portable flashlight.

When I hear from beekeepers, one of the most frustrating aspects of beekeeping is trying to literally see very young eggs. There are several reasons to be able to do so:

It’s confirmation the queen is laying.

It’s the right size for notching to encourage worker bees to raise bees.

It’s fun to look for them.

Young eyes have better luck seeing the eggs than older ones.

Short of eye surgery, one option is to use a small penlight flashlight. The focused beam of light helps to reflect the white milky royal jelly found in the bottom of drawn wax frames where a queen lays eggs. Especially when starting a new colony, seeing evidence of egg-laying is confirmation that the colony is up and running.

The flashlight is also helpful to check bottom board corners for small hive beetle larvae.

I now have two flashlights, one for my beekeeping basket and the other for my short trips outside at night.

Charlotte

Russian Scion Swarm Catcher

I have one of the Russian swarm catchers on a nearby tree. (Photo by Charlotte Ekker Wiggins)

I have one of the Russian swarm catchers on a nearby tree. (Photo by Charlotte Ekker Wiggins)

Russian Scion Swarm Catcher

Some beekeepers love to make, and try, new, and sometimes old things. Luckily I have two beekeeping friends who regularly are up to trying something, this time a “Russian scion” swarm catcher.

Now there are a couple of special things about this old gadget:

First, my bee buddy David, well known for not doing much if any woodwork, made one for me. Actually he made me two, one for each of my apiaries.

Secondly, I am past the period in my life where I want to climb trees, even if it is after a swarm of honeybees.

My northern apiary primarily faces down hill. (Photo by Charlotte Ekker Wiggins)

My northern apiary primarily faces down hill. (Photo by Charlotte Ekker Wiggins)

Basic Russian Apiary Tool

From what I read about the Russian scion, it is a basic tool in Russian apiaries. The device is designed to catch swarms in midflight, effectively interrupting their settling high into trees. Most swarms move in small increments to keeping scions close to hives is probably a good idea.

In illustrations I found online, Russians hang the scions from tall poles.

I placed mine on the side of a tree downwind from my apiaries, hoping the scion will attract any swarms that my colonies may generate.

Two pieces of wood form the foundation of the Russian scion. (Photo by Charlotte Ekker Wiggins)

Two pieces of wood form the foundation of the Russian scion. (Photo by Charlotte Ekker Wiggins)

How to Make a Russian Scion

According to David, Russian scions are easy to make. He made the ones he gave me from wood remnants.

The center round pole is covered in melted wax. David said it should also be lightly covered with lemongrass, which I have yet to do.

According to a reader, lemongrass smells similar to the nasonov pheromone, which bees share to guide other bees to an area. Lemongrass is also used asa a swarm lure in swarm traps and bait hives.

The center round piece is covered in melted wax and lemongrass. (Photo by Charlotte Ekker Wiggins)

The center round piece is covered in melted wax and lemongrass. (Photo by Charlotte Ekker Wiggins)

Of all of the swarm “traps” and ways to try to entice swarms, this is definitely the easiest one to make. Especially since someone else made them for me!

Charlotte

Hive Tool Identification

Pick a color to be able to quickly identify your hive tools. (Photo by Charlotte Ekker Wiggins)

Pick a color to be able to quickly identify your hive tools. (Photo by Charlotte Ekker Wiggins)

Hive Tool Identification

If you’re a beekeeper you are worse about loosing your hive tools than you are your garden trowel. Beekeeping hive tools are more slim and easier to slip out of a pocket. Hive tools, however, also disappear courtesy of other beekeepers who pick one up thinking it is their hive tool.

One easy way to keep hive tools separate is to paint yours. Mine are painted marine blue for Bluebird Gardens.

The process is easy. Once you decide on the color, get all hive tools ready for the paint.

Let air dry to make sure the paint sticks. (Photo by Charlotte Ekker Wiggins)

Let air dry to make sure the paint sticks. (Photo by Charlotte Ekker Wiggins)

The hardest part of this was figuring out how to allow them to dry. I ended up painting one end, letting that end dry and then spray painting the other end.

It’s a small step but one that will help ensure you don’t keep losing your tools to other beekeepers!

Charlotte

Safely Move Hives

It takes two people to easily move hives with a hive lifter. (Photo by Charlotte Ekker Wiggins)

It takes two people to easily move hives with a hive lifter. (Photo by Charlotte Ekker Wiggins)

Safely Moving Hives

Spring is here and some beekeepers will be looking for new sites for their hives, either because it’s too shady or there are not enough flowering resources to feed their bees. Or maybe they want their colonies closer to the house so they can watch them every day.

Regardless of the reason, one of the best tools I have in my beekeeping inventory is the hive lifter.

Now I put off adding this to my inventory at first. I was transitioning from 10 frames to 8 frame hives so thought that would be enough to lighten the load when I needed to move a colony.

Once I had it in hand I wondered what had taken me so long. The hive lifter makes moving hives much easier on the back and, although it requires two people to use, makes the transportation easy. Helps if you tie the hive closed so the boxes don’t move in transit.

Most beekeeping suppliers offer a form of hive lifter. Since it’s a hit and miss use item, get one and split the cost among several beekeepers.

It’s a great little tool that will save backs for many years to come!

Charlotte

Clam Shell Flipping

Flipping clam shells so the sugar cake bottoms dry out. (Photo by Charlotte Ekker Wiggins)

Flipping clam shells so the sugar cake bottoms dry out. (Photo by Charlotte Ekker Wiggins)

Clam Shell Flipping

It sounds like an athletic sport of sorts, doesn’t it. Actually, I found an easier way to dry my winter supplemental sugar cakes for my honey bees without making a mess out of my kitchen.

Up until now, I was repurposing those clear fruit clam shells to make the supplemental sugar cakes. To be able to use them in a hive, they need to dry out first. The clam shells make it convenient for sizing the sugar cakes as well as storing them in a cold oven until they dry.

However.

The bottom of the sugar cakes need to dry out as well. That’s where the mess came in.

Have you tried to turn a wet pail of sand? So you know what happens when you try to turn a half dry rectangle of sugar.

As I was starting to pop the sugar blocks out of the clam shells to try to turn them, the clam shell fell over on its own, turning the sugar cake on its head.

Gingerly trying this out with the rest of the clam shells, I discovered I could easily turn the clam shells over, still full of the sugar cakes, leaving the sugar cake bottoms exposed to air to dry. Without taking them out of the clam shells.

No messy kitchen. Back in the cold oven they went on cookie sheets to complete the drying out process.

The sugar is not dripping out of the clam shells and I don’t have sugar at the bottom of my oven.

I think that makes this tip a 10, don’t you?

Charlotte

Smoker Stand

How to repurpose cut down trees to make smoker stands, especially beekeeping on a hillside. (Photo by Charlotte Ekker Wiggins)

How to repurpose cut down trees to make smoker stands, especially beekeeping on a hillside. (Photo by Charlotte Ekker Wiggins)

Smoker Stand

You’re probably thinking what’s the big deal about having a little stand for a smoker. Well, if you are keeping bees on a limestone hillside, it’s a problem.

No fun chasing a smoking smoker down a limestone hillside. (Photo by Charlotte Ekker Wiggins)

No fun chasing a smoking smoker down a limestone hillside. (Photo by Charlotte Ekker Wiggins)

Without a lot of level areas, a smoker placed on the ground has a higher chance of rolling down hill, setting everything it touches on fire. Not a good look in general but even worse when everything is so dry a spark could send the hillside up in smoke.

Keeping with my history of repurposing what is in my garden, or what I can easily add to my garden - I am taking some of the short tree stumps around and making them into smoker stands.

They were actually just stands to begin with. I don’t want to use chemicals to speed up the stump decomposition so I repurpose them. The taller ones have birdhouses on top; medium sized ones form garden decor stands and the legs for bird baths. It just so happened this one was near a hive and I stopped myself from dropping the smoker when I stuck the smoker on the level top.

I have made use of them twice now and they work quite well. Besides keeping the smoker level, I can also easily find it as I move to the next hive.

My smoker stand in use and the smoker not rolling down the hill. (Photo by Charlotte Ekker Wiggins)

My smoker stand in use and the smoker not rolling down the hill. (Photo by Charlotte Ekker Wiggins)

I am particular about the thin cedar pieces that form the top. At first I couldn’t describe what I was looking for, it was more of a I will know it when I see it.

When I spotted these cut down cedar pieces, I knew they were perfect. They look nice even with nothing on them.

I confess, I pick wood pieces that look like flowers for my stands. (Photo by Charlotte Ekker Wiggins)

I confess, I pick wood pieces that look like flowers for my stands. (Photo by Charlotte Ekker Wiggins)

I am moving some iris to surround this one. The iris will look nice nearby and, once they bloom, the pointed leaves will make it look like a giant flower in the center of the iris bed.

Apparently some of the other garden residents find them handy as well. I periodically find lizards sunning on them. Birds have stopped while carrying worms. This morning, it appears it was set for breakfast.

My smoker stands come in handy for more than holding hot smokers. (Photo by Charlotte Ekker Wiggins)

My smoker stands come in handy for more than holding hot smokers. (Photo by Charlotte Ekker Wiggins)

I recently saw a cut down stump reshaped into a chair. I may try that on the next stump that gets made in my garden but in the meantime, I like my little smoker stands.

Charlotte

Beekeeping Basket

This repurposed basket makes a nice container for my basic hive inspection tools. (Photo by Charlotte Ekker Wiggins)

This repurposed basket makes a nice container for my basic hive inspection tools. (Photo by Charlotte Ekker Wiggins)

Beekeeping Basket

There are a number of options on the market for carrying beekeeper’s inspection tools around the apiary. Some use 5-gallon paint buckets, others buy gardening buckets.

My personal choice are repurposed baskets. They are lightweight compared to buckets and, when I find the right size, nicely hold my basic hive inspection tools.

I keep one packed and ready to use at all times. And yes, it includes a small portable level. I keep on a Missouri limestone hillside so I tend to check that my bee hives are not slipping down hill.

What else is in my basket?

Depending on the time of year, I carry some pollen substitute, that’s the large white container on the right. I prefer muslin kitchen towels to keep my bees calm during inspections so I toss a half a dozen of those in as I head out to the apiary.

If weather conditions are good, i don’t use gloves but I keep them close, just in case. There’s also a hive tool, small container of talcum powder to mask any stings, bungee cords, tacks in case I have to mark a frame and small plastic pots in case I find a plant I want to dig up and move. Don’t tell anyone but hive tools are handy to dig up plants!

Find repurposed baskets at thrift stores and yard sales. Antique malls may have some options as well but you will pay more for the older ones. Check how strong they are, you want something that is sturdy and will hold your hive inspection items. This would also make a nice birthday and holiday gift.

Oh. And I have some reusable small hive beetle traps and carry mineral oil in one bottle and the homemade lure in another. If I tuck them into the corner, they don’t fall over.

What do you have in your hive inspection basket?

Charlotte