Winter Colony Cluster Check

Checking for a colony cluster can be as simple as lifting the hive top quickly and finding heat.

Checking for a colony cluster can be as simple as lifting the hive top quickly and finding heat.

Winter Colony Cluster Check

I sometimes cringe when beginning beekeepers contact me after they've opened their hives mid-winter to see if their honey bees are still alive. Even though I repeatedly remind everyone not to break the propolis seals bees have built and not to touch the hives after October, there are always a few who rationalize why they did what they did, then wonder later why their bees didn't make it through winter. 

It's hard to not check, I know but if you must, still don't break open the hive and destroy the propolis seals. That's how the bees make their hives airtight for winter. When the propolis seals are broken, the bees don't have the time to make repairs and the open cracks in hives then let in cold, wind and especially rain, which can quickly kill a bee colony.

The only relatively safe thing you can do to check if the bees are alive is to peek under the lid and, with your bare hand, try to locate the heat the cluster is generating inside the hive.

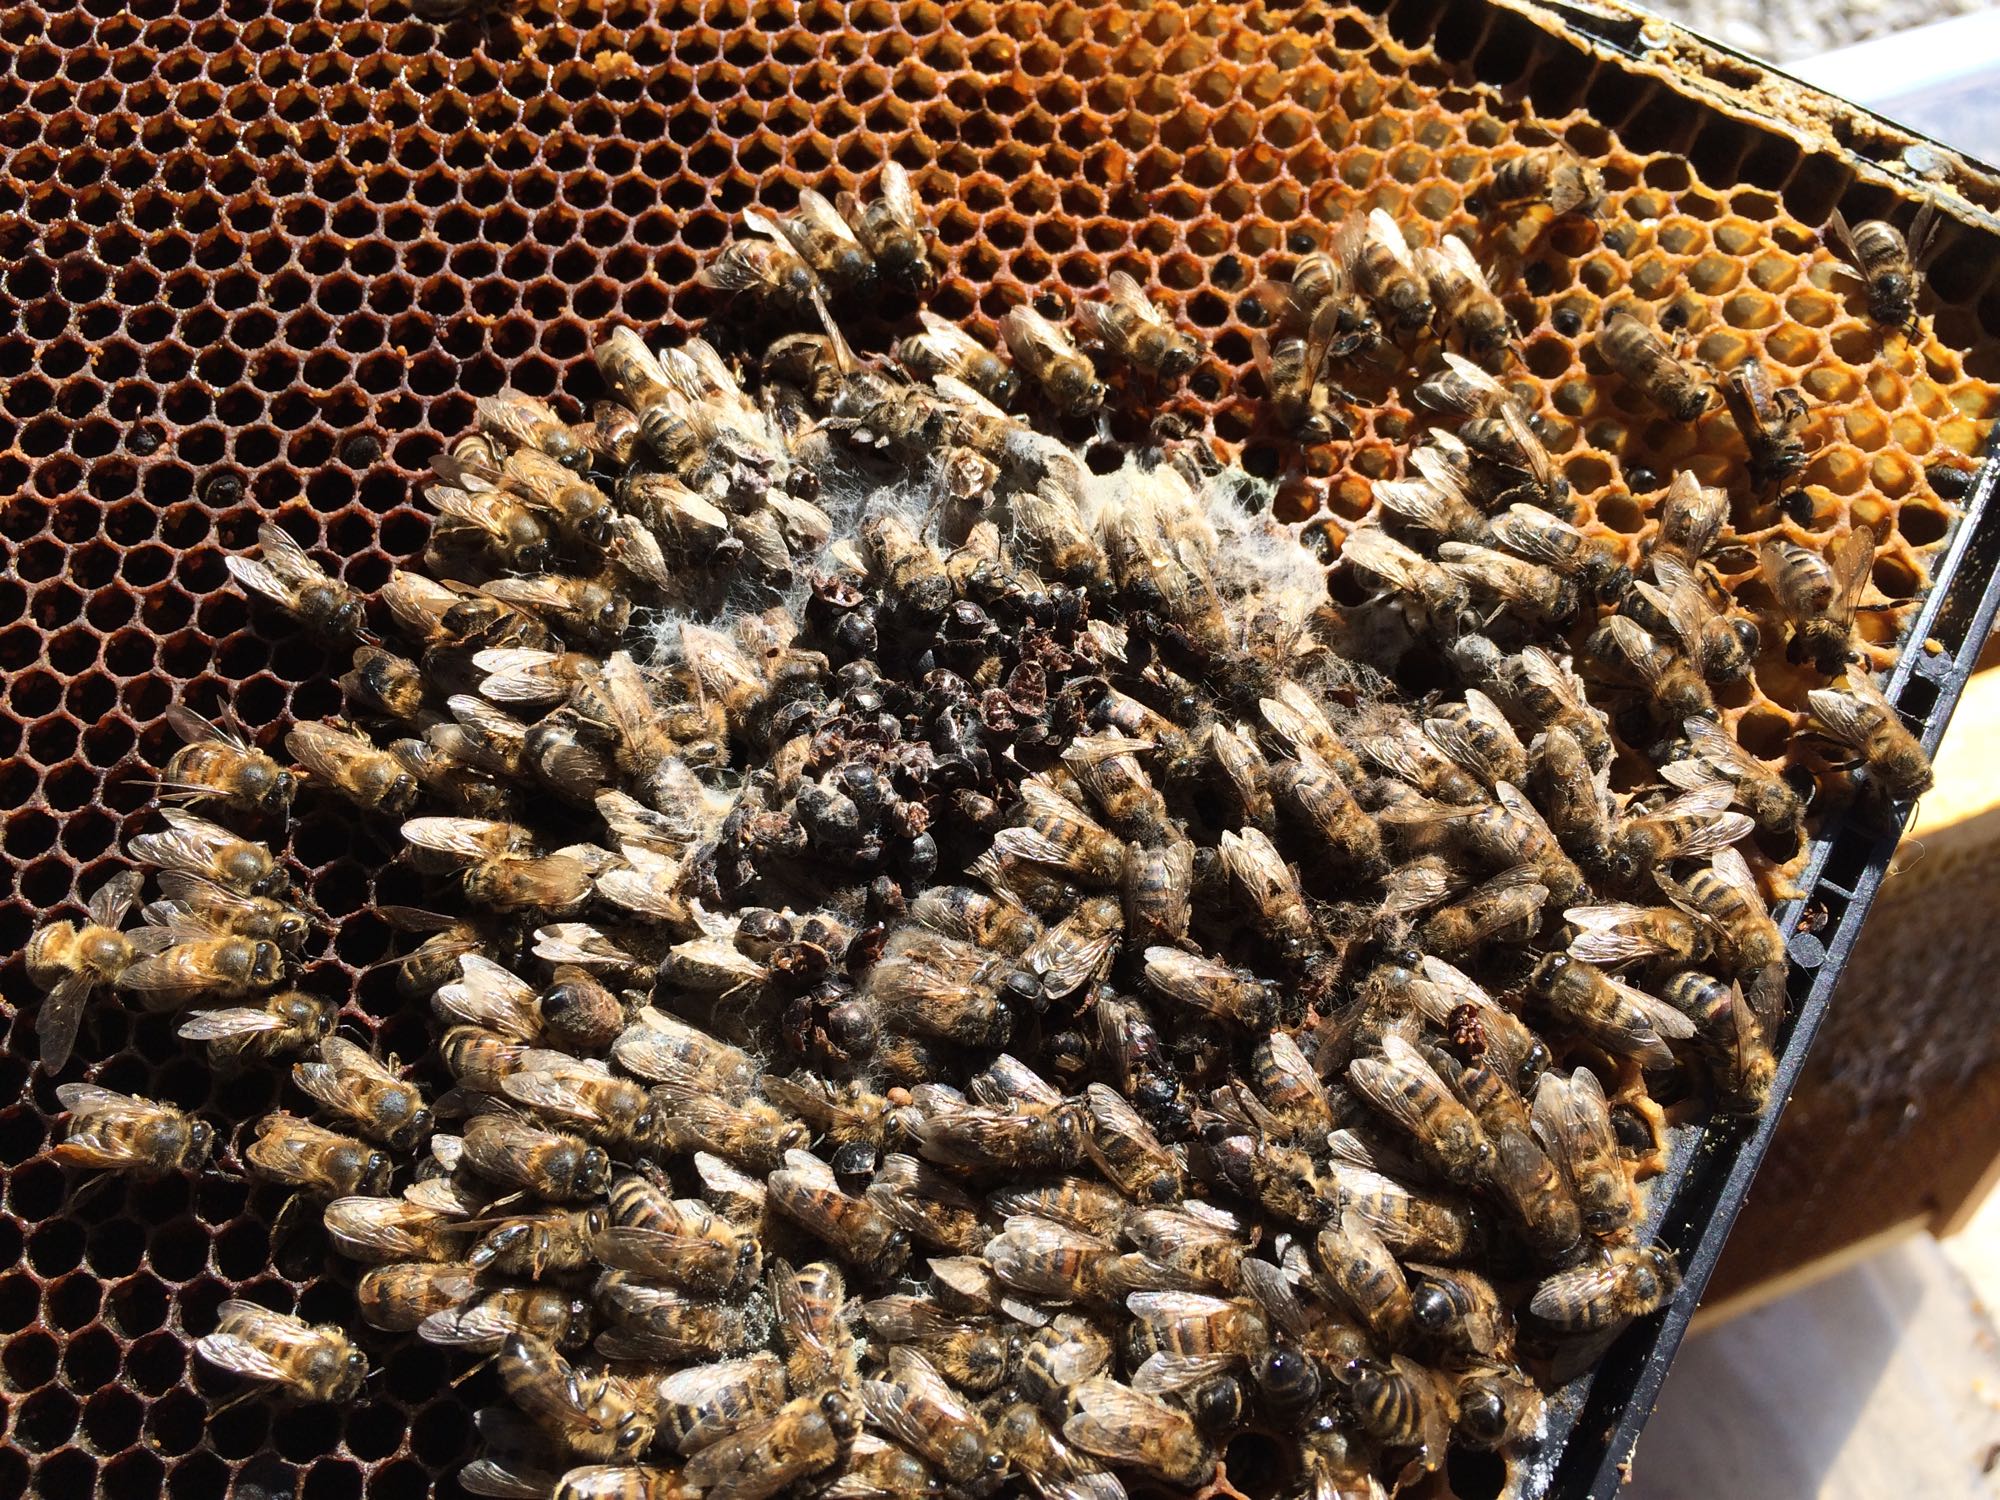
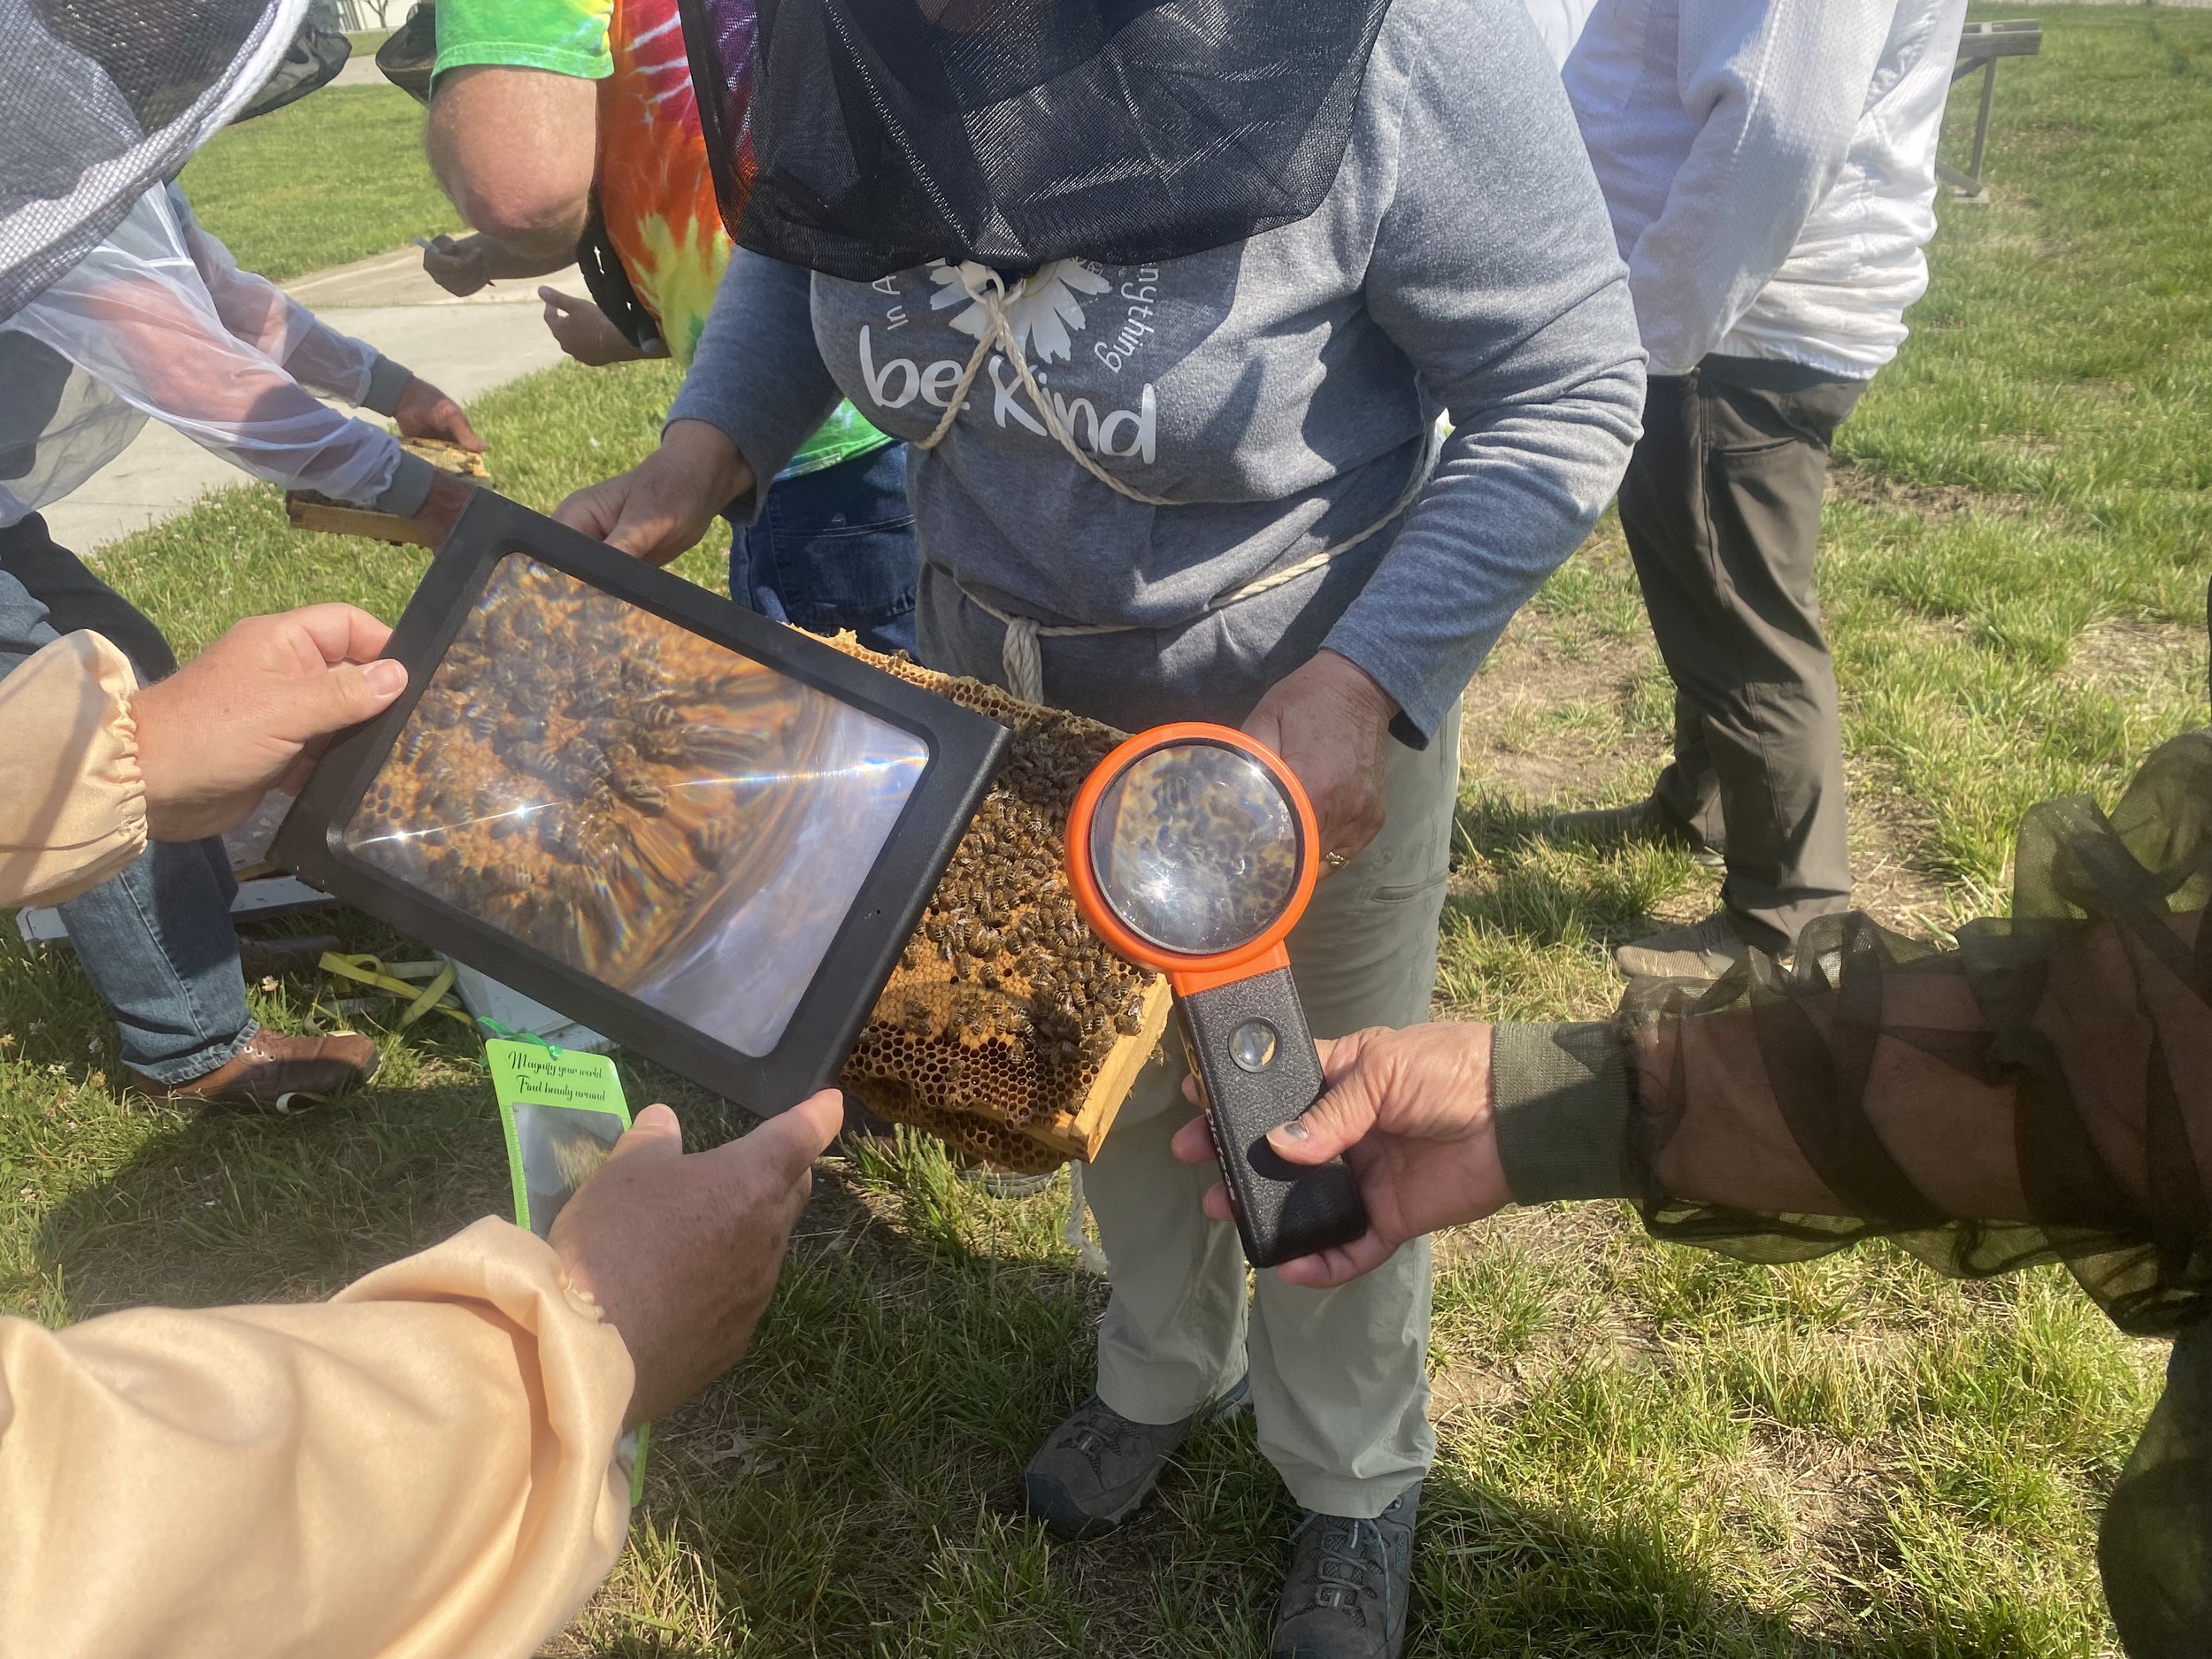
Honeybees don't hibernate through winter, they literally shiver in a cluster with the queen in the middle, consuming the honey they made earlier in the season for carbs and energy. It's amazing to think those little creatures can keep the hive so warm.

Once you locate the heat, close it up, you have your confirmation that the colony is still alive.

The honeybee cluster can generate a lot of heat that's easy to find with your hand.

The honeybee cluster can generate a lot of heat that's easy to find with your hand.

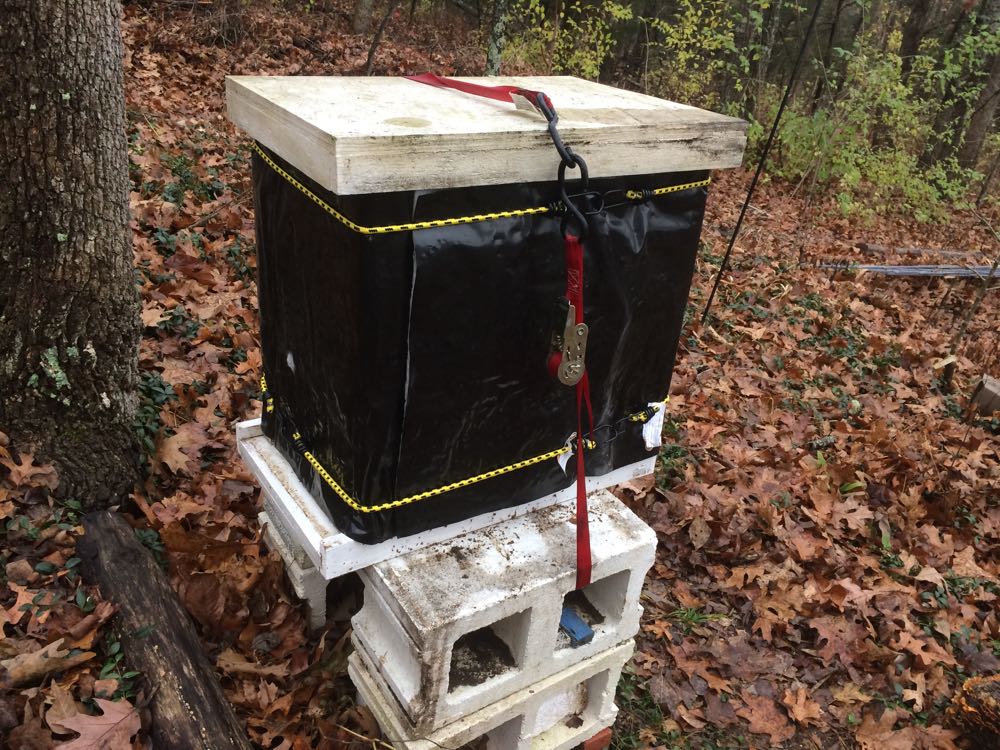
The day before our late December winter storm forecast, I decided to check on hive stores. This year I gave each colony 2 medium supers full of honey instead of one per colony since last year the colonies were at the top of the hive at Christmas. Late falls and warm winter temperatures mean bees are out flying and consuming their honey at a faster rate than when they are clustered. I didn't want to find any colonies dead from starvation so I took my extra sugar cake supply with me just in case I found a cluster on top.

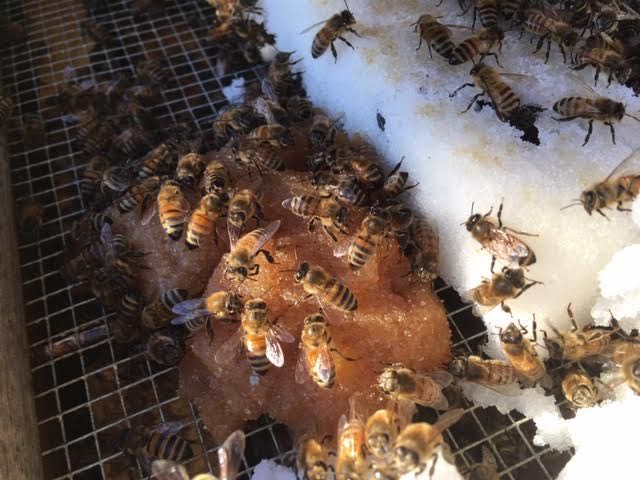
Sure enough, the last colony I checked was at the top, festooning off the screened inner cover I was also going to change to solid inner covers. 

This is another colony with the cluster at the top and into the emergency sugar cakes.

This is another colony with the cluster at the top and into the emergency sugar cakes.

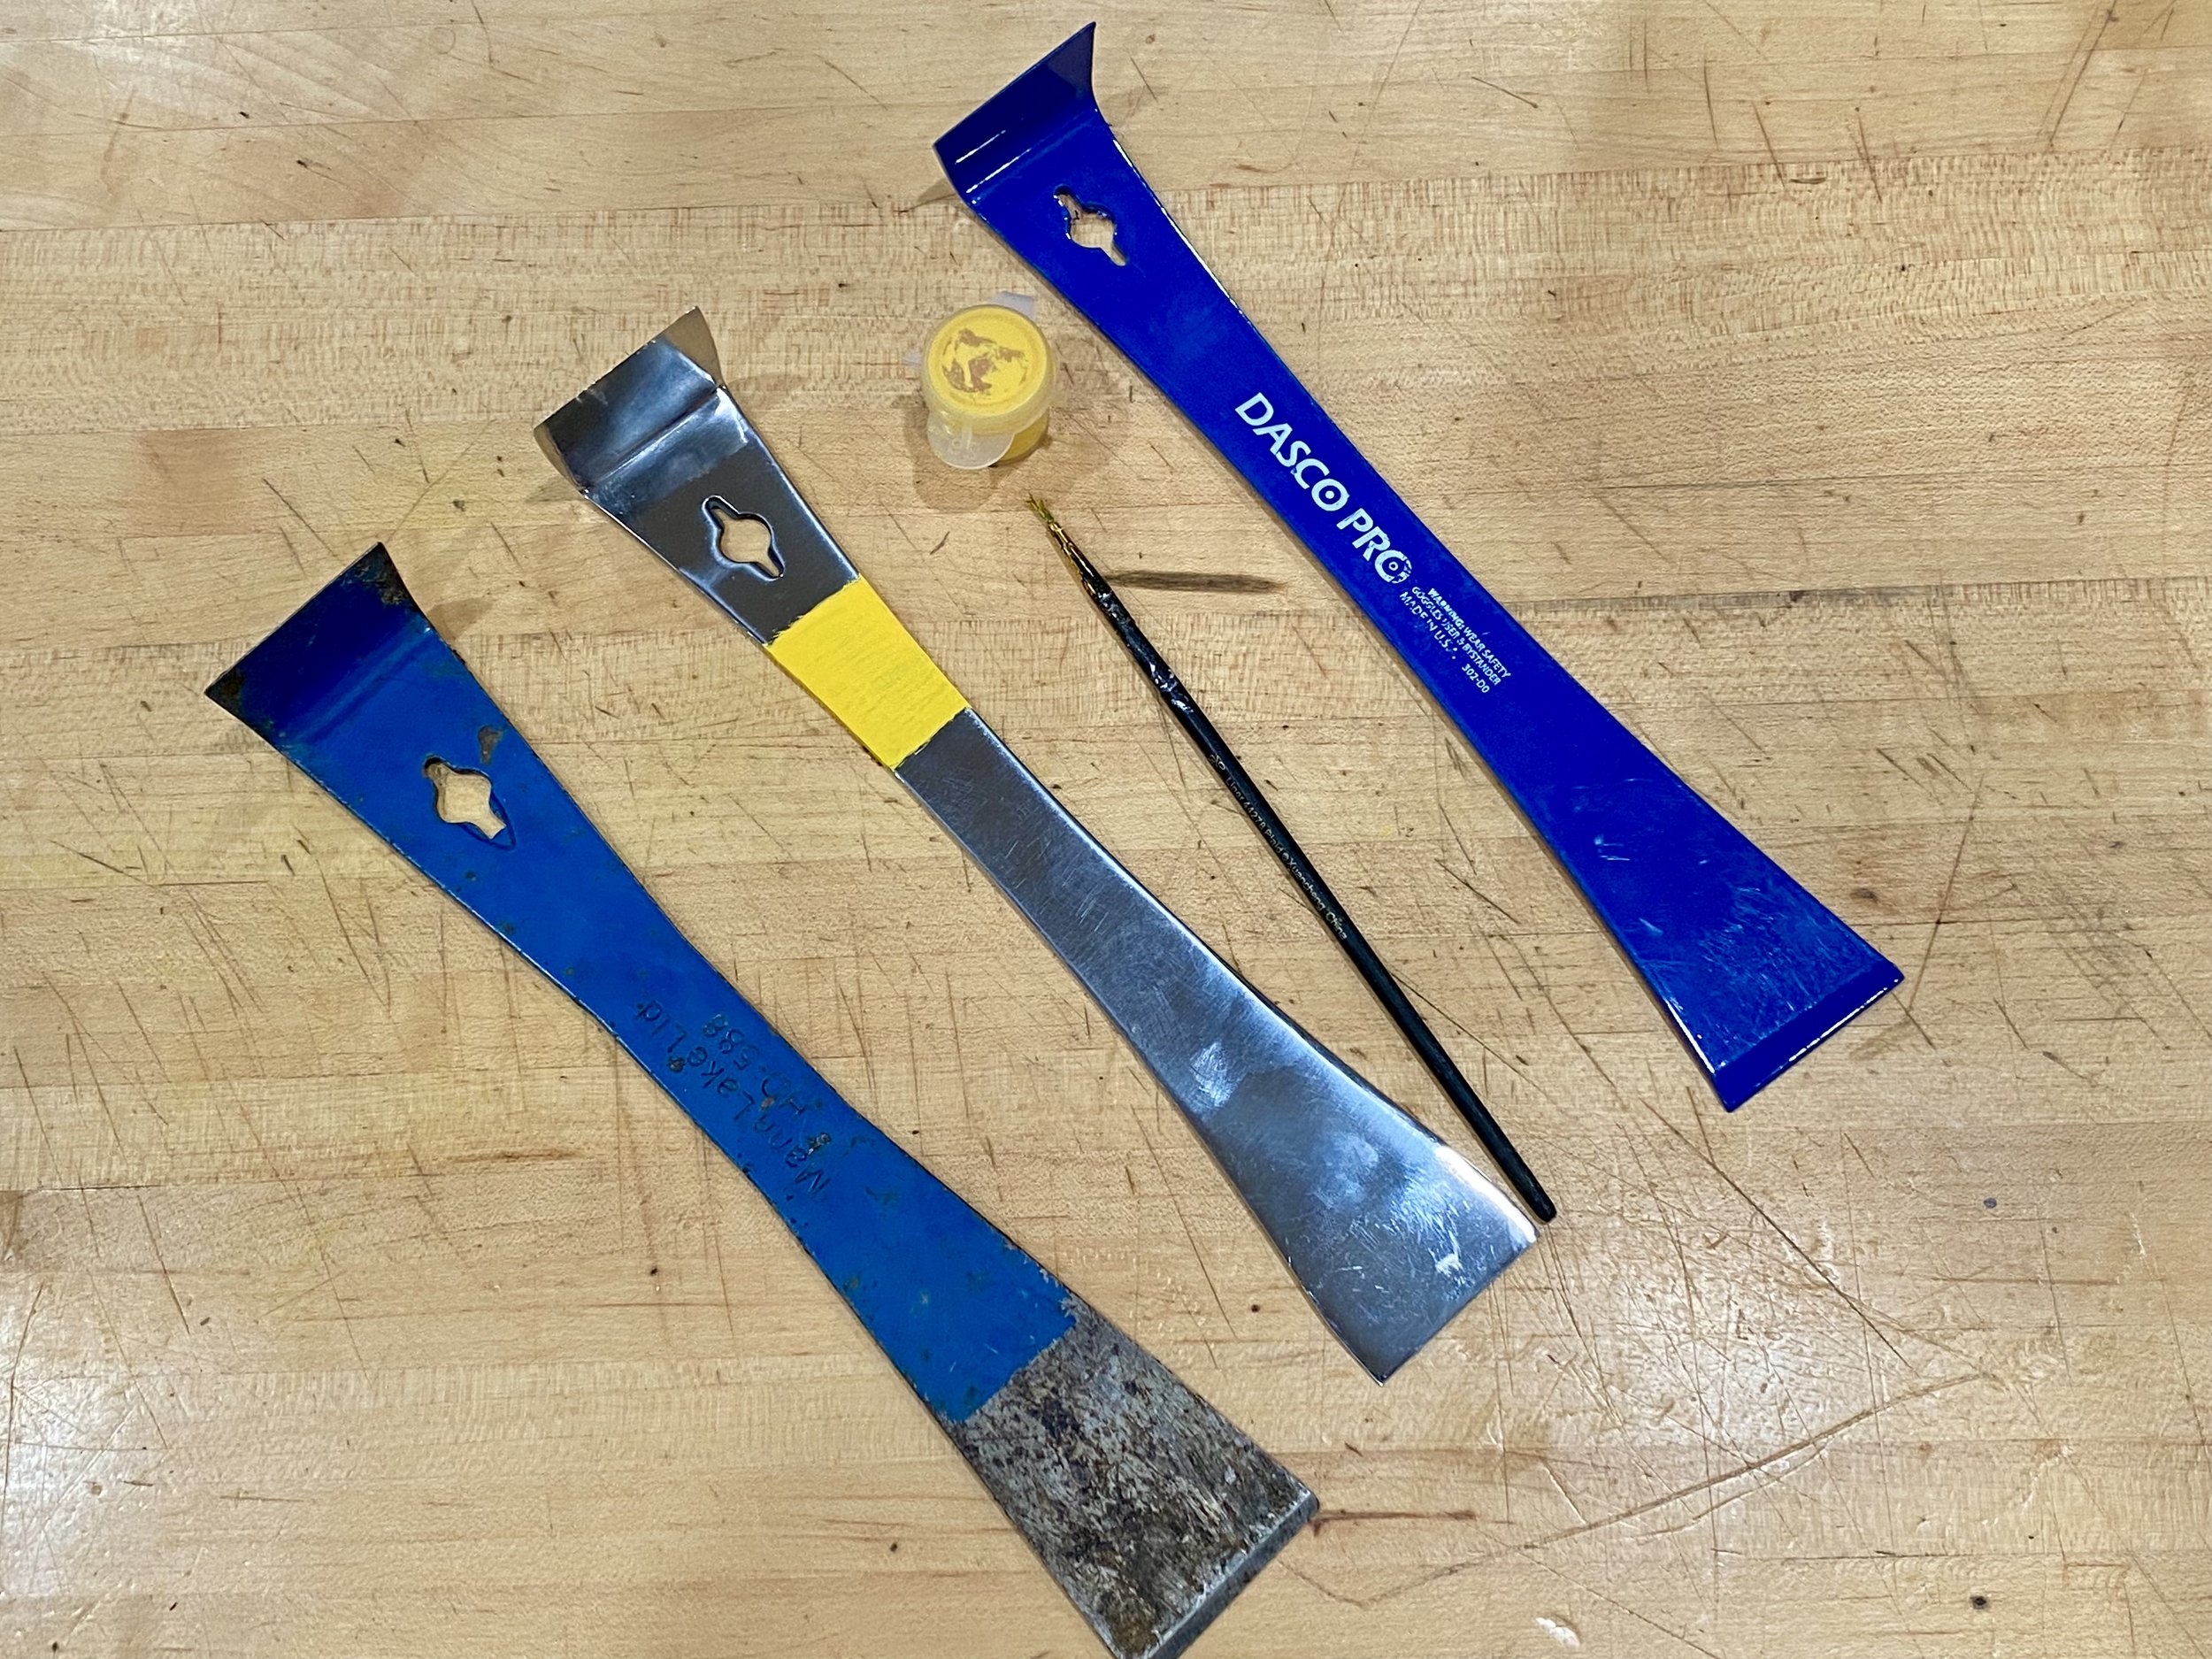
Not wanting to disturb the bees any more than necessary, I snuck the sugar cake bar over the cluster and closed the hive lid for a few minutes.

I gave them an extra cake first on top of the wired inner cover to get them settled.

I gave them an extra cake first on top of the wired inner cover to get them settled.

When I returned a few minutes later, I was able to sneak the old sugar cake out and place the new one right over the cluster with little fuss.

When I checked a few minutes later, the bees were checking out the sugar cake.

I was able to quickly sneak the sugar cake under the wired inner cover with little disturbance.

I was able to quickly sneak the sugar cake under the wired inner cover with little disturbance.

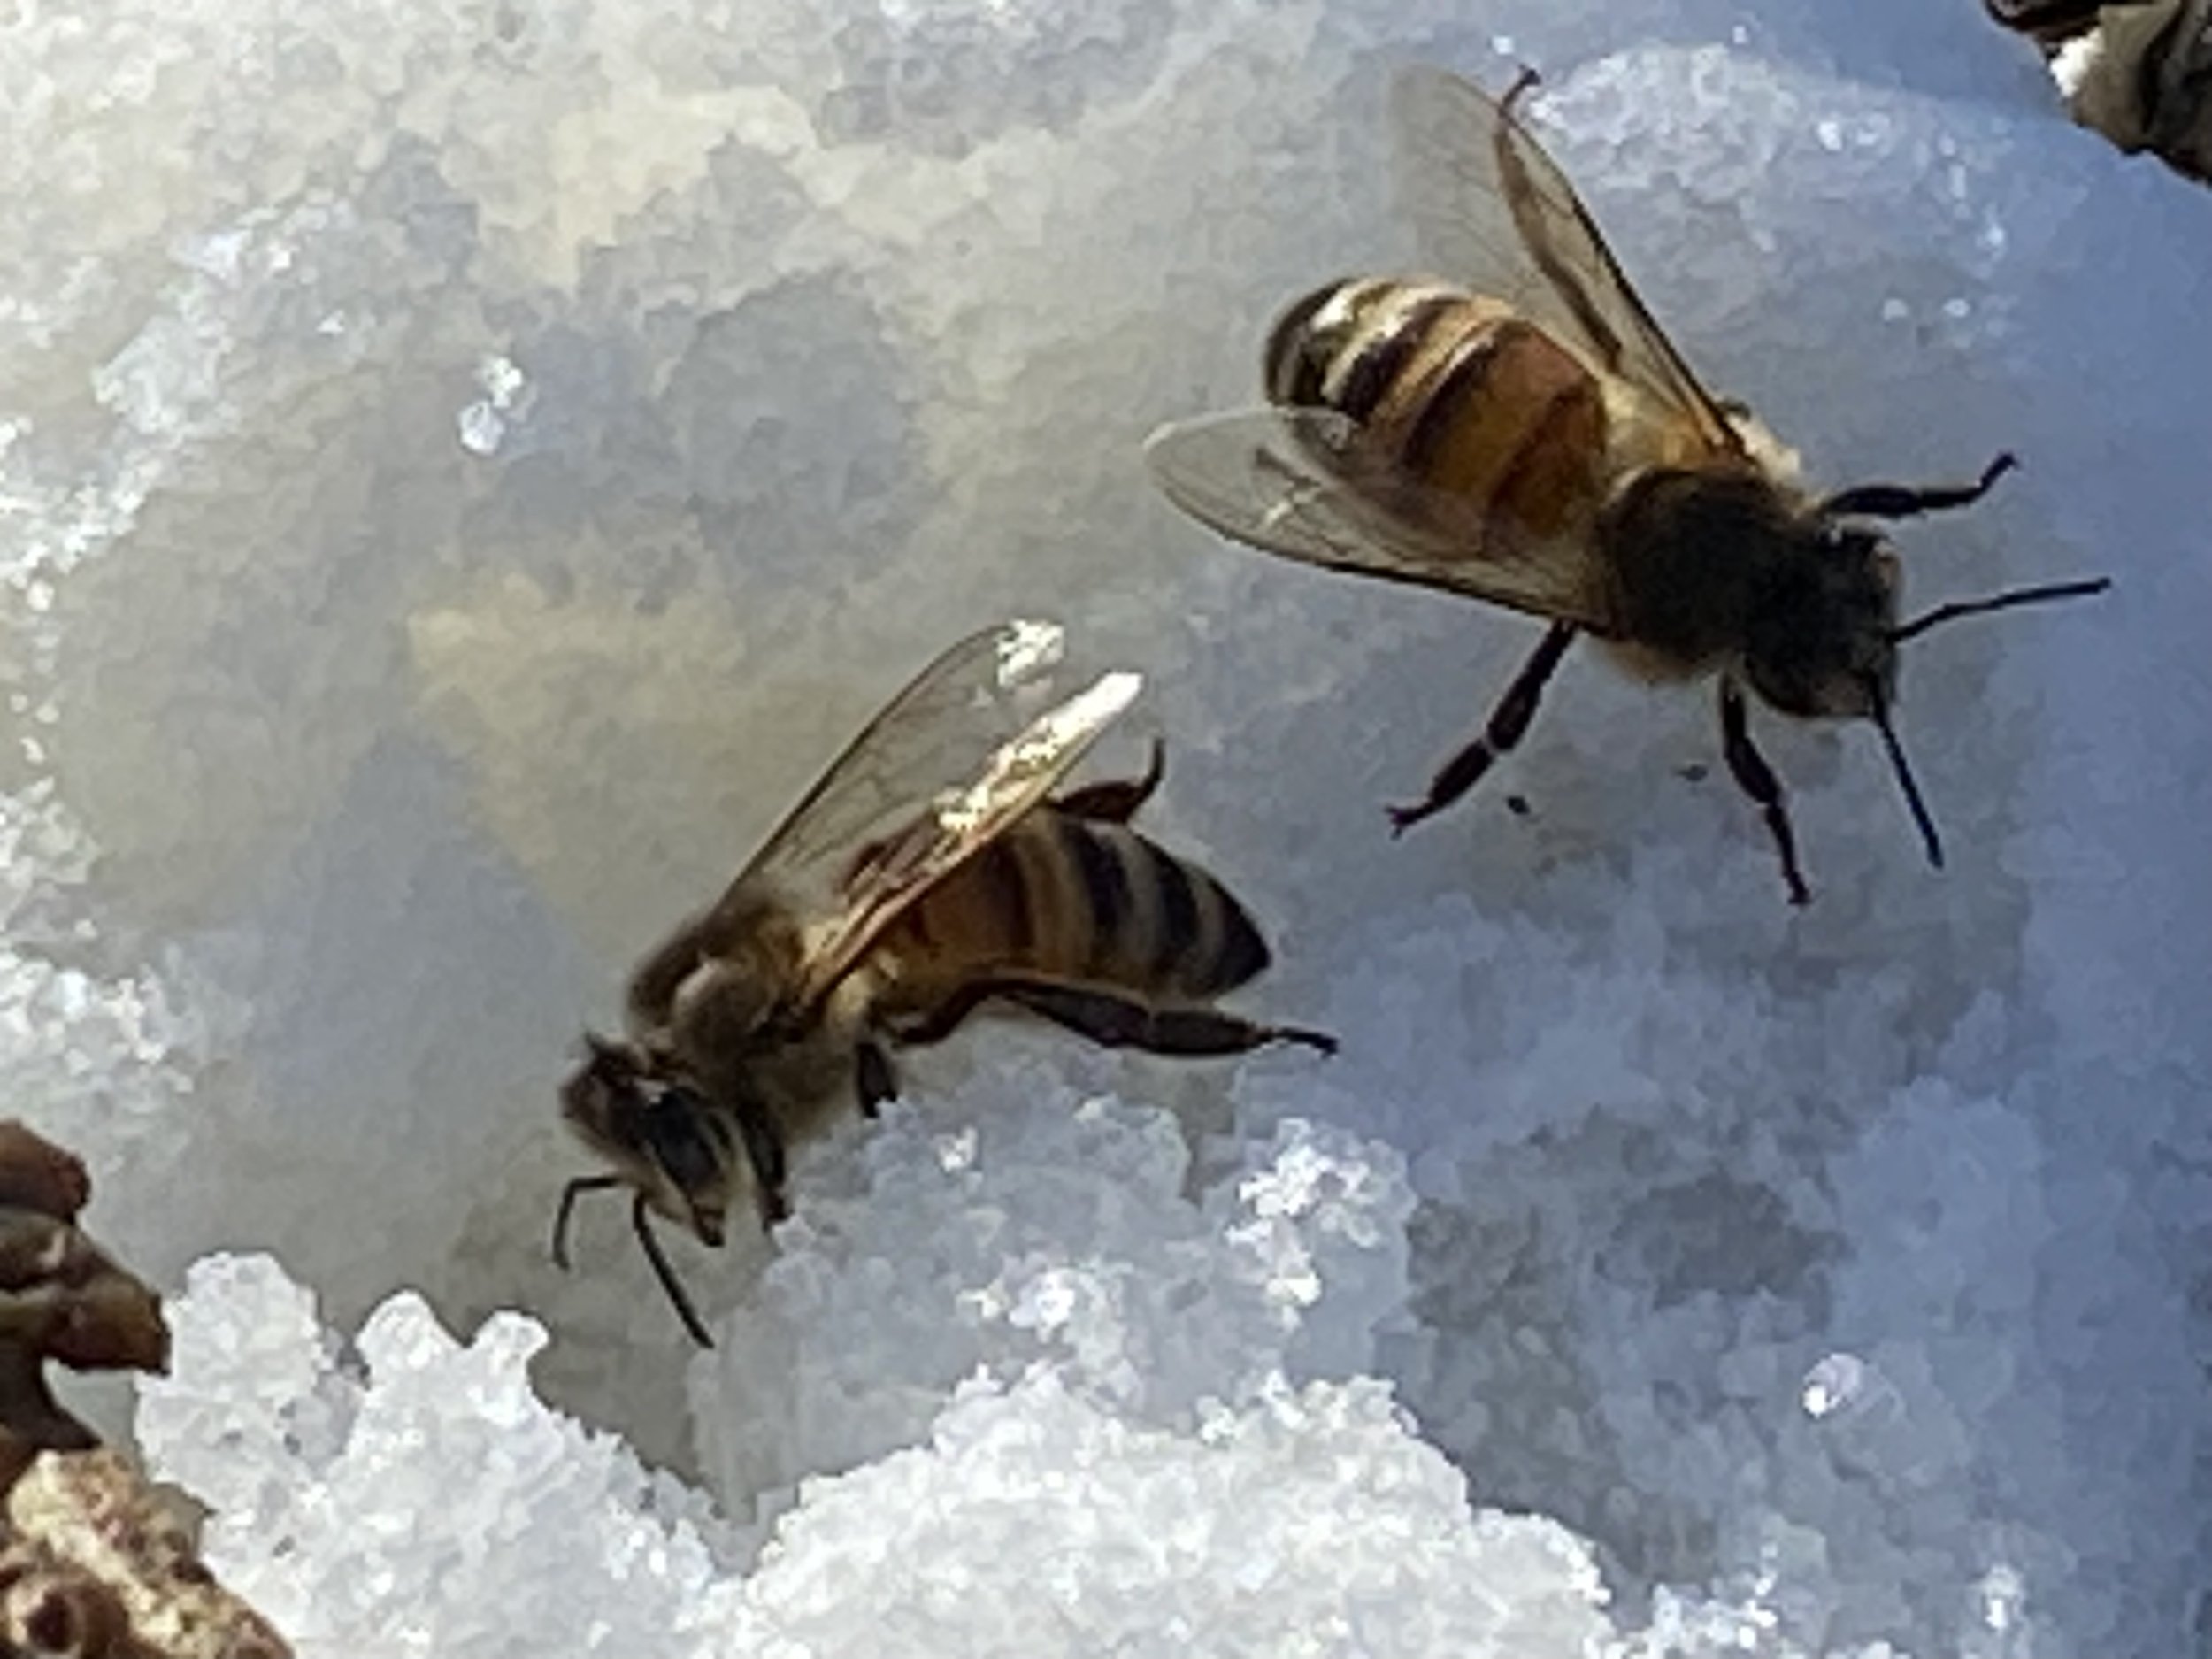
The few bees that flew up when I took off the screened inner cover were heading back inside the hive, with only one bee that needed a personal escort to find the hive entrance.

The few bees that flew out of the top were quickly going back in through the bottom entrance.

The few bees that flew out of the top were quickly going back in through the bottom entrance.

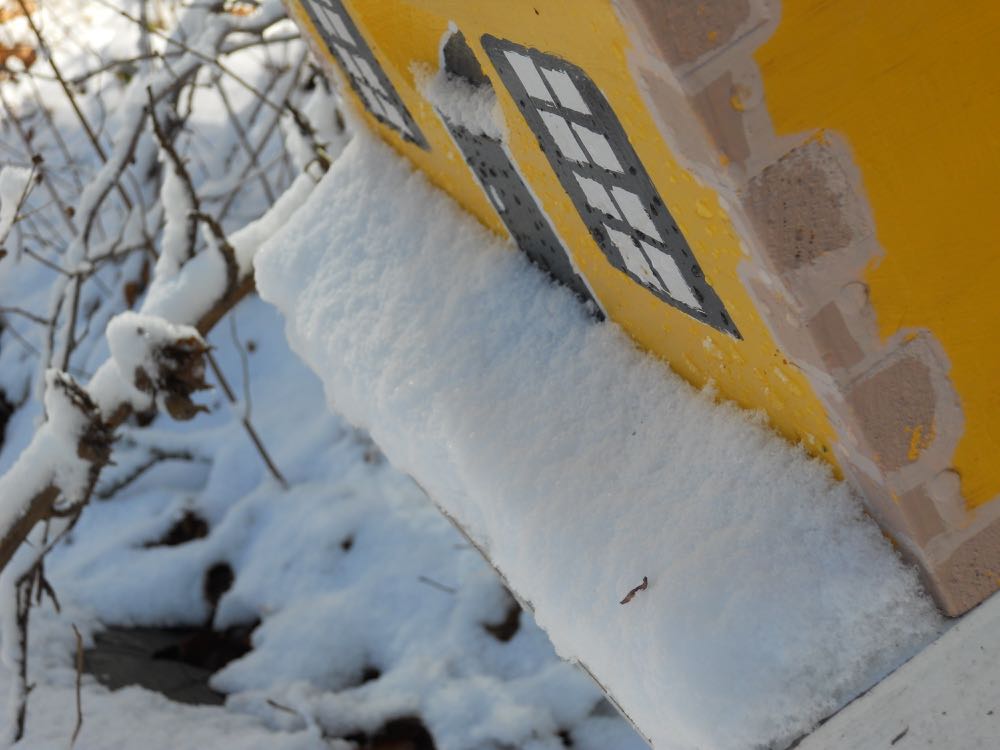
As I refilled the bird feeders and suet holders, I forgot to replace the screened inner covers with solid inner covers until later that evening. With my flashlight as a guide, I quickly removed the screened inner covers and added the solid ones. At that point, even this yellow hive didn't have any bees at the top so it was easy enough to quickly make the switch.

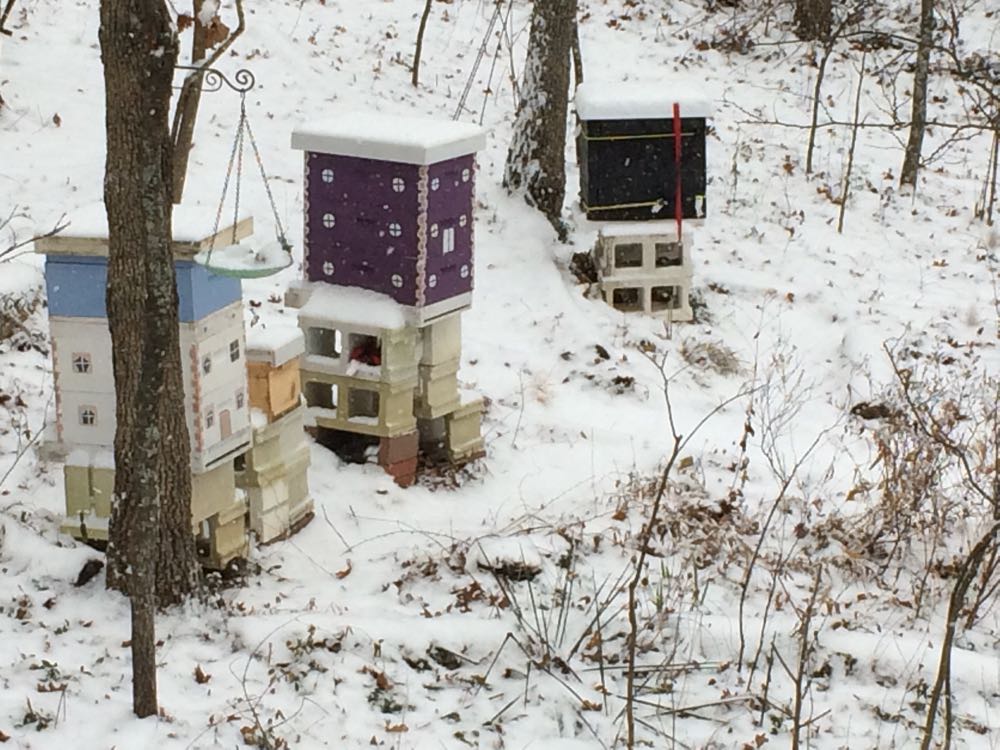
Temperatures are below zero at night now. It's still tempting to want to go out and check the bees but I know they are snug in their homes with enough food so I won't until our next day with the temperature in the 50s. It will be a good time to check on food stores then to make sure they all have enough food to make it into spring.

Spring. Can't wait to see it!

Charlotte

Winterizing Honeybee Hives

Some of my equipment and supplies to get my honeybee hives ready for winter this year.

Some of my equipment and supplies to get my honeybee hives ready for winter this year.

Winterizing Honeybee Hives

I'm not going to say I waited until the last minute to get this done this year but let's just say the temperatures dipped precipitously the following day.

My holdup was getting those emergency sugar cakes dry enough to place on the feeding shims I have at the top of the honeybee hives. I keep the shims on all year to give the bees a second entry and exit to the hive, especially in winter when the front of the hives can get covered in snow.

Snow can easily close up the small hive entrance and leave honeybees without a way to get out.

Snow can easily close up the small hive entrance and leave honeybees without a way to get out.

The other challenge with getting hives ready for winter is making sure the quilted insulated black hive wrap doesn't cover the entrance, either.

After wrapping the hives to help keep the wind out, I check the front to make sure it's still open.

After wrapping the hives to help keep the wind out, I check the front to make sure it's still open.

I also have a wrestling match of sorts using those red straps. I find them hard to release to elongate them so I also invested in these bungee cords. Did I pick them out because of their color scheme? Well, what do you think??

I bought these bungee cords because of their colors, very bee-inspired.

I bought these bungee cords because of their colors, very bee-inspired.

The bungee cords hold the insulated black wrap at the top and bottom of the hives. Then I use the red straps to secure the hives to the concrete blocks I painted white earlier to discourage ants.

Another advantage of having concrete blocks is that I can tuck entrance reducers and other equipment into the side cubby holes.

This colony is tucked in and ready for winter weather, including emergency food at the top.

This colony is tucked in and ready for winter weather, including emergency food at the top.

Before I strap down the hive, I added emergency sugar cakes to the shim at the top. This year, I also left two medium supers full of honey on each colony.

Last year, I found the colonies at the top of their honey-full medium at Christmas so I had to add sugar cakes almost two months earlier than I have in the past. Not knowing what the weather was going to be like this fall and winter, I decided to hedge my bets and give them extra honey, which is much better than these emergency sugar cakes I make. 

Emergency sugar cakes formed in bread pans nicely fit across my honeybee hives.

Emergency sugar cakes formed in bread pans nicely fit across my honeybee hives.

In addition to the emergency sugar cakes, I added a 1x1 inch square of winter pollen patty next to or just under a corner of the sugar cake. Anything larger and I will most likely be feeding small hive beetles instead of honeybees.

Some of my honeybees snacking on the sugar cakes at Christmas this year.

Some of my honeybees snacking on the sugar cakes at Christmas this year.

I don't break the propolis seals on the hives through winter but I can peek under the hood at the top and place my hand inside to find the heat generated by where the cluster is sitting. Once I know where the cluster is located, I can add the sugar cakes over that space so that I know the bees will hit the emergency food as they work their way up through the honey frames.

Honeybees don't hibernate, they literally shiver in a cluster while they consume honey to give them energy. And if/when they run out of honey, the sugar cakes come in handy to supplement them.

Another view of the honeybees on the emergency sugar cakes at the top of the hives.

Another view of the honeybees on the emergency sugar cakes at the top of the hives.

Once the hive is given the extra sugar cakes, it's time to close it up and hope that all will go well as the colony braves winter.

Sugar cakes not only feed but help absorb moisture out of the hive during winter.

Sugar cakes not only feed but help absorb moisture out of the hive during winter.

I had a few peppermint candy canes left over so I added those in the shims. I read somewhere the peppermint is a natural antibacterial so I placed one in each hive wishing the girls a happy Christmas.

Last year, snow arrived before I had all of my hives wrapped, I beat the snow this year.

Last year, snow arrived before I had all of my hives wrapped, I beat the snow this year.

Most of these colonies were spring splits with one being a swarm from a known bee tree. The two mother colonies had drone frames removed mid-spring to break the varroa mite cycle and mid-August were tested for the mites. The alcohol wash had less than 2 mites per 100.

Next year, winterizing will start in August with a varroa mite treatment that ends several steps I will take to minimize varroa in all ofthe colonies, starting in spring. Until then, I hope the colonies are dry and well fed so they can make it through winter. This is the hardest time for me, looking out my window to see the hives out in the cold and wondering if they are okay....

Charlotte

Safely Watering Bees

Water lettuce Pistia stratiotes makes a nice safe landing spot for bees gathering water.

Water lettuce Pistia stratiotes makes a nice safe landing spot for bees gathering water.

Safely Watering Bees

Winter is settling into my garden and I am already missing green - anything green. The garden looks very brown as leaves cover most of the ground and I try to keep my bird baths full of water for my bees.

The National Weather Service today said we had the driest November on record this year, and December doesn't look very promising in terms of precipitation. One of things I tried earlier this year to keep my bees safely drinking from bird baths was adding water lettuce Pistia stratiotes.

These fast-growing, non-native Missouri plants are offered for sale in garden centers for contained ponds. I purchased only 3 to add to a small pond and within weeks the pond was almost covered so I moved some to bird baths. Within days bees were landing in the center of the water lettuce and safely taking drinks so I spread the plants to the rest of the bird baths.

Water lettuce off shoots grow fast and can be moved to other bird baths.

Water lettuce off shoots grow fast and can be moved to other bird baths.

As long as I kept the bird baths in water, the water lettuce nicely survived and provided a safe landing spot for bees.

Surprisingly, the greenery in the bird baths did not prevent birds from taking a drink or even bathing, they just moved in between the water lettuce plants.

To make sure the bird baths were safe, I also added a few pieces of gravel and small twigs to the bird baths to give anything small that fell in a safe place to climb back out. 

The green of the water lettuce made a nice contrast to watch the bees up close.

Keep water lettuce out of rivers and other running water areas, it can be invasive.

Keep water lettuce out of rivers and other running water areas, it can be invasive.

A friend has taken a water lettuce start and is going to try to winter it over. If successful, I will get a start back next spring and then within a few weeks, the bird baths will once again have safe landing spots for bees to stop in and get a drink.

Charlotte

Another Small Hive Beetle Lure Use

This is a jar of small hive beetle lure in my refrigerator for identification training purposes.

This is a jar of small hive beetle lure in my refrigerator for identification training purposes.

Another Use for Small Hive Beetle Lure

There were a lot of things I wasn't told when I started beekeeping and for the purposes of this column, I'm going to focus on my refrigerator.

There was a time when most of my refrigerator was full of - well, yummy things. Fruit from my neighbor's garden, leftovers from my cooking, and more vegetables than I could possibly eat in a week but I bought because they were pretty.

Now that I keep bees, at least two refrigerator shelves have what one of my non-beekeeping friends calls "mystery things." Of course I know what they are but he is more adventurous than I am.

Take the time he took a bite out of my homemade protein patty thinking it was homemade fudge.

There were scrambled eggs he made one morning sprinkled with bee protein mix. Don't ask, I didn't try it.

Then there is a jar of small hive beetle lure that needs to sit in the refrigerator for two weeks to ferment. See how it is sitting next to the pickle jar?

In my defense, the jar did originally have a label. However, over time, the label fell off and I, who knew what was in the jar, didn't think it was necessary to replace it. I also made a general public service announcement that the jar sitting on the top rung of the refrigerator was not to be touched or consumed unless one was a very black, and very thirsty, sub-Saharan bug. Come to think about it, I would have bigger problems if I had a small hive beetle big enough to be rummaging through my refrigerator but I digress.

Shortly after this small hive beetle lure identification announcement, I was informed that the pickle juice in my refrigerator was turning rancid. Delighted to have another empty jar I could use, I removed the dill pickle jar, composted the dill pickle juice and I frankly can't remember what I did next but I was soon informed again I needed to remove the rancid pickle juice.

I pointed out the ring of banana peels floating at the top of the remaining refrigerated jar, see them in the photo? Those are signs that the jar is not full of pickles, or pickle juice, I said, but a very special concoction to, ah, about two inches of fluid was missing...let's just say use in a bee hive.

For bees, he said.

It helps the bees, yes, I said.

It tastes terrible, he offered.

Well, if you're a black bug it's like a beer, you drink it with your friends.

You're now making beer for hive bugs?

Very bad black hive bugs, the beer attracts then, then they drown. Now stay out of the lure jar.

Here's the small hive beetle lure recipe:

½ cup apple cider vinegar
¼ cup sugar
1 cup water
1 ripe banana peel cut up finely

Directions: Combine all ingredients and allow to ferment for about 2 weeks. 
Fill center traps with lure. Fill side traps 1/3 full with mineral or vegetable oil.  Replace when full of small hive beetles or every few days. With hotter weather, traps should be checked and refreshed more frequently. Clear top of traps of propolis.

I do believe that lure jar will now also keep two-legged visitors out my refrigerator.

Charlotte


How to Make Creamed Honey

Creamed honey becomes solid, is not sticky and ships easily, a must for my gifts.

Creamed honey becomes solid, is not sticky and ships easily, a must for my gifts.

How to Make Creamed Honey

When I think about how worried I was before the first time I tried to make whatever you want to call this - whipped honey, spun honey, I call it creamed honey - let me assure you. this is NOT hard to do. There are a couple of key steps that make this a success so let me cover those right here:

1. You will need an area that is not heated to store the seeded honey in jars to set. I have used both an unheated storage area and my garage, both successfully. Ideal temperature is around 50F to 57F.

2. You will need a seed starter. There are several options on the market from a dry powder option to actual creamed honey. I have only used actual creamed honey and started with one I found at a grocery store. Once I had mine, however, I didn't have to buy any more because I used mine as my starter for my next batches.

3. The containers you want to pour the seeded honey in. There is no middle step in this process, no weeks in between when you make the creamed honey and when you bottle it. The raw honey is mixed with the seed, then it is poured into the final containers to set. If you are planning to make this for gifts, then collect the containers you plan to use and have them clean, on hand and ready to be used.

I start with a nice smooth creamed honey for starter, such as Sue Bee Spun Honey. A friend has used a start of my creamed honey and made her own, and so forth.

I start with a nice smooth creamed honey for starter, such as Sue Bee Spun Honey. A friend has used a start of my creamed honey and made her own, and so forth.

How to Make Creamed Honey

The basic ratio is one part creamed honey to 10 parts raw strained honey. Select a wonderful seeded honey to start because the raw strained honey will copy those crystals.

Pour the room temperature raw honey in a bowl; add the room temperature seeded honey, then slowly mix it. When I started, I would carefully mix by hand, which is fine for small quantities. This time, I mixed it with a beater on low until light and fluffy, about 3 minutes or so. Don't beat on high or you will end up with huge air bubbles in the mixture. 

Pour into containers. Add lids. I lined a cardboard box with plastic, added the containers, then stored in the cool area to set.

Since I used a beater on low to mix the honey and seed, the creamed honey had tiny bubbles. I could have left the mixture in the bowl overnight, scooped the froth with bubbles off, then poured the mixture into the containers but I didn't think about that at the time.

Here's how my tiny containers looked with their tiny bubbles.

This year's creamed honey mixed on low with a mixer had small bubbles once it was set.

This year's creamed honey mixed on low with a mixer had small bubbles once it was set.

The 2 oz. containers set within a day. The larger 6 oz. containers set within a couple of days so I am assuming larger containers will take a little longer to be ready. In general, it should take a week to 10 days for the honey to fully set so I left them for the full time.

If you don't like how they turned out, place the mixture in a glass jar in a pan of hot water off the heat source and let it melt back to liquified honey. I have also fed creamed honey back to my bees on a warm winter day to enjoy watching them.

Store creamed honey in a cool area, not close to heat such as the stove or in a window. For most people, it doesn't last long so they don't have to worry about storage!

Charlotte

How Not to Lose Hive Tools

These are some of my hive tools splattered - yes, I used that word deliberately - with blue paint.

These are some of my hive tools splattered - yes, I used that word deliberately - with blue paint.

How Not to Lose Hive Tools

Maybe this is not the best title for this column, maybe I should call this one of the many things one can do to not lose one's hive tools but it was the latest of many steps I have taken over the years, and the one that seems to have worked the best. So far.

As a beekeeper, one should not only have several hive tools but one should have a way to easily retrieve them, especially out of another beekeeper's tool bucket. Or car. Or bee jacket!

Not that my beekeeping buddies would ever deliberately abscond with one of my hive tools but this year it sure seemed like I would get home from a bee yard hive inspection and find myself light of a hive tool, or two. Then the discussion would center around which of the extra hive tools belonged to whom, they all looked alike.

A little blue paint and I fixed that discussion, I literally splattered blue latex paint over my hive tools to mark them as mine. It was from an old blue spray bottle leftover from another project so I didn't even go out of my way to buy the paint.

My biggest challenge was trying to figure out how to hang them so that both sides could dry.

Screw drivers under something heavy make good temporary hangars for drying hive tools.

Screw drivers under something heavy make good temporary hangars for drying hive tools.

Using another indispensable beekeeping tool, at least in my apiary, screwdrivers, I piled a heavy plastic tote on the screwdrivers and the hive tools could easily hang to dry.

Now when they end up in the wrong bucket at the end of a hive inspection, at least everyone knows whose hive tools they have to return!

What do you do to mark your hive tools - or do you?

Charlotte

How to Find Store Beekeeping Section

A sure sign of the store beekeeping section, bees flying overhead!

A sure sign of the store beekeeping section, bees flying overhead!

How to Find the Beekeeping Store Section

Busy, busy, busy this year, so busy that I barely glance around stores as I pop in. Our local hardware stores have picked up on the beekeeping interest but sometimes I have to check all of them before I find what I need. 

On this particular day, I had just heard the first winter 2018 forecast on the radio. I never quite know whether the bellybutton of Missouri falls into the northern plains or the east coast, especially when they don't even mention a state remotely close. I hope we have a little bit of a break, or more of a break than we had last year, I thought as I popped into yet another hardware store.

It's honey harvesting time, and a friend had told me there were some plastic bear jars locally in stock. Not a particular fan of those containers, I was going to give them another look before I decided if I would use them this year if I could remember what store he had said he found them.

 It's a personal thing. My bees work SO hard to make honey, I like to package their hard work in a way that honors the gift they give us. Actually we take it from them when they make extra but I digress.

So this particular hardware store had recently changed hands, and inventory. They were also transitioning from summer to Christmas so my usual aisle haunts were gone. Sad but true, I was lost.

Around one of the corners, a lady was stocking shelves so I decided to ask for help. Did she happen to know how I could find the beekeeping supplies?

She gave me a smile and pointed towards the ceiling. Several stuffed bees were hanging around a mannequin in a bee suit. Not quite a swarm but definitely a good clue!

Charlotte

Why Honey Frames Should Be Frozen Before Storing

This was the last honey frame in the bottom box from a pile of six, 10 frame boxes.

This was the last honey frame in the bottom box from a pile of six, 10 frame boxes.

Why Honey Frames Should Be Frozen Before Storing

It's always tempting to say it won't happen to me, or I don't see them, or not to concentrate on the warnings I pass on at our bee club meetings. See, I know some of you are snoozing when I talk about it but here's why I say honey frames should be frozen before storing.

I had six boxes of honey frames stacked in my cold basement utility room as I cycled the frames through my tiny freezer before storing them in plastic totes. The honey frames were beautiful, all drawn out across the foundation, some even foundationless, not a hint of trouble as I cycled through the boxes.

By the time I got down to the bottom box, it was easy to think I got through this honey batch without any problems until I pulled out that last honey frame. Up in the upper right hand quadrant of one side of the frame was the telltale signs of small hive beetle larvae, and it was apparent they had had some time to enjoy the fruits of the honeybees labor before I found them.

Close up of the culprits, small hive beetle larvae in empty comb.

Close up of the culprits, small hive beetle larvae in empty comb.

Needless to say, I wrapped the frame up in plastic and stuck it in the freezer to kill off the bugs.

I tend to leave small hive beetle larvae in the freezer for a good week before pulling the frames out, washing it off before it thaws out and letting the bees rob out the honey and clean out the comb.

That is one of the many benefits of having bees, they are meticulous housekeepers. If I have a honey spill of any kind, or leftover honey in a container, I take it outside and let the bees clean it out. They do fast work and leave it squeaky clean so that I can then easily wash it without sticking to it myself.

Now can you imagine what this, and the other frames of honey, would have looked like, and smelled like, had I stored it straight into the plastic tote?

I don't even want to think about it!

Charlotte

New Bee Syrup Feeder

My honeybees taking a drink of hummingbird sugar water at a hummingbird feeder.

My honeybees taking a drink of hummingbird sugar water at a hummingbird feeder.

New Bee Syrup Feeder

There are only a very few situations where I recommend feeding bees sugar syrup to supplement what they may find in nature; catching swarms and when making two-frame splits come immediately to mind. There may be other special situations but, in general, I try not to feed my honeybees sugar syrup.

My bees apparently don't agree. Right after hanging my hummingbird feeders around the garden, with a 4 to 1 water/sugar syrup, one of the hummingbird feeders was getting emptied out faster than the rest. Suspecting my resident raccoon may have been sipping the sugar water, I started watching the hummingbird feeder shortly after filing in.

No big visitors to the feeder but bees were constantly around it. Even when I took the hummingbird feeder down to wash out and replenish, bees were waiting for the hummingbird feeder's return.

No other feeders have regular bee visitors like this one. It is within the flight path of one of my hives so maybe that's what makes it a popular stopping point as they head out to find pollen sources.

And the hummingbird feeder?

It has little slits designed to allow hummingbirds access but supposedly keeps everyone else out, including bees.

Maybe they should promote it as a bee syrup feeder instead!

Charlotte

Sandy Bird Bath

Sandy bird bath gives my bees a safe place to land near one of my bird feeders.

Sandy bird bath gives my bees a safe place to land near one of my bird feeders.

Sandy Bird Bath

Over the years, I have experimented with a variety of bird bath additions to give my honeybees a safe place to land while they get a drink of water. Honeybees need water for a variety of reasons, from hydration to take water back to the hive to use in food production and to ventilate the hive.

From twigs and leaves to rocks and statuaries, my bird baths have gone from simple bowls holding water to virtual sandy beaches - literally.

The latest experiment is this bird bath at the front of my house lined with sand. I keep it saturated with water so bees can easily get moisture without having to walk into the deep end on the other side of the rocks. 

The bird bath is a little too close to the bird feeder. Sunflower seed hulls end up dotting the sandy edge but it doesn't seem to bother the bees.

One of my honeybees that lived through winter at the edge of the bird bath.

One of my honeybees that lived through winter at the edge of the bird bath.

One of the questions I researched last year was how far should the water source be located. According to Larry Connors, the water source should be no farther than half a mile from the hive. This bird bath is about halfway between my two bee gardens, maybe 200 feet from the closest apiaries.

Rocks in the bird bath help give honeybees a safe landing spot.

Rocks in the bird bath help give honeybees a safe landing spot.

Besides sticks, I also add larger rocks to my bird baths to give bees a safe place to land. If I have to choose between large and small rocks, I prefer smaller rocks so bees can still easily reach water but still be safe from falling in.

Sand also gives honeybees a safe place to land to take up moisture.

Sand also gives honeybees a safe place to land to take up moisture.

That's why the sand works well, it gives bees a safe place to land while giving them easy and safe access to moisture.

Charlotte

Canning Lid Disk Entrance

Two homemade swarm traps that both could use the metal disk entrance disks.

Two homemade swarm traps that both could use the metal disk entrance disks.

Canning Lid Disk Entrance

These are homemade bee swarm traps, the deeper ones honeybee colonies like. The one on the right has the metal disk entrance that is attached with a screw and allows the entrance to be closed while still allowing for ventilation.

I either never have those around when I need them or order extras and then can't find them when I am ready to use them. So I was very intrigued when one of our very handy guys came up with this nifty alternative, using the inner cover of canning jars to make these disk entrances.

Now this is very exciting for several reasons. I am not handy with woodworking but I do have canning jars. I can relatively safely manage a drill bit and who doesn't like to be able to say "I made this myself."

Here is the canning lid close up with the drilled holes.

Here is the canning lid close up with the drilled holes.

Looking at the canning lid closer, the design is simple enough: a larger hole, a collection of tinier holes,  and a tiny hole in the center.

Helps to have a wooden guide to get the larger hole the right size.

Here is a demo of how the holes are drilled using a wooden block guide.

Here is a demo of how the holes are drilled using a wooden block guide.

I also like the little screw on the left to keep the canning lid from moving during the drilling process.

Note the little screw on the left holding the canning lid in place for safety.

Note the little screw on the left holding the canning lid in place for safety.

Considering how expensive these can be to order all by themselves, and how easily available canning lids are, this is a great option for when one needs a metal disk entrance.

And I will never, ever complain again that I have too many inner canning lids again!

Charlotte

Minimize Small Hive Beetles

Joining my bee buddy David, left, at a first spring hive inspection.

Joining my bee buddy David, left, at a first spring hive inspection.

Minimize Small Hive Beetles

We have had a mild winter this past year, which means another bad year combating small hive beetles. 

Last year, the little black beetles devastated many hives, including strong ones, in the matter of a couple of weeks. Originally from sub-sahara Africa, the ladybug-size black bugs can lay up to 2,000 eggs a day in dark hive corners. If left undisturbed, the larvae will quickly slime the comb, honey and even the bees, eventually chasing bee colonies out of the hive.

There is a definite rotten smell to a colony infested with small hive beetle larvae.

What is worse, most beekeepers first dealing with this pest will scrape the larvae into the ground, where the worms will pulpate and grow into more small hive beetles. The beetles will fly up to 7 miles, infesting other nearby colonies.

As beekeepers start their spring inspections, it's important that they take a plastic container with a lid with them where they can scrape the bottom of the hive, sight unseen. The frass at the bottom of the hive will contain left over wax where  small hive beetle larvae will hatch. To try to control the beetle population, scrape that out of the hive and burn it.

Frass and debris off the bottom board was scooped into a plastic bag, not poured onto ground.

Frass and debris off the bottom board was scooped into a plastic bag, not poured onto ground.

Look at the photo above, can you see the small hive beetle larvae in the frass?

Initially, many beekeepers were telling me small hive beetles would die over winter. Inspecting colonies that died, we found that the beetles were wintering over inside the colony clusters and, in some cases, surviving where the bees had died.

Small hive beetles have been wintering over inside the clustering bees.

Small hive beetles have been wintering over inside the clustering bees.

So in addition to killing the small hive beetle bugs, beekeepers need to remove the actual larvae, often found in the bottom of frames and boxes.

Here is what one looks like:

Kill the black beetles, then look for the larvae growing in frass and hive nooks and crannies.

Kill the black beetles, then look for the larvae growing in frass and hive nooks and crannies.

In addition to killing the black beetles, and removing the larvae, make sure to use traps with lures to try to keep small hive beetle populations down and replace the lure every week or so.

Colonies also need to remain strong and packed in the hives to make sure there are few uncovered frames where small hive beetles can hide.

What are you doing to manage for small hive beetles?

Charlotte

Tying a Hive Down

Using bungee cords and ratchet straps to tie down bee hives at Bluebird Gardens.

Tying a Hive Down

Not that beekeepers have a derth of topics to discuss but if you want to start a lively conversation, ask a beekeeper how he/she ties down a hive.

When I first started beekeeping, I was told a rock was required to keep my hive lids on. I love rocks, I collect them on walks but having a big chunk of the earth sitting on top of my beautiful white topped hives doesn't quite fit with my hive aesthetic.

I did use rocks for my first years, then graduated to red bricks I had in my garden. The bricks were ok but I still wasn't too settled on the idea. Besides, I was short of red bricks and now I had a mish mash of rocks and bricks on my hives. Sheesh, that was worse.

Now I am a hobby beekeeper. I don't "run" my girls to make honey, I like having them in my garden and appreciate having a little extra honey but it wasn't my primary motivation to get bees. Which is another way of saying I do care how my hives look in my garden and I am willing to take the time to make them look nice.

Enter a non-beekeeping friend who prides himself on coming up with solutions. MacGyver has little on this man, and I appreciated his suggestions, especially about things I can't resolve to my own satisfaction.

On this particular visit, he noticed my hive rocks lined up on a wall. I told him I was trying to make them blend in better into my garden landscape. A few days later, he gave me a ratchet strap and suggested that may be the solution.

Do you know what I'm talking about? These are heavy duty straps with a belt-like contraption that helps tighten the straps. My challenge is how to make the straps loose, especially without breaking off my nails to pull back the little levers.

After several training sessions, my friend politely suggested this may not work. By then I had invested in several red ratchet straps and winter was just around the corner. No more time to play around with matching rock sizes or coming up with an alternative for holding down my hive lids.

During the same shopping spree, I had also purchased yellow and black bungee cords in various sizes. Yes, I bought them for the color to tie the black insulation I wrap around my hives to give them some wind protection.

I now hook ratchet strap ends to my bungee cords to hold my hive lids on.

I now hook ratchet strap ends to my bungee cords to hold my hive lids on.

Oh, I still use the ratchet straps, only instead of forcing the belt side I hook the ends onto the bunge cords. Easy to take off and put back on, and no further damage to my nails.

MacGyver would be proud.

Charlotte